
 by
by 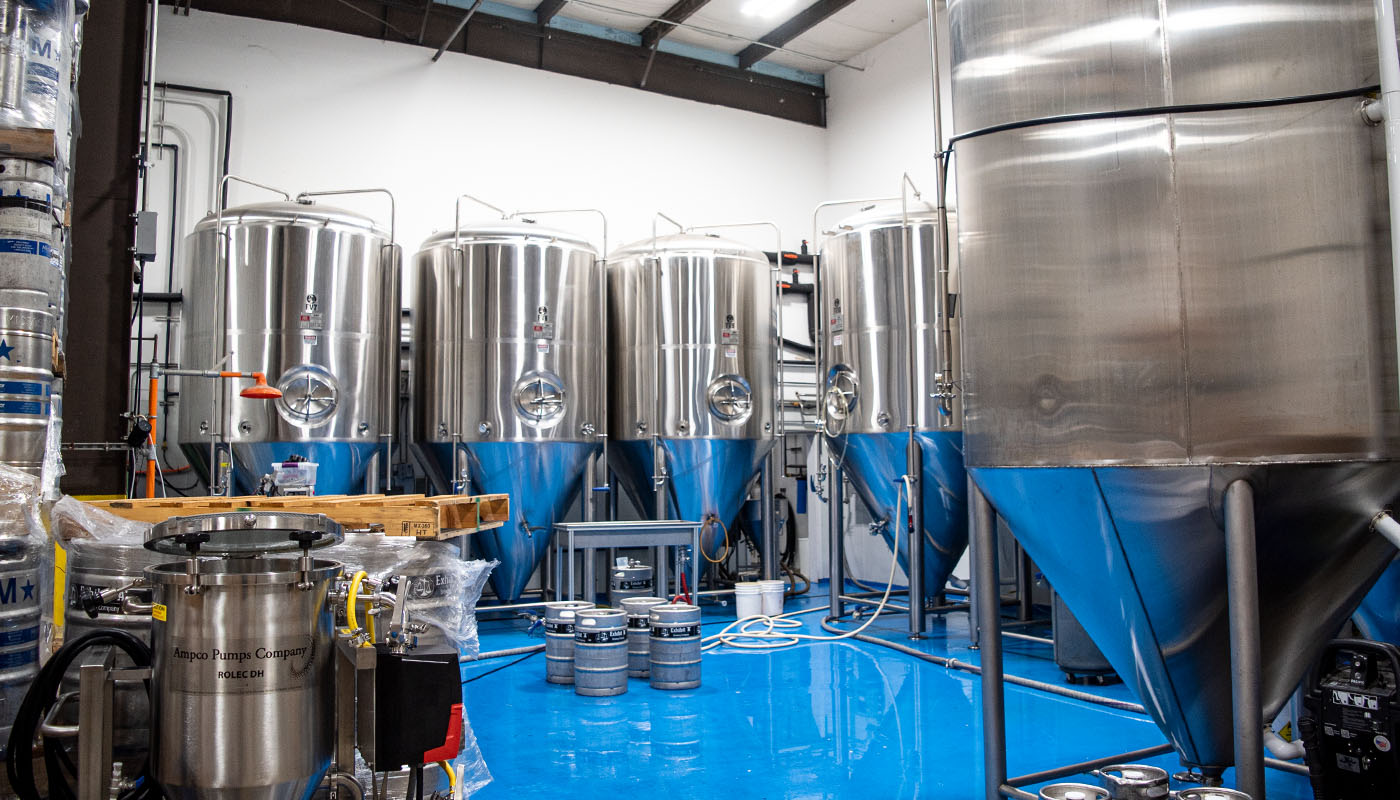
I’m often emailed about how I handle the cold side of brewing, specifically as it pertains to conicals and more advanced fermenting vessels. I’ve spent a lot of time researching and talking with commercial brewers on the very same topic. It’s probably where I had/have the most questions myself.
Once you venture into brewing NEIPAs and IPAs, the cold side becomes even more critical to your beer’s success. While this article will emphasize brewing hoppy beers, it applies to ANY style. If you treat all of your beers with the same careful considerations of a hop-infused NEIPA, you’ll see success across any style. Let’s dive into my step-by-step process. You can learn more about my fermenter and glycol chiller before diving in.
1. Chilling Wort
As soon as I conclude the final stage of my hot-side process, I immediately chill my wort down to pitching temps. I use the Exchilerator Maxx CFC to simultaneously chill and transfer my wort directly from the boil kettle to my conical fermenter. In terms of temperature, I usually shoot for anything under 80°F. Once the wort is in the fermenter, I’ll do more fine-tuned chilling down to my exact pitching temps via glycol chilling.
This last step saves on water consumption and allows me to not overshoot my pitching temps. My Brewer’s Hardware jacketed conical is really efficient and can quickly bring the wort down to pitching temps in under an hour. During this time, I usually focus on cleaning equipment and organizing my brewery. Once my wort has reached pitching temps, typically 66-68°F, I aerate with pure oxygen and pitch plenty of yeast. I pitch two pouches/packs for any 5-gallon batch with a starting gravity over 1.055. It’s not uncommon for me to brew in the morning and pitch my yeast at night.
2. Fermentation
I let my beer ferment for 5-10 days before adding any dry hop or secondary additions. Most ales finish fermenting in roughly 3-5 days, depending on the strain. The first 24 hours of active fermentation are the most critical in terms of proper temperature control. Once fermentation starts to slow, I let the fermenters free-rise to 70-72°F. This ensures fermentation fully completes and scrubs out any unwanted off-flavors.
Since I ferment in a conical with a dump valve, I don’t use a secondary fermenter. Even back in my plastic bucket days, I skipped secondary vessels to mitigate oxygen exposure. From the moment my yeast is pitched, I take all precautions possible to mitigate oxygen from my product. Up until then, it’s not really a concern (unless you’re worried about hot side aeration). I do not ferment under pressure and always use a blowoff tube submerged in a bucket filled with sanitizer. Airlocks are great too.
3. Yeast Removal
If you’re harvesting yeast, it’s recommended to remove it prior to dry hopping. This is both for preserving yeast health for repitching and mitigating negative interactions between the yeast and hops. I currently do not harvest yeast but I do my best to remove as much as I can prior to dry hopping. It’s difficult to remove yeast at warmer temps, so many brewers will soft crash their fermenters down to 55-60°F to allow the yeast to settle into the cone.
A lot of commercial breweries are dry hopping at the same cooler temperatures as well. The only word of caution with this approach is to ensure your beer is FULLY finished fermenting before soft crashing. I would not start a soft crash until days 7-8. If you ferment in a bucket or bucket fermenter, yeast removal and dumping are not possible. This is fine and should not be a major concern for most styles.
4. Dry Hopping
Once fermentation is complete, I’ll cap off my fermenter and seal it up in preparation for dry hopping. I dry hop under pressure, meaning after I add my dry hop charge, I’ll seal the vessel off under 10 PSI. You will need to take measures to safely do this as pressure will typically RISE from dry hopping. Be sure you are equipped with a pressure gauge, a PRV, and a spunding valve to safely mitigate pressure.
If using a dry hopper, you’ll want to ensure you fully purge the dry hopper of oxygen before adding your hops. This is best done from the bottom up. I add pressure to my conical, crack the top butterfly value, and let the pressure move through the vessel and through the dry hopper while I purge from the top. Add your dry hops, pressurize the vessel, and seal it off.
If you’re double dry hopping, there are a few considerations. Prior to adding additional dry hop charges, I typically remove as much trub/hops as possible through my dump valve. This should be done very slowly under a few PSI. My first DH charge is on days 5-6, and my second DH charge is usually on days 8-9.
The use of a dry hopper will also allow you to dry hop while under/maintaining pressure. To do this, you’ll need to equalize the pressure in the dry hopper with the pressure in the fermenting vessel. This allows you to safely open the conical port without having a beer explosion.
5. Cold Crashing
Once secondary fermentation is complete, I begin my cold crash. My cold-crashing process consists of pressurizing my vessel and dropping the temperate down to 35°F for 48 hours. When beer is chilled, the pressure inside the vessel drops and creates a vacuum. This vacuum creates a phenomenon called suck-back, which typically sucks your airlock’s sanitizer into your beer along with oxygen. To avoid this, I completely seal my vessel under 7-10 PSI. The pressure is necessary to prevent the vacuum from damaging your equipment.
This is obviously much simpler with a pressure-capable fermenter. If you ferment in buckets, it gets a little more complicated. My advice would be to look into a CO2-filled mylar balloon that will replace the fermenter with CO2 as the pressure drops. In general, it’s very difficult to totally mitigate oxygen at this stage unless you have the right equipment. S-type airlocks are said to be better at preventing sanitizer suck-back, however, this won’t save your bucket from the vacuum effect.
To be perfectly honest, I don’t think I was nearly as concerned with oxygen introduction before I started brewing IPAs. Some styles are simply not as sensitive as others.
6. Conditioning, Carbing, and Packaging
Most of my beers are kegged around day 10-12. From here I do a completely closed pressure transfer into a fully purged keg. Look into the star-san purging method if you don’t know what it is. This method is far more effective than simple CO2 purging. I usually transfer my beer with 3-5 PSI of head pressure to avoid foaming. Since my beers are usually under some degree of pressure throughout the process, they start to partially carbonate.
Once my beer is transferred, I seal the keg with 25 PSI. This ensures a tight seal on the lid and also gives an initial burst of CO2 to help with carbonation. Do not remove the pressure, simply dial back the regulator to serving pressure for extended carbonation and conditioning. Leave your beer hooked up to CO2 and place it in your fridge/keezer. Your beer should be fully carbonated in about 7 days.
I’m a believer in the low and slow force carbonation method because it doubles as much-needed cold conditioning time. My beer is typically ready around days 20-22. Hoppy beers need ample time to mellow out and form their delicate flavors. Rushing this process is only doing a disservice to yourself. It’s amazing how much beer can improve in a week of cold conditioning. More details on keg carbonation are here.
Final Thoughts
This process was born from brewing NEIPAs. That being said, I follow this same process for every brew I make. I think it’s made a big difference in overall beer quality because I’ve tried to mirror commercial processes as much as possible. There are several benefits along the way. If you feel as though I missed anything or I should provide more detail in any step, I would love your feedback!


Awesome post!
To be clear, when you’re doing steps under pressure (dry hopping at 10psi, cold crashing, etc), are you hooking up a CO2 tank and keeping it on the whole time for each process? Assume so or else the CO2 would dissolve in the beer, right?
Thank you!
More or less correct. Sometimes I just monitor closely but always try to keep 7-10 PSI in the tank. Dry hopping will often raise PSI so sometimes I just rely on that.
Are you happy with dry hopping in the 50s in a conical without a Co2 rumble to rouse the hops?
I’ve done hop rousing in the past by blowing CO2 through the dump valve in my cone. I think the pressure DH and temp tends to absolutely drop the hops out faster. At this point my DH durations are pretty quick so I’m not sure rousing is super effective. I’d argue two 24-48 hour dry hop additions would be best! Removing hops in between if possible. Hope this answers your question.
I too use a conical and wonder If you dump yeast/hops post fermentation and DH’ing do you then rack out of the dump port or do you still use the racking arm and just give up the beer between the dump port and racking arm? At our scale I fear loosing an extra 8-12oz of beer, but I also fear I need to just deal with it as a loss in order to make the best beer.
You can’t lose sleep over 8 ounces of beer. The key here is to not overdump. You want to dump just enough trub until you’re pulling clean beer from the racking cane. If you dump the whole cone, you’re wasting good beer. I haven’t attempted what you’re referring to but it could work in theory. Prob not worth it for a pint, however.
Great article, thank you!
I’ve read some of your other articles and was curious if you feel your ipa’s (hazy specifically) have improved specifically from being able to dump yeast before dry hop? I’ve been trying to sort out an issue of my own for a while now where my hazies taste great in my fermenter (no bottom dump port) and once I’ve moved them to a starsan purged serving keg they 1) lose a lot of haze 2) hop flavor is no longer pungent. I’ve dry hopped during fermentation, after fermentation, at cold crash temps etc and no luck. I even fermented in corny kegs for a while to eliminate the oxygen variable. No luck. Where I’m at right now is trying to dry hop in a keg after I move the beer off the yeast and see if that helps. Would love to hear your thoughts, cheers!
It’s hard to say. I’m not always the best at dumping yeast because it requires crashing to a degree. I’m usually dry hopping warmer these days.
It sounds like you’re tasting a lot of hops/matter in suspension prior to transferring to a keg. This would be why you’re seeing the beers clear up over time as well. My hazy beers tend to remain very hazy for the duration of the keg. I would try eliminating whirlfloc and upping wheat/oats.
How much are you dry hopping? You may want to try 2 larger dry hops that are 7-8 ounces per dry hop. I would also explore layering in lupomax hops. Lastly, assuming your tranfer is completely closed correct? It’s very hard to capture exploding hop aroma like the pros. You have to remember these commercial breweries are hand picking their hops and sticking with what works over the course of years. I also think there is an advantage when it comes to pure volume and flavor extraction.
Keys to good hazy IPA:
1) Proper Cl:SO4 water ratio around 3:1
2) Medium molecular weight proteins (short boil time)
3) Acidified wort (under 4.8) at 160F or less for WP hops
4) Proper yeast, my choice is WLP066
5) First dry Hop during active fermentation, do what you like with the second or third
6) Avoid all oxygen post pitch!!!! Purge vessels, positive pressure transfers, etc.
7) Enjoy stable haze and soft mouth feel 😁
Hey Shawn, thanks for the great info.
What temp are you carbing/cold conditioning at? Also, what’s your serving temp for this style of beer?
Thanks!
Matt
I typically carb and condition at fridge temps. it’s usually 35-40 degrees.