
 by
by 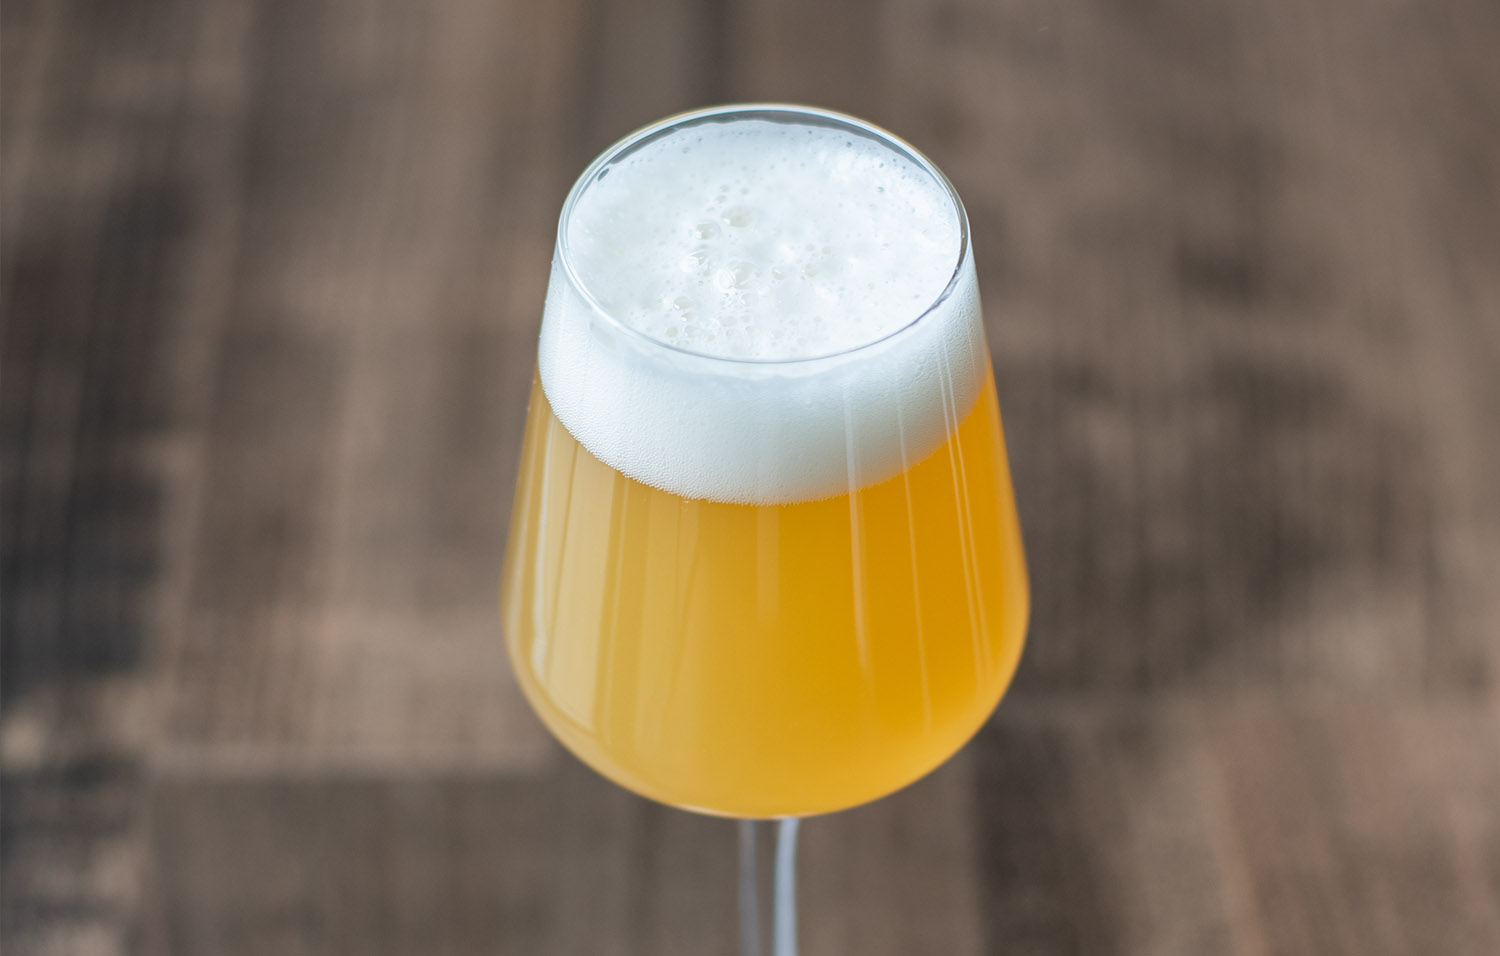
I’m coming up on the 1 year anniversary of diving headfirst into brewing New England IPAs. In fact, it’s all I’ve been brewing this past year in pursuit to crack the code to the perfect hazy IPA with a soft mouthfeel and juicy hop character. It’s definitely been a frustrating journey as I often compare my beers to the best commercial examples out there. I’m also incredibly picky, and like most of you, my own worst critic.
I was often left asking myself what the hell brewers put in their beers to achieve such amazing flavors using the same ingredients as me. What I did learn is not only are ingredients very important, but the technique is equally if not even more important. In order to replicate such a difficult style to brew, we must replicate the processes and equipment of a commercial brewery to the best of our abilities. While it’s all really important, it’s really the cold side that will ultimately make or break your success.
While I feel as though I have finally produced a beer I’m really proud of, there is still much to learn and so much more to explore. I can say with confidence that with the right process it’s 100% possible to brew a commercial-quality NEIPA at home, you just need to do everything perfectly.
Brewing a New England IPA
I will say that after trying a handful of various NEIPA recipes online, they all more or less look the same. A base malt of 2 row with a mix of white wheat and flaked oats. Whirlpool additions of citrusy fruity hops followed by 5-8 ounces of dry hops on the tail end of fermentation. I was pretty much getting the same poor results every single time. I knew exactly what I wanted, I just didn’t know HOW to brew it. There had to be some missing link.
All of this information comes from extensive research, podcasts, Scott Janish’s book, experimenting, failing, advice from professionals, and other homebrewers. If you’re just starting on this journey, hopefully, this article will help point you in the right direction. I’m certainly not an expert, and I’m sure there are several ways to achieve a delicious New England IPA, this is just what has worked well for me.
If you dig really deep, all of this information is out there. The problem is there is also a tremendous amount of really bad advice out there. Trust the pros (and the really experienced homebrewers), not the random dudes (like me!) in forums spewing untested advice.
I’m going to dive into:
- Water treatment
- Grain bill
- Mashing
- Yeast
- Hops
- Whirlpooling
- Dry hopping
- Conditioning/Packaging
Water Treatment
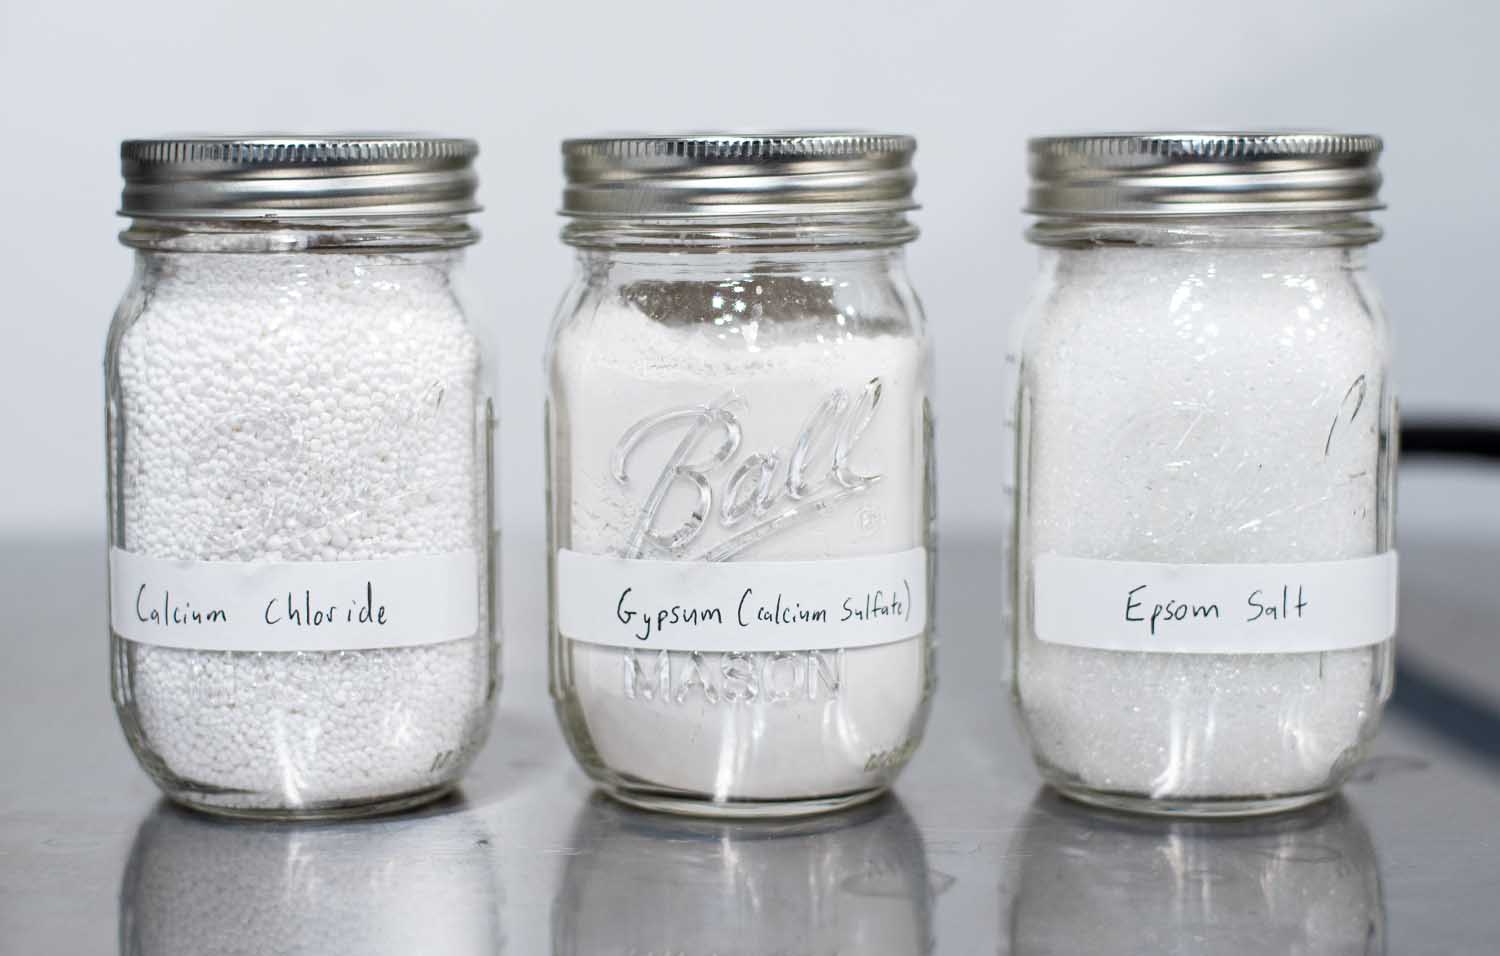
Water chemistry is a very complex topic and still something I am learning more about myself. I would say no other style quite dictates attention to water chemistry like the NEIPA. It’s not enough to use tap or just wing it. You must have an understanding of the mineral makeup of your water and how to adjust it. This is where brewing software comes into focus for building a water profile, adding brewing salts, treating chlorine with Campden, and understanding mash pH (shoot for 5.1-5.4). If you ignore this step and do everything else right, You’ll never quite nail it.
Chloride to Sulfate Ratio for NEIPAS
I’ve done a lot of experimenting with chloride-to-sulfate ratios and have finally settled on a 3-1 or 2-1 chloride-to-sulfate ratio. This will help really round out your beer to achieve a soft pillowy mouthfeel that compliments the hop character. If you were to inverse those numbers, you’d be left with a sharper, more hop-forward emphasis on your beer. I’ve done both extremes and can tell a definitive difference.
People will argue until the cows come home on what ratio/amount is best but this seems to be the sweet spot for me. You’ll need to invest in a water report and brewing software to dial all this in. It takes some practice and research but it’s really easy once you get the hang of it. I go a little more in-depth on my NEIPA water practices here.
My Advice: Start with a chloride-to-sulfate ratio of at least 2-1. A good starting point is 225-200ppm chloride and 100ppm sulfate. Use brewing software to build a water profile. Use RO water or get a home water test at Ward’s Labs so you know exactly what you’re working with. Treat tap water with Campden tablets to eliminate chlorine/chloramines. Use lactic acid to achieve a mash pH of about 5.3.
Grain Bill
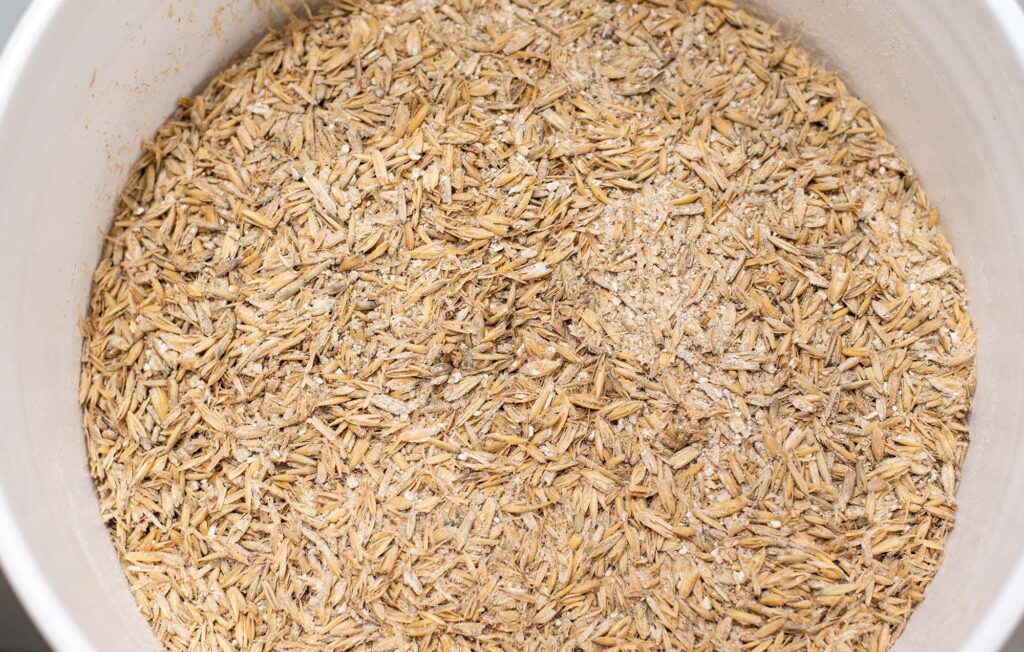
Your average grist usually looks like a base of American 2-row with some combo of white wheat and oats. The general rule of thumb is to use around 20%+ oats to add creaminess and body. This is also going to add lots of proteins that will contribute to haze later on. Many will cringe when brewing for haze, but let’s be honest, we drink with our eyes. Some may tell you that 20% is the ceiling, but I would be willing to try to push it even further to maybe 25-30%. That being said, I’ve had great success with very simple grain bills using only 10% oats. It’s all a matter of preference and experimentation!
My new favorite grain bill uses flaked oats AND golden naked oats. Golden naked oats are great for adding creaminess, mouthfeel, and silky head retention. Absolutely one of my favorite additions to my recipes (shout out to my man Nick for turning me on to this).
My Advice: Don’t be afraid to boost your flaked oat bill to 20%+ of the total grain bill. If you have a traditional sparge system then you should include rice hulls to help avoid a stuck sparge. Don’t let anyone tell you how hazy or not-so-hazy your beer should be. Follow your heart (and your eyes). Experiment with golden promise or Pilsner malt in place of 2 row.
Mashing Temps
It wasn’t until I started understanding the mash temps of commercial beers I liked that I understood how mash temps were affecting my own beers. I absolutely had a problem with mashing too low on several early batches. This was giving me dryer thinner beers that just didn’t have the medium-bodied sweetness I wanted to achieve. Trillium mashes many of their beers very low (149-150°F), so it’s honestly a matter of preference and what you’re going for with a particular brew.
I’ve received different advice from other commercial breweries, which was to mash higher (154-156°F) for a sweeter fuller body. Mash temps are honestly a matter of preference and the overall result you’re looking to get. I don’t think one way is any more right than the other. In general, I like to shoot for a final gravity of around 1.017-1.020. This will give you the subtle sweetness and softness you need to accentuate the juice character. It’s also important to understand yeast attenuation and how yeast selection will impact final gravity. Grain bill selection will also impact body and final gravity.
My Advice: Mash in the 148-150°F range for a drier crisper finish. If you want fuller bodied with a softer, sweeter finish, mash higher in the 154-156°F range (my personal preference).
Yeast

If you’ve read my 5 yeast experiment you’ll know how much power yeast has over your final product. The same beer, pitched with different strands, can ultimately result in two totally different products.
I focused a lot of my early research solely on using London Ale III 1318. London Ale III is a very popular choice among commercial breweries, so I figured that was my best bet. This strand will throw tropical fruits and subtle esters that work really well overall. I think it’s a good place to start for most approaching the style however there are so many good choices out there.
As of writing, I have used:
- Imperial Yeast Juice – A38
- SafAle S-04
- Omega British Ale V – OYL-011
- Wyeast London Ale III – 1318
- Gigayeast Vermont IPA – GY054
- Wyeast British Ale – 1098
- White Labs Dry English Ale – WLP007
- White Labs Saccharomyces “Bruxellensis” Trois – WLP644
- Omega’s Tropical IPA – OYL200
- Imperial Yeast Dry Hop – A24
- A combo of SalAle US-05 and US-04
I’ve marked my favorites in bold as of now. I’m also really curious to explore Voss Kveik, WLP008, and WLP002. From what I’ve heard from a source, WLP002 is the yeast of choice for a lot of ‘big name’ NEIPAs.
My Advice: I think London III 1318/A38 Juice is a great place to start. That said, pick a strand and stick with it for a while while you tweak various elements. I think it’s important not to change too many things at once so you can better understand what is working and what is not. Always make a yeast starter or pitch two packs of liquid yeast. I’d rather slightly overpitch than under pitch. I’ve recently become a fan of Imperial double-pitch packs.
Hops

Hops are a major, major part of the style. Timing, and temp will make or break your results. In this section I’m going to touch on both hot and cold side hops and what they do.
Hop Selection for NEIPAs
There are numerous hop choices out there that are great for NEIPAs. Personally, I lean towards tropical citrusy hops that are fruit-forward and complement the tropical notes driven by the yeast. If you’re just getting started, I would pick 2 hops and use in both the whirlpool and dry hop. It’s hard to go wrong with Citra, Mosaic, and Galaxy as they’re going to give you a lot of tropical flavors. There are so many other options out there but I think it’s important to start with the basics before getting too wild with hop varieties.
Combining too many hop varieties at once will also leave you with a muddled mess of flavors. I’d rather use one hop variety throughout the entire recipe over four. The best advice I received was not to change too many variables at once so you can pinpoint what’s working and what’s not.
Lastly, look at Yakima Valley Hops or Yakima Chief Hops and buy direct from them! High-quality hops make a BIG difference. You absolutely need the best hops you can get your hands on for the best results. Trusted suppliers will ensure you get properly packaged and stored hops.
Whirlpool Hops
Whirlpooling is the process of adding hops post-boil at sub-boiling temperatures. The idea is to preserve flavor and aroma and not boil off the volatile oils that add tremendous character.
Most if not all of your hot side hops should be added to the whirlpool and whirlpool only. I’ve tried small charges for the full 60 minutes, along with later additions in the last 10-15 minutes. I won’t go as far as saying these hops are wasted for this style, but I think all the bitterness and hop flavor you need can be achieved later while preserving as much of the volatile oils as possible. I’ve whirlpooled at temps as low as 108°F and as high as 185°F, however lately I’ve settled on about 175°F.
Trillium hints at doing 60-minute charges for bitterness. Trillium’s NEIPAs tend to have a pretty pronounced upfront bitterness, unlike a lot of other breweries. I wouldn’t doubt they do the majority of their hopping on the cold side, however, I wouldn’t be surprised if they add a decent bittering addition as well.
My Advice: Start with whirlpool hops only for 20-30 minutes in the 170°F-180°F range with 3-5 ounces per 5.5-gallon batch. These additions will build the backbone needed for the dry hop, which is where the majority of the juicy flavor and aroma is going to come from.
Dry Hopping
Biotransformation
The newest trend, especially with New England-style IPAs, is dry hopping during active fermentation in the primary vessel, usually on days 2-5 of fermentation. This is probably one of the defining characteristics of the style. The major buzzword around this technique is called biotransformation. Biotransformation is believed to enhance the flavors and aroma of the finished product through chemical reactions between the yeast and hops. This is said to lead to juicier and more pronounced tropical flavors that are thought to be unachievable with traditional dry hopping methods.
I’ve experimented with dry hop charges almost every day during the active fermentation window. Day 0, 2, 3, 4, and 5. I will say that adding hops early and only early has not given me the best results. You need to save the majority of your dry hops until fermentation has reached terminal gravity. This is going to ensure you get the most out of your hops. I once made the mistake of adding 8 ounces of hops 48 hours post-pitch and made a really astringent and bitter beer with no juice quality. The yeast essentially chewed through the sugars and blew any and all flavor out the window.
It would appear most of the big-name NEIPA producers I read about dry hop at terminal and terminal only. This is largely due to yeast harvesting and repitching practices. Yeast is harvested BEFORE hopping in order to salvage the yeast. At this point, I only dry hop post-fermentation, usually day 7-8 post-pitching. This has 100% produced the best results for me hands down.
My Advice: Explore early dry hopping (24 hours post-pitch) and see what you like. Regardless, I’d save the majority, if not all of your hops for days 7-8. You’re certainly not going to lack intense flavor. See my hop doser build.
Soft Crash
Soft crashing is the process of dropping fermentation temps down to 55-60°F post-fermentation (after performing a diacetyl rest). This is going to drop some yeast out of suspension to make way for the dry hop. Dry hopping in large amounts with a lot of yeast in suspension creates what is called hop creep. Hop creep is when the enzymes within hops break down long-chain, unfermentable sugars into fermentable sugars, causing additional fermentation to occur (you can read more on this as it was sourced here).
This can actually lead to diacetyl production later in the keg due to the late-stage fermentation and inadequate time or temp for the yeast to clean up their newly created mess. I’ve personally experienced this and it RUINS the entire batch. Nothing like a nice butterscotch NEIPA developing a week after kegging!! It’s really important not to rush this stage as you don’t want to soft crash too early. Let fermentation finish and let the temp rise above 68°F on the tail end.
From everything I’ve read, I would say colder dry hopping seems to be a big trend for commercial NEIPAs. Another reason for this is once again improved yeast harvesting. That being said, there are still some breweries dry-hopping warm. The advantage of a warm dry hop is being able to dry hop during active fermentation or right as the beer is finishing. There is simply no time to do this while simultaneously soft crashing. You’ll likely get diacetyl production due to the timeline of it all. From my personal experiences, colder dry hopping allows me to turn a beer around much faster as there is a lot less hop burn present early on.
My fermentation/DH process looks something like this:
Day 1: Pitch yeast at 68°F and let rise to 72°F on days 2-3 for the remainder of fermentation.
Day 7-8: Drop the temperature to 60°F and hold for 24 hours.
Day 9-10: Drop yeast and add dry hop charge, hold at 60°F.
Day 14: Crash to 35°F for 48 hours. Proceed with packaging/cold conditioning for another week.
Double Dry Hopping
DDH can mean slightly different things depending on who you ask. Some will tell you it’s two separate dry hop charges, others will tell you it’s one singular larger hop addition. At the end of the day, we can all agree that double dry hopped=dry hopping with double the typical amount of hops (whatever typical is these days…)
Trillium is quoted in a BYO article as adding 90-95% of their hops to the cold side of brewing, aka the dry hop. If a 5-gallon batch uses 12 ounces of hops, 10 ounces would be on the cold side. This is double the recommended amount your average NEIPA recipe will call for and is probably assumed outlandish by many. Dry Hopping at higher rates has absolutely improved my results.
So many online recipes call for dry hops at a rate of about 1 ounce per gallon. I don’t think this is enough on a 7%+ IPA to achieve an intense saturated hop flavor. My favorite NEIPA to date was hopped closer to 2-3 ounces per gallon, and I still think I could push it further. I will say that dry hop rates and ABV should go hand and hand. You can get away with more aggressive dry hopping on higher-ABV beers. A session IPA or <7% ABV beer should probably have a scaled back DH charge to avoid astringency.
My advice: Dry hop the hell out of your bigger DIPAs and ignore people that tell you it’s too much. Shoot for 2 ounces per gallon and add the majority of these on days 7-8. If you would like to explore biotransformation, add a 1-2 ounce charge on days 2-3. My preferred ratio is about 70% cold, 30% hot. I think homebrewers may actually need to beef up their hot side to mimic commercial equipment.
Dry Hopping Under Pressure
Dry hopping under pressure could be the technique that really tipped the scales for me. There’s a tremendous amount of talk out there about homebrewers looking to ferment under pressure. The main benefit of pressure fermentation is being able to ferment at higher temps without the accompanying ester production. This technique is also used to ferment lagers at ale temperatures. When it comes to NEIPAs, pressure fermentation is not widely practiced because it suppresses fruity esters and yields muted results. Scott Janish wrote about experimenting with it and not being crazy about the results. That was enough for me.
@kbenoit mash low (~150F ish), add a little british light crystal malt, 90% of hops late/dry, dry hop under pressure in a cornie keg at 60F
— Trillium Brewing (@trilliumbrewing) April 2, 2014
Several local breweries, Trillium being one of them, have suggested dry hopping under 10 PSI of pressure. The idea is to preserve the volatile hop aromas and also combat oxidation. Ever walk by your fermenter shorty after dry hopping? It smells amazing…but hop aroma in the air=hop aroma, not in your glass.
My Advice: Dry hopping under pressure of course requires a pressure-capable device. The best way to do this is with a pressure-rated conical fermenter. A much more realistic budget choice is to ferment in a modified corny keg, which works REALLY well and is a fraction of the cost. You can read more about corny keg fermenting here. It’s worth a shot to see what you think of the results and process before investing in an expensive conical fermenter.
Whirlfloc
This is not a major section but yes, I use whirlfloc in all my NEIPAs. And no, they’re not clear. I want to briefly touch on the sensitive topic of HAZE. Haze is achieved by the chemical reaction between hops, proteins, and yeast. Not by trub and yeast remaining in suspension. I’ve made perma hazy NEIPAs that remain hazy in the keg for months with no sign of clarifying.
Yeast selection and dry hop amount will also dictate haze. Higher dry hopping rates and high protein malts are going to yield hazier beers. From what I’ve read, water treatment can also contribute to stable haze. This does not translate to drinking sludge, folks.
Cold Crash and Conditioning
If there’s anything I hate with a passion it’s statements like grain to glass in >>>insert unrealistic timeline here<<<. This thinking of drinking NEIPAS FRESH is completely overblown and untrue. I would say the average commercial brewery producing NEIPAs is grain to glass in about 20 days, not 10.
NEIPAs need adequate conditioning time to really shine. Most advice I received from brewers was a minimum of 2 weeks of fermentation followed by a week of cold conditioning. Neil Fisher of Weldwerks says their flagship, Juicy Bits, takes 20-25 days to turn around! He stresses the importance of dropping yeast and hops out of suspension to eliminate vegetal, meaty, or astringency from the packaged product.
Cold crashing is going to help drop hop particles and unwanted things out of your beer much faster. Some commercial breweries use a centrifuge to speed this process up, allowing them to churn beers out faster than homebrewers. Cold crashing is not going to make your NEIPA clarify assuming you did everything else right. Anything that settles during a cold crash is going to gradually fall to the bottom of the keg in a few days anyway.
My Advice: Ferment for 2 weeks, cold crash for 48 hours at 33-35°F, cold condition 5-7 days pre or post-package. This is going to help the more delicate flavors shine through. If you love harsh hop burn in the back of your throat, absolutely drink your beer on day 7.
Cold Side Oxidation
Cold side oxidation is the biggest killer of brewing New England IPAs. A once beautifully golden IPA is now a muddy and unappetizing flat brown color with sometimes a purplish tint. It’s an amazing phenomenon considering how careless you can treat other beers and not have any real adverse effects. Sure, all beers suffer from oxidation, but with the NEIPA, they become ugly, lose their popping hop flavor, and taste stale or like wet cardboard. Not to mention an incredible waste of expensive hops.
My NEIPAs are exposed to a negligible amount of oxygen and remain golden, hazy, and full of rich flavor for months in the keg. I always fully purge my serving kegs using the Star San method (fill the keg with water/sanitizer and push out with CO2) to ensure there is very minimal oxygen pickup. I use CO2 to transfer my beer from my fermenter to the serving keg through a completely closed system. This part is incredibly important. You can learn more about oxidation and my process here.

Summary and Advice
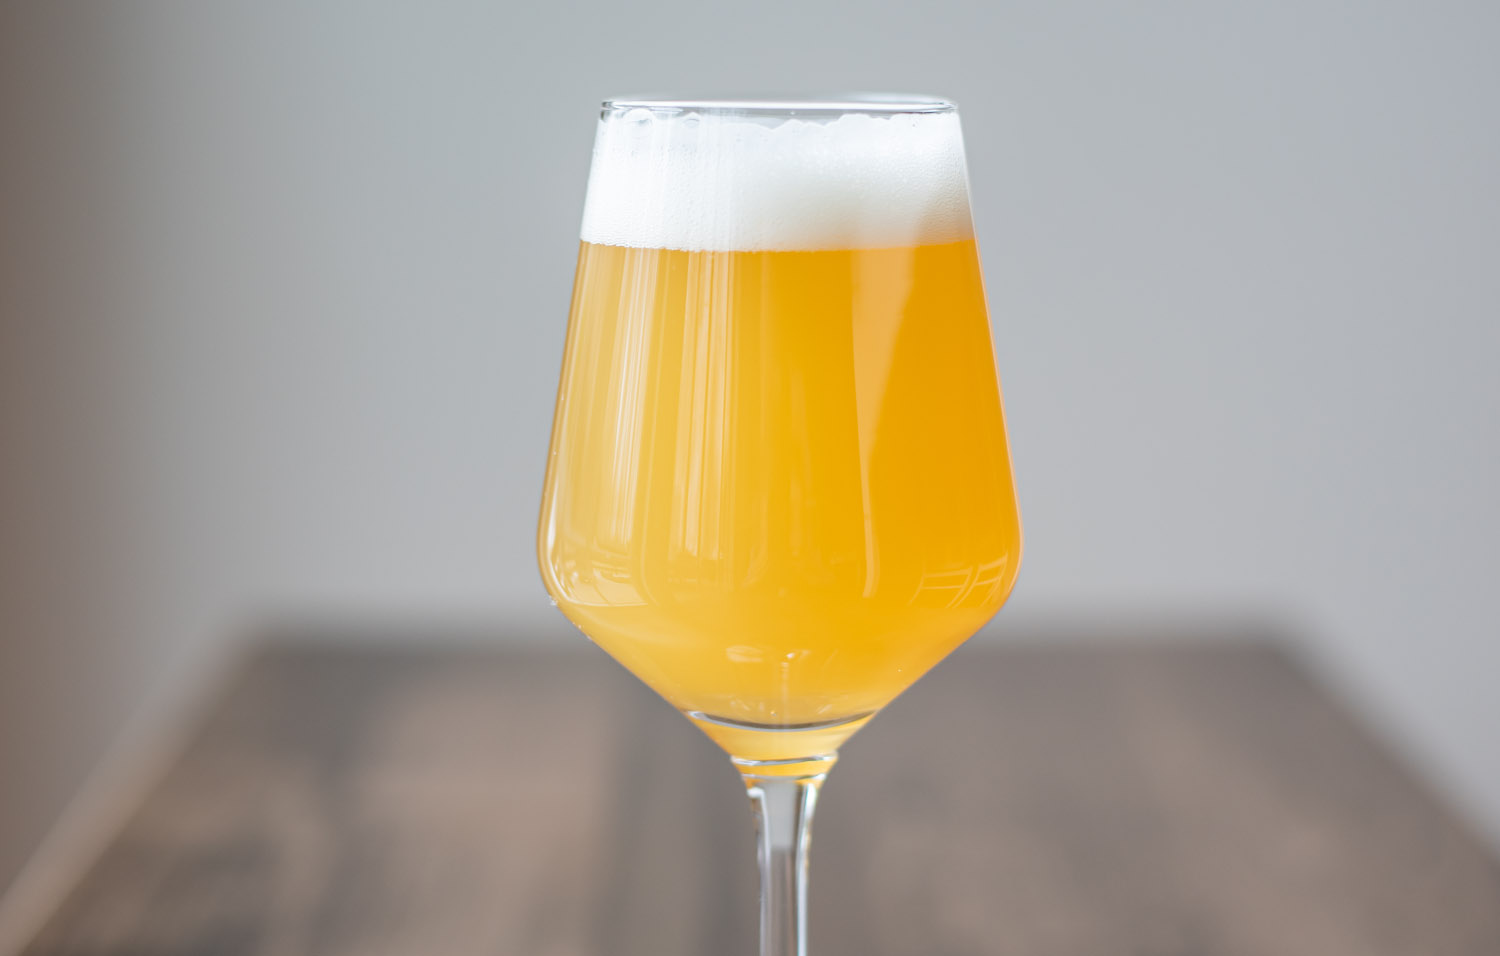
Here is the recipe pictured above. I applied all these techniques in putting it together. Imperial’s Dry Hop yeast honestly steals the show and throws so much tropical fruit and nice esters. It’s loaded with pineapple, mango, and passionfruit. It features a nice creamy head, perfect lacing, and beautiful color thanks to golden naked oats. It’s juicy with a creamy pillowy finish without being overly murky despite being a heavily oated recipe. It’s honesty the first beer that’s made me really excited to share with friends.
I think it’s important to understand that producing a high-quality beer is the sum of doing every little thing right. There are no shortcuts and it’s certainly been a major learning process for me. It’s honestly taken me all of 1 year to finally produce a NEIPA that I really enjoy and would honestly stack up against a commercial NEIPA.
After several failed attempts I began to wonder if I could honestly produce what I was looking for at the homebrew scale. I went as far as investing in a conical to replicate professional processes and not run into any limitations. While I don’t think this is 100% necessary to make a great beer, it certainly makes things a whole lot easier. If you’re really serious about brewing NEIPAS, I think it’s an investment worth considering.
Intermediate equipment options would be keg fermenting or the Flex+ fermenter. Both options are going to give you the necessary features to successfully pull off the style. I personally think the Flex line of fermenters is the best budget option outside of a true conical. Yes, I realize these vessels aren’t cheap, but they’re the cheapest feature-rich fermenters on the market.
I hope this was helpful and I would love to hear about what’s working well for you too.


Incredible advice, so much info. Im used to taking beer to bbqs and friends houses, so I bottle all my beers. Iv bottled my NEIPAs and IPAs in the past, and had no issue with oxidation, but this is using aprox 1 ounce of hops per gallon or maybe a little less. Do you think going to 2 ounces per gallon will make it difficult to bottle? I dont really have the equipment to make a closed bottling process, but I do take a lot of care of not exposing my beer too much to the air.
Anyway, awesome post and I will definitely put it to use. Cheers from Chile.
Thanks! To be honest, I’m not entirely sure if you’d see an impact or not. I did not have success with bottling my NEIPA so you’re already ahead of me.
That FG seems so high – almost sweet versus juicy. I don’t think I can do it.
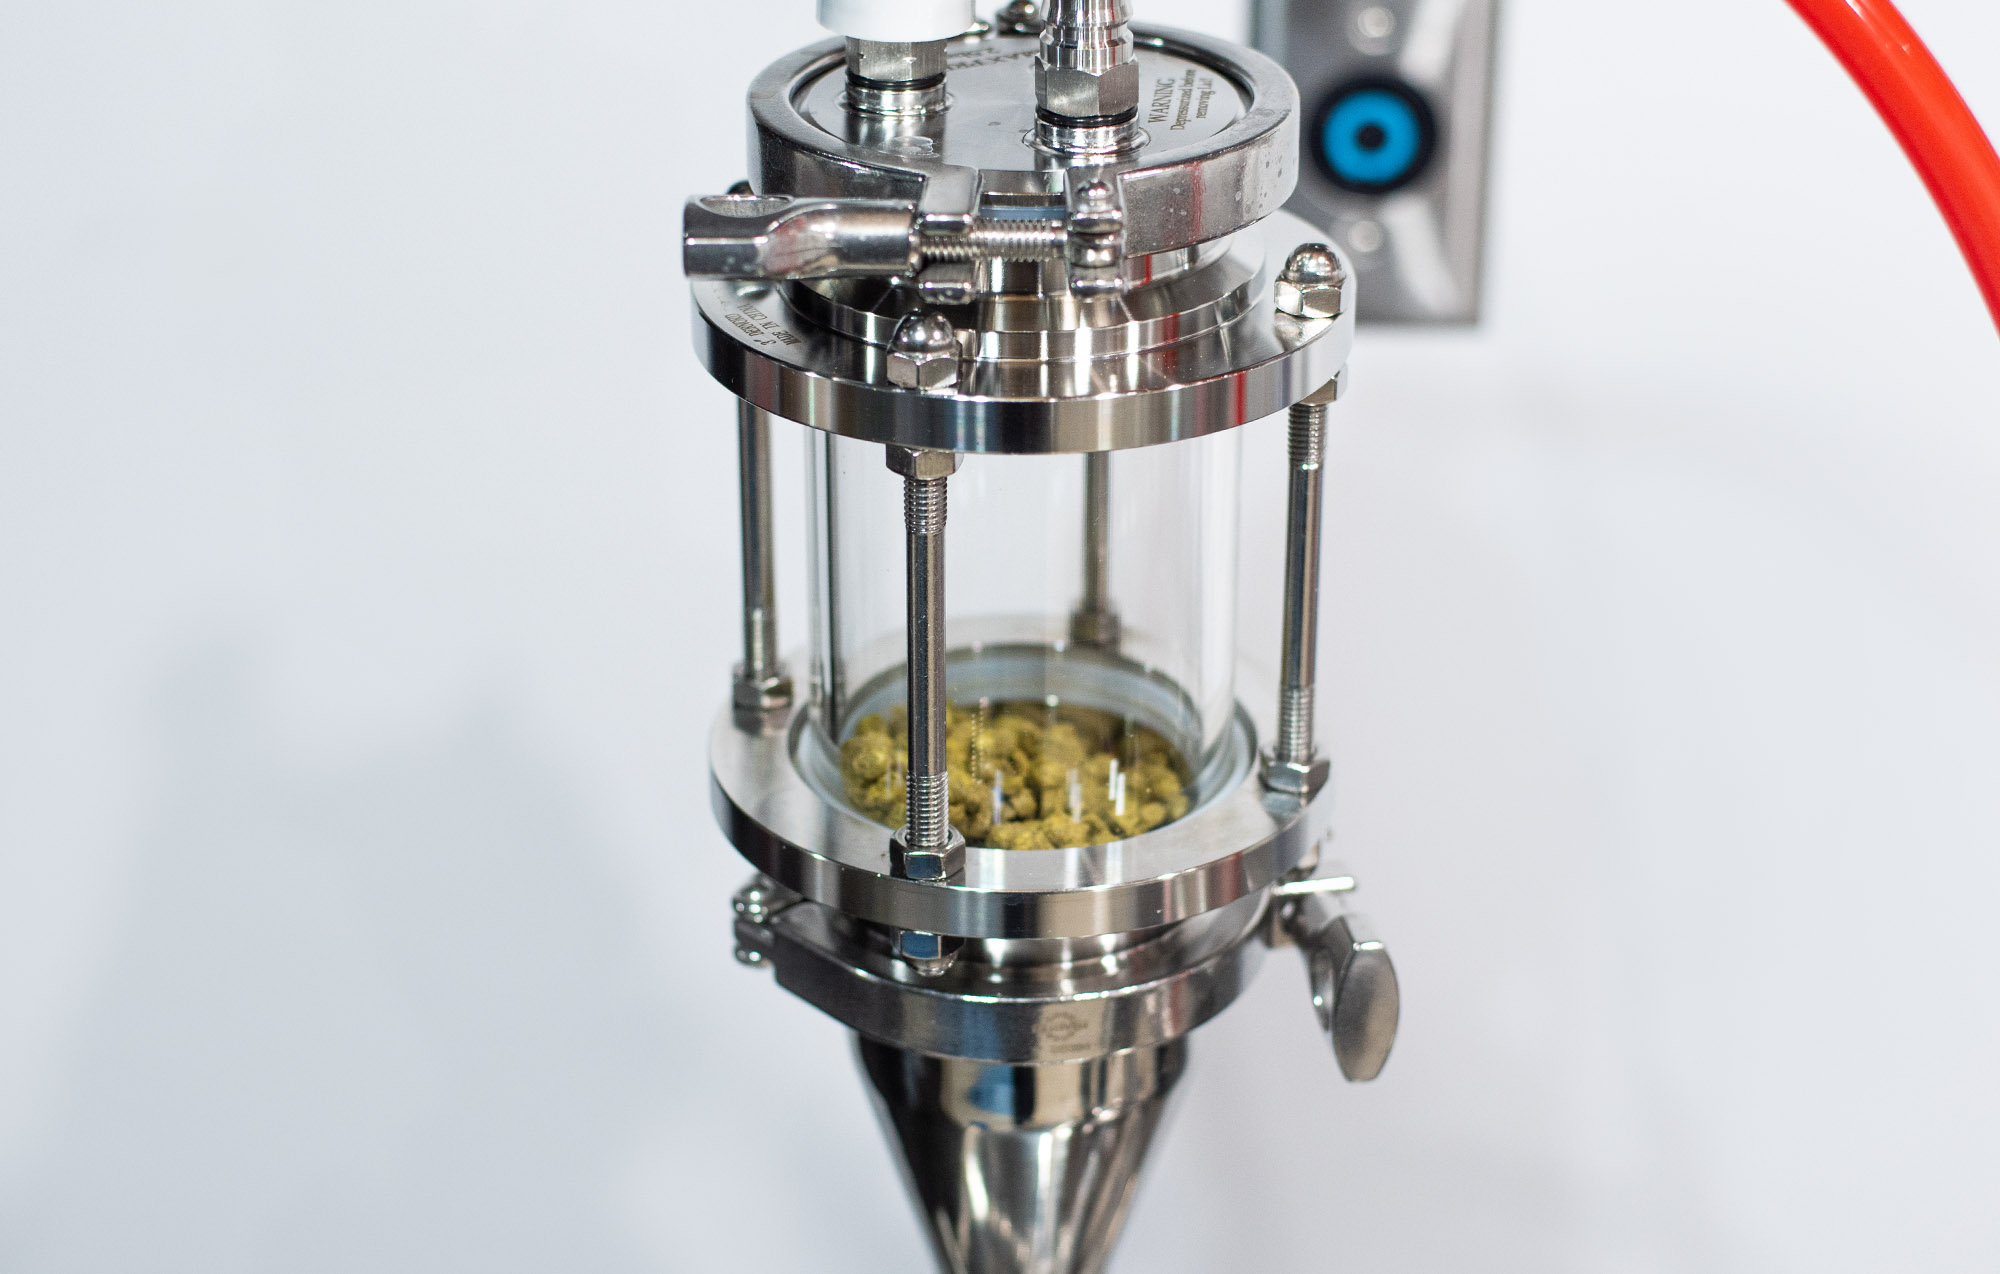
What’s that hop chamber thing in one if the pics?
That’s my dry-hopping device for adding hops with no oxygen exposure or even under pressure: https://hazyandhoppy.com/my-diy-dry-hopper-for-homebrewing/ I wouldn’t want to go higher than 1.020. The sweet spot for me is about 1.017-1.018.
Great read! Question… looks like you dry hop for 5-6 days @ 60F. Do you burp the conical with co2 through the dump valve to insure the hops stay in suspension? If so, how many times do you do the purge throughout the dry hop. Thanks again for the article.
I dry hop about 7 days. I haven’t tried that as of yet but I do plan on looking into that more in the future. I’d imagine every few days or so. Hops drop faster under pressure as well.
For bitterness, I get a syringe from YVH and add 1.5-2mL of hop extract at 60min to get pure bitterness and no absorption or vegetal matter in the fermenter. I do about 3-4oz in whirlpool at 176F for 30min, then transfer to fermenters (I split batch so I can do separate dry hopping for comparisons). I like the idea of a single DH after fermentation at 60. I normally do one at 1.022 during fermentation (about 7oz) and then at FG and do each for 2-3 days. How long are you leaving your hops in before you pull (to limit vegetal flavors)?
Yeah, I’m really curious to explore the hop extracts as well. I’m hoping to have a second fermenter soon so I can start doing larger split batches and experiment with different DH techniques. What does your second DH charge look like after the 1.022 7? I usually DH a full 7 days then package so the hops are in there the whole time. I’m curious to split that into a few charges and do 2-3 day intervals then dump, then add the second charge. Still all post ferm but quicker contact period.
With all of this, do you have a recipe that you’ve come up with that you think is the best?
Thank you for this information. You can find pieces of this all over the internet, but it’s really great to have it in one place. I’ve incorporated a lot of those same techniques and I will refer to this page a lot for future brews!
The “ratio” discussion needs to die. 3000:1000 is still a 3:1 ratio, and I don’t even know if you could survive drinking that much gypsum
I hear you… but let’s be fair, it’s still a ratio and speaks to emphasis of one over the other. You’re certainly right on amount, but that’s a different ballgame. One I’m trying to understand better and what amounts are actually detectable in beer in terms of enhancing flavor. Something I’m going to add to that section as soon as I play around with the numbers more. But you make valid point for sure.
Hi Shawn,
I too have focused solely on NEIPAs for last year+. The practical complexity of dry hopping and yeast management is so unique to this style and anytime I brew a beer that is not dry hopped, it seems so so much easier.
On your protocol, when do you cap the fermentor or are you soft crashing open to the environment?
I cap as soon as I start the temp drop. You’ll see suck back even at a 10 degree drop. I’ve seen my blowoff suck up about 10 inches of starsan in that stage. I hit with about 5 PSI and cap and start the soft crash. This is mainly to add some positive pressure to the tank before dropping temp in a sealed vessel. Dry hop then top off to 10 psi or so.
Hi, I am trying to minimize oxidation. I am fermenting in a plastic fastferment conical. I followed all of your advice and am now dry hopping at 60 degrees for a week. Do you recommend cold conditioning in the conical for the second week with the hops still in or would this be too much time in contact with the hops? I’m just afraid to cold condition in the keg and get partial fallout at the bottom of the keg.
I don’t think you need to cold condition for a week. I’d do a 4 day dry hop and then cold crash in your fermenter for 2 days as close to 32F as you can get. That should settle everything in suspension. From there you can get and carbonate/condition.
Shawn,
Quick question for you: the White Wheat you refer to in the grain bill discussion; is that malted or unmalted?
Thanks for this article! Like everyone else has said, this is an extremely helpful guide to brew a style of beer that I personally find to be challenging.
I always use malted over raw…although I once accidentally used raw wheat and didn’t have any issues!
You ever have an issue where there must be enough hop residual that it is clogging up the keg? I keep unclogging and I get about a quarter cup before the hop matter clogs the ball lock again. Any idea how to fix?
Hey Shawn, losing my mind reading advice on repitching yeast used in NEIPA. Assuming a cold side dry hop, then cold crash and rack, have you ever tried to use yeast slurry again ? Did you wash it or just capture and let it settle out ?
I think ideally you need to really pull the yeast for harvest before dry hopping. I think this is what most commercial shops are doing.
Thank you for all this info in one place some really helpful stuff in here that crosses over for all styles. cant wait to up my game. and start drinking some beer that i might actually be happy with.
Hi, I’m really enjoying your articles, and you’ve helped me make better IPAs, so thanks so much. Im wondering what you think of adding a blow off tube stuck into sani and attaching to the other side of a spunding valve after pitching? Youd be able to monitor fermentation with the activity in the sani liquid and the spunding valve would carbonate the beer and also surpress krausen (a concern when fermenting in a corny keg).
Would love to brainstorm this with you.
Regards,
Nick
How much hops do you use during whirlpool?
greatly depends, but usually 2-4 oz per 5-gallon batch.
Hi Shawn. Really great article. In your last step for cold conditioning and packaging, does this mean the beer isn’t ready until day 21 or can I drink once it’s cooled down to 35 degrees F?
Regards,
James
You can drink it at day 5 if you really want…it just won’t taste as good. The 21 day timeline is my rec for when the beers start to evolve into something good. I like to save myself for the best pours. It’s amazing how much a neipa will evolve from 13-25 days.
Thank you for answering all my questions Shawn!
Did you get better results by dry hopping under pressure? Did you achieve better hop flavor? Thanks again
I can’t point better beer to one single thing. I honestly think it’s a combination of several iterative changes to my entire process. DH under pressure being one of them. I think it has been beneficial.
Hope you don’t mind if I pick your brain a bit. You mentioned in your article that you do not ferment under pressure for NEIPA’s? What if you were pressure fermenting at normal temperatures? 68 degrees first 3 days, raise it at 72 at day 3 then lower it at 60 to prep for dry hopping? Do you think this would retain more flavor in beer than normal fermentation in a vessel without pressure?
With regards to pressure dry hopping, what is the purpose of pressure dry hopping other than trapping aroma and flavor? Couldn’t I just dry hop in a keg without pressure or is the pressure necessary so that we could release the oxygen?
I touched on your second question already, but pressure dry hopping relates to oxygen mitigation and trapping aroma/flavor as you suggest. Fermenting under pressure, meaning you’re spunding during active fermentation, will suppress ester production. Esters are essential for NEIPAs becuase they compliment the fruity hop aroma and character. Fruity esters are your freind!
The temperature does not have anything to do with pressure fermentation, that’s just a temp process that you can follow.
Thanks for all the hard work. Your TropVaca was adapted to make a low 1.5% ABV version. One of my favorite beers. The full strength recipe will be made next week with Verdant IPA yeast and Galaxy, Azacca, Amarillo and Idaho 7 hops. Looking forward to seeing the results of fermenting without pressure and dry hopping at 10 psi.
really interesting!
What is your mash gravity reading?
This is always recipe dependent.
Great article! Im brewing my 2nd NEIPA this weekend and have a conical/pressure fermenter, I was wondering how you dry hop – in a bag or just dump them in? Last time I used a bag but never felt I got quite the hop utilisation I should (used 240g in 5 gallon, was nice but not massive). This time Im thinking I will dump em in, flush a few times with CO2 then pressure up to 10PSI, swirling the fermenter every day or so for 5 days to get it all mixed in. My worry is that 240g in 5gallon is a lot and am I going to loose loads of beer?
Beer loss is inevitable with heavy dry hopping. Brew larger batches to account for it. I always dry hop FREE. FREE THE HOPS!
How interesting to know the process of brewing beer and the fermentation part of it. My husband and I love to try new beers and want to go to a great restaurant this week. We will find a restaurant that does excellent beer brewing in the area.
Just starting into the neipa realm. I recently made your trillium clone and when I took a sample from my flex+ fermenter it tasted great! I just pressure transferred to a keg. I poured a sample, just to see and it is milky with trub throughout. My question is: how long will it taje to settle before i can drink it, or did i do something wrong. Thanks in advance.
These beers must be cold-crashed for 48 hours prior to kegging. The trub will settle eventually, it’s just going to happen in your serving keg. You may need to pour some nasty pints to clear the bottom.
Nice read and seems like you’re putting a lot of thought and time into your brewing.
I wanted to say something about dry hopping during active fermentation that a lot of people don’t realize or even think about. As homebrewers we’re always fighting oxidation right? Well dry hopping during active fermentation helps wash O2 out of your hops. I used to wash my hops in CO2 as I was dropping them into the active fermentation and that seemed to have a huge impact on the freshness of my finished beer. I transferred to kegs using gravity while feeding my fermenter with CO2 as well. As you know I called BS on bioT but there’s new proof about releasing thiols and such which is a whole different topic. But these small things seemed to help me quite a bit.
Happy Brewing!
Thank you Marshall! – I have not messed with active ferm dry hopping in quite some time but I would be curious to give it a try again. I think that’s a really interesting observation.
Shawn – Great article, this is exactly what I’ve been searching for! So many Hazy IPAs that I’ve tried have been great for 2 weeks and then lost all the haze and a good bit of the taste. Big question though, maybe I’m just still too new to this (been fermenting just in buckets for a couple of years) but if I let the beer go for 7-8 days it’s going to drop well below the FG you want to target (almost all of my beers, regardless of yeast strain, end up below 1.010). So if I’m already at say 1.015 on Day 3 how do to I stop the fermentation without jumping to the soft crash?
Hi Mike – sounds like a few things going on here. 1. If your IPAs are degrading after 2 weeks then it is likely a problem with oxidation. Buckets are incredibly hard for oxygen mitigation. You need to keep these beers in a closed environment post pitch (kegging, closed transfers etc.). 2. The over attenuation issue is very strange. I would find the root cause of this rather than trying to stop fermentation. It could be an issue with infection or you are mashing much lower than you think you are. Double check your thermometers are accurate or intentionally mash 4-5 degrees higher than what you think you are. You will likely see the FG go up. Always let beers fully ferment out. Don’t try to stop them early..esp if you’re bottling. Hopefully this helps.
Hey Shawn – this is a great resource…thanks for taking the time.
I’m curious if you have ever used White Lab’s Costal Haze yeast, and if so, how it compares to Dry Hop?
I havnt tried that one yet – maybe in the future.
I use a 30L Speidel for fermentation. I can buy fittings from Nor-Cal do perform a closed transfer. Would this process work? After primary fermentation, do a closed transfer to a 5 gallon corny keg purged with co2 which i have already placed the dry hops into(in a bag)? Add 10 psi, then after 3-5 days cold crash to 35 when ready to transfer to a serving keg. I think this would allow me to harvest the yeast cleanly. I am not ready to invest in a conical yet.
Sounds like to maximize the amount of survivables which make it from the “cool-pool” to the fermenter we don’t want to drop the cold break just prior to pitching, since (at least for me) it’s impossible to separate the rather expensive hop matter from the rest of the cold break. If that’s the case do you expect to remove the cold break after primary fermentation and just before a late dry hop?