by
by 
There are so many different ways to configure your homebrew system. The best part is you can start with one kettle and move to as many as 3 depending on what you’re looking to do. I started with extract when I first started brewing and moved to a simple 3 vessel system before settling on a more automated 2 vessel kettle RIMS system.
What really sets each system apart is how the mash portion of the brewing process is handled. Once mashing is complete, the rest of the process is the same across the board. This article will go over the 5 most popular all grain-homebrew systems and how they work. Hopefully, this will work as a little guidance when choosing which all-grain system is best for you.
Here are your 5 common all-grain brewing systems for homebrewing.
Quick Terms Guide
- Hot Liquor Tank (HLT): Reservoir of hot water for strike and sparge water used for mashing
- Mash Lauter Tun (MLT): Kettle or cooler used for holding grains for mashing, the process of extracting fermentable sugars from grains
- Boil Kettle: Vessel for boiling fermentable wort and hops
Brew in a Bag (BIAB)
Brew in a bag has taken the homebrew world by storm. It’s not necessarily a new method of brewing but it has become increasingly popular over the past few years. There are a handful of high-end turnkey BIAB systems on the market right now dedicated to electric brewing. These systems feature recirculation, pumps, temp control, etc. You can of course also use a really simple propane setup with a kettle, burner, and mesh bag.
at a basic level, you mash and boil in a single vessel. Grains are mashed in a large and very fine mesh bag in a directly heated vessel. It’s the easiest way to brew all-grain recipes with minimal equipment and cleaning. It also offers a simple and faster brew day because it’s a full volume, no sparge mash. You can learn more about my BIAB process here.
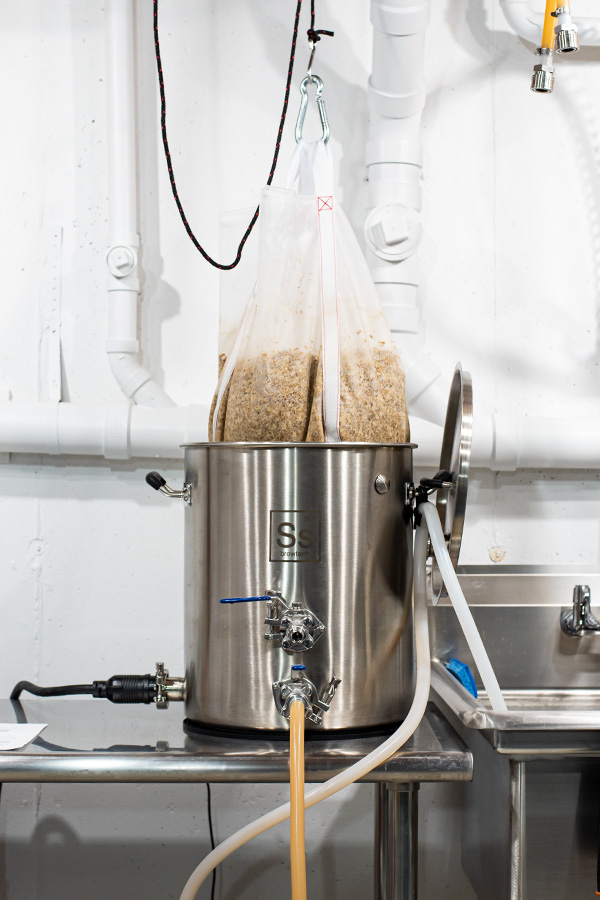
The biggest downside to BIAB is reduced brewhouse efficiency (typically 68-72%) and the need to hoist a very hot/heavy grain bag out of the kettle when mashing is complete. Many brewers build some sort of pulley system to lift up the grain bag and let it hang to drain every last bit of wort. Overall, it’s the preferred method of a lot of homebrewers due to its overall simplicity. A solid choice.
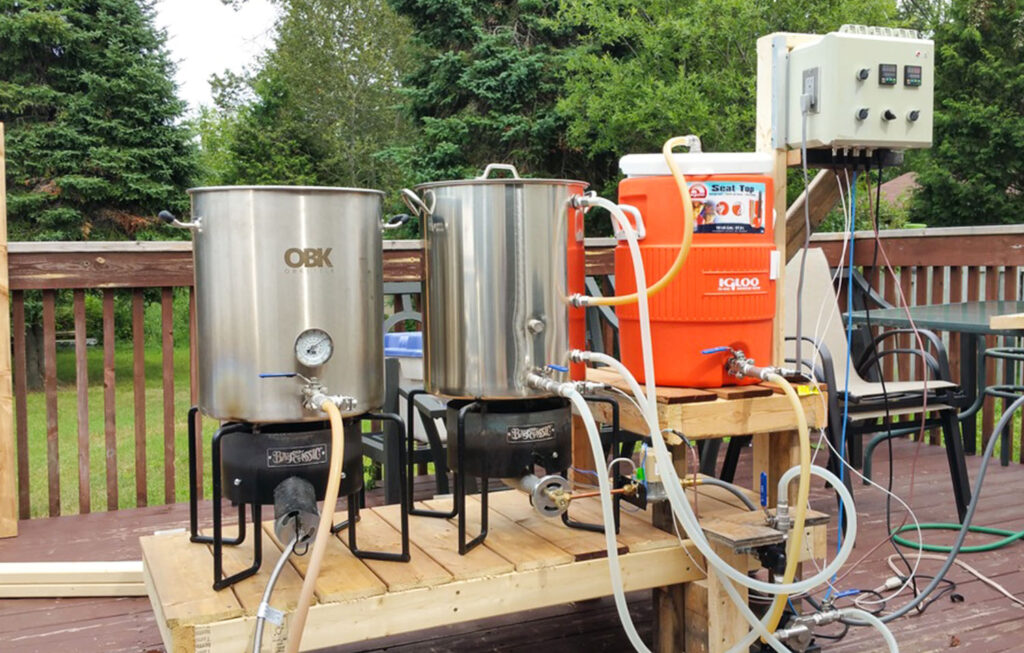
2 Vessel Kettle RIMS
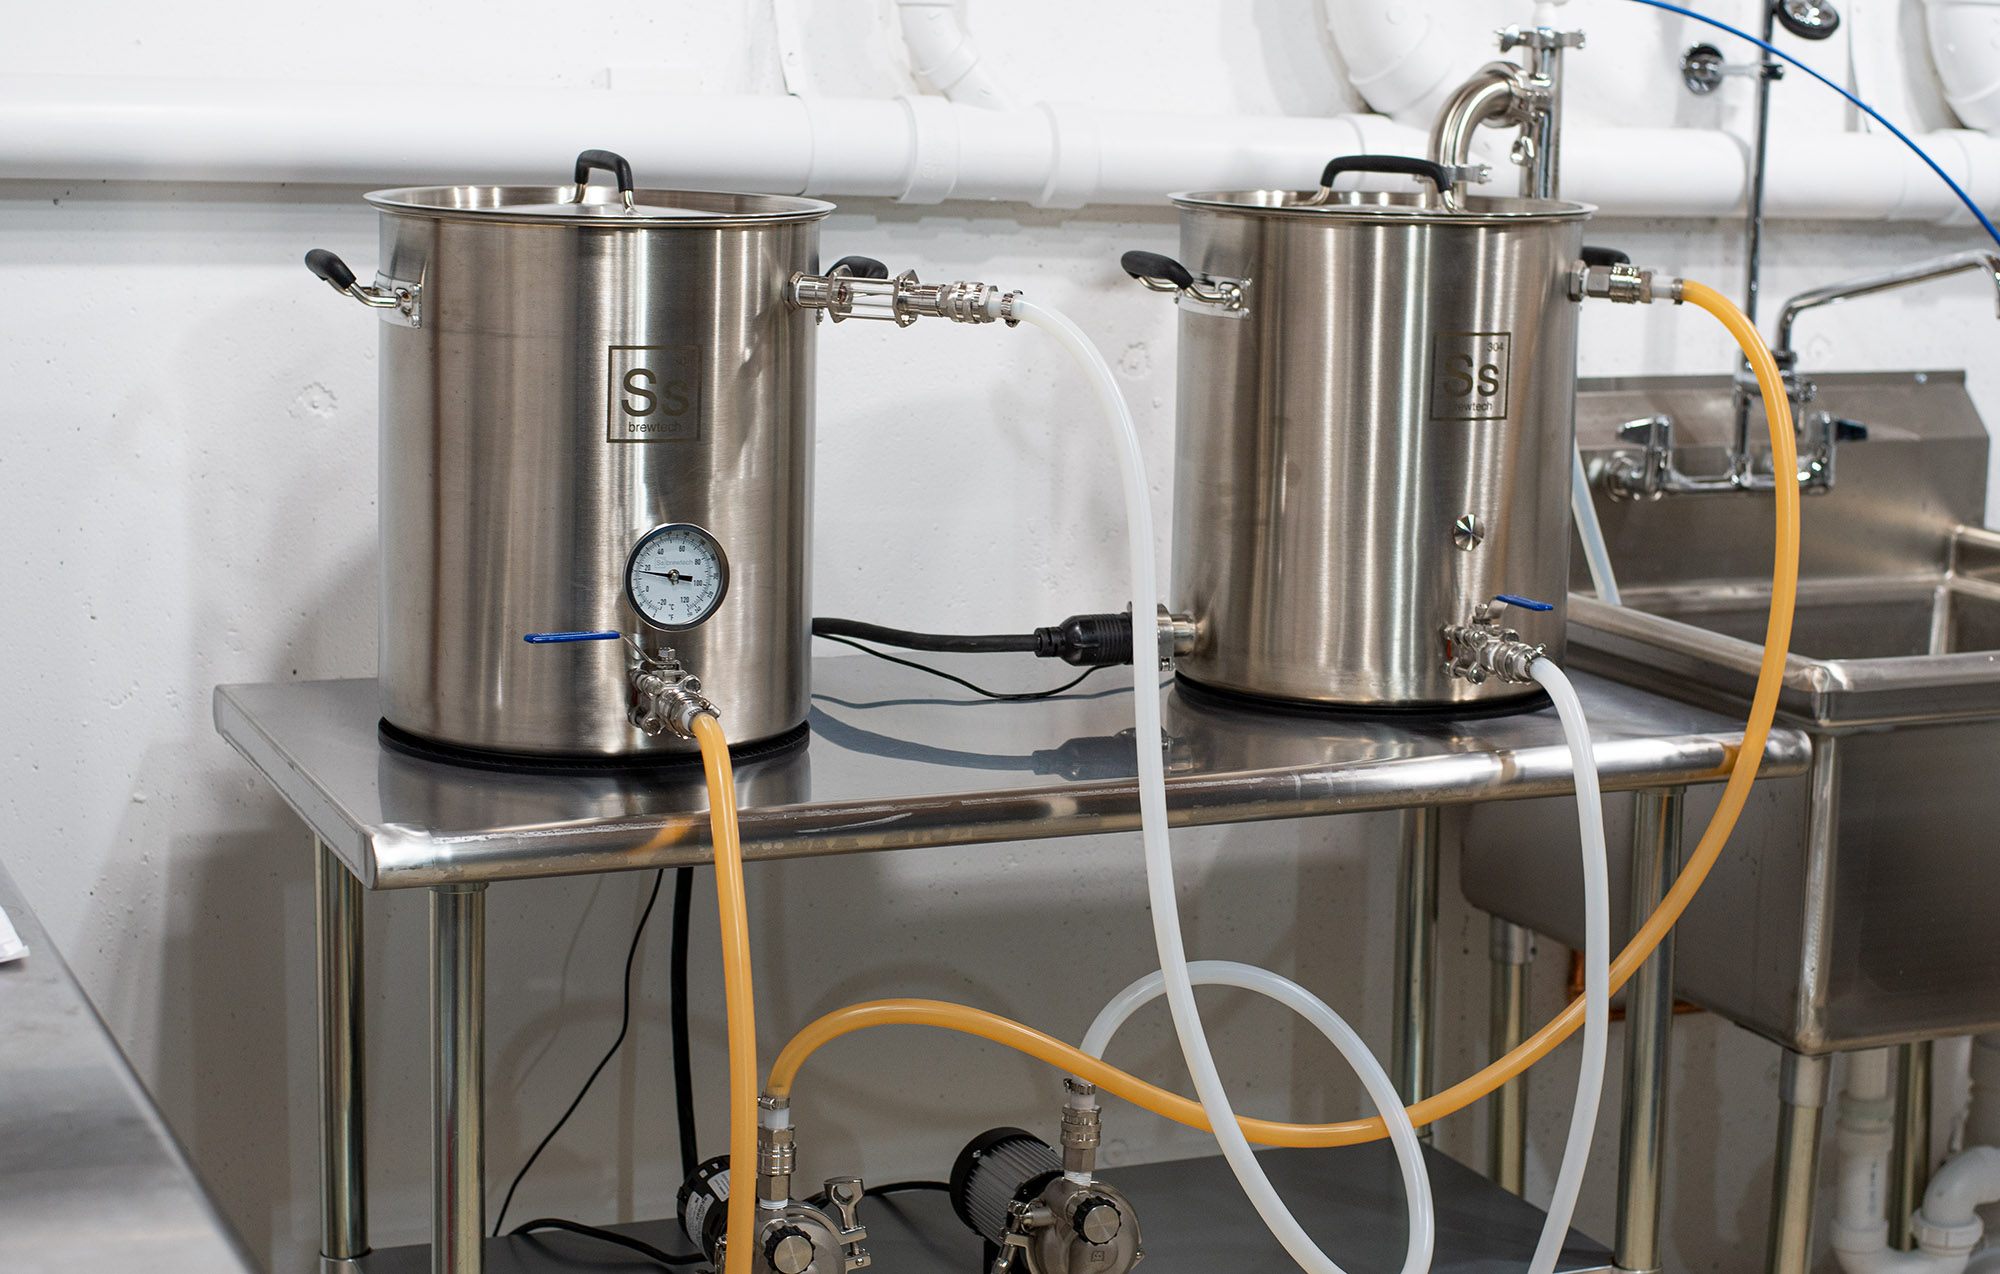
A kettle RIMS system (my system or a horizontal Blichmann BrewEasy™) builds off the BIAB process but with 2 kettles instead of 1. The main difference is a dedicated mash lauter tun (MLT) and direct-fired or electric boil kettle. A kettle RIMS system features a full volume mash with recirculation for grain filtering, wort clarity, and more uniform heat throughout the mash tun. 1-2 pumps are required to continuously recirculate the mash from the mash tun to the boil kettle to heat and maintain mash temps. Due to a dedicated mashing vessel, a large grain bag is not required.
The advantage of kettle RIMS offers a little more control over BIAB and the ability to produce clearer wort due to grain bed filtering. The big plus for me was not needing to deal with removing or suspending a grain bag above the kettle for boiling. I may change my mind someday but my system makes more sense for me right now.
System efficiency is about the same as BIAB, around 68-72%. Like BIAB, it also offers a simple and faster brew day because it’s a full volume, no sparge mash. The biggest downside is additional equipment and a bigger learning curve to dial in your recirculation. It also requires cleaning an additional kettle and pumps. The good news is it’s easily upgradable if you wanted to move to a 3 vessel system.
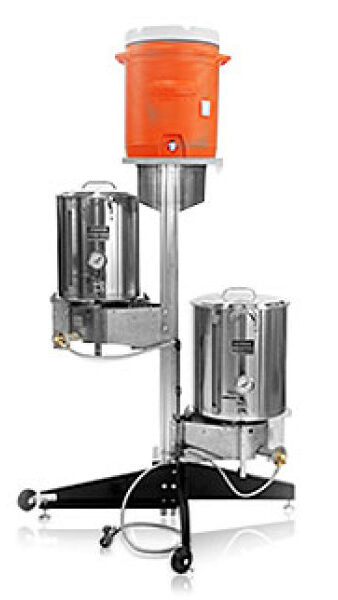
2-3 Vessel With Cooler Mash Tun
My first all-grain system featured 2 stainless kettles and a cooler mash tun. One kettle was the hot liquor tank (HLT), the other a boil kettle. Before I added pumps to transfer the wort, I would transfer from vessel to vessel by dumping or by gravity draining. A cooler mash tun is a great way to hold a mash temp for an hour without any additional heat source. It’s basically a set it and forget it approach.
Strike water is added to the cooler with your grains and the lid is sealed. Once the mash is complete you can drain to the boil kettle and rinse the grains with additional hot water from the HLT to extract any remaining sugars with either a batch or fly sparge. Since the system uses a sparge (grain rinsing) you can achieve higher system efficiency than BIAB or Kettle RIMS.
I was never a fan of this setup because it required additional equipment for minimal gains (at least how I had it configured). After I mashed I would do a really basic batch sparge with 168°F sparge water. I always struggled with hitting my initial mash temp and adjusting was difficult to do on the fly with no heat source. I would highly recommend BIAB over this method if just starting out. The gains in efficiency are probably not worth it. Also, clear wort is not possible without recirculation.
There are certainly more ways to set up a more sophisticated brew process with a cooler, leading us to RIMS/HERMS systems.
Heat Exchange Recirculating Mash Systems (HERMS)
HERMS or heat exchange recirculating mash system is a highly efficient and complex brewing system. It’s reserved for advanced homebrewers looking for the ultimate level of control in their mash and brew process.
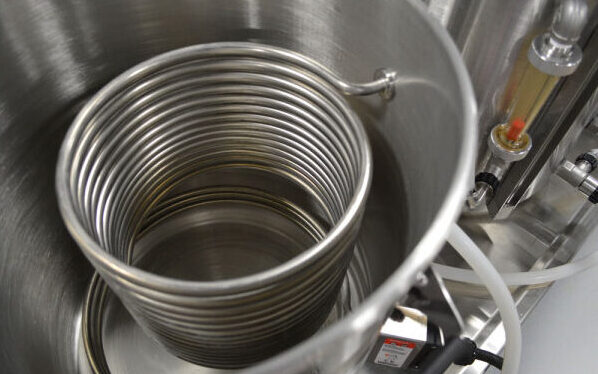
HERMS builds on many of the steps and components I’ve already hit on, however, the biggest difference is how the mash temperature is maintained. A 25′-50′ coil (similar to an immersion chiller), is seated inside the HLT which is full of hot water. Wort is pumped from the MLT exit through the HERMS coil and is indirectly heated by the water inside the HLT before returning to the top of the MLT. Like a kettle RIMS system, the wort is recirculated through the mash, promoting grain filtering, wort clarification, and uniform mash temps. The biggest difference between HERMS and RIMS systems is indirect vs direct heating of the wort during the mash.
HERMS systems are highly efficient (the mid-80s+) and usually adopt a fly-sparge method which adds to the brew day duration. One of the biggest advantages is repeatability and a lot of control. It’s certainly a setup for advanced brewers who really love the intricacies of the brewing process. And of course, more kettles and components always comes with more cleanup.
Recirculating Infusion Mash System (RIMS)
A RIMS or recirculating infusion mash system is very similar to HERMS in terms of overall function. As mentioned earlier, the big difference is how the wort is heated after it exits the MLT. A RIMS system usually features a heated RIMS tube that directly heats the wort as it passes through the channel. The main advantage of this approach is quick temp ramp times for step mashing and mashouts.
Another way RIMS can be achieved is by direct firing the MLT with gas or propane. Since the wort is being continuously recirculated, it’s being heated at the bottom and pumped right to the top to distribute heat evenly.
One thing to point out regarding RIMS is the risk of wort scorching due to it passing directly through a heating element. HERMS does not pose the same risk due to the indirect nature of the heat. RIMS systems in general are probably the most complex brewing systems but can yield exceptional and easily repeatable results once you understand what you’re doing. Like HERMS, it is also a highly efficient system, usually in the mid-’80s+ once dialed in.

A Final Note On System Efficiency
Some homebrewers love to chase high total efficiency. I want you to understand that system efficiency does not *really* matter in terms of producing high-quality beer. Some may disagree with me but efficiency is just a measure of wort losses from equipment plus how efficiently your system extracts sugars from grains. Most homebrewers compensate for lower efficiency by simply brewing with additional grains. Grain is relatively affordable, so a few extra pounds is usually a matter of a few dollars per batch.
Efficiency really matters for commercial breweries trying to profit off of their product. Higher efficiency means higher margins and fewer ingredients required to produce the same product. A more important thing for homebrewers is to understand WHAT their overall system efficiency actually is (using brewing software) so you can replicate and more easily predict results, such as hitting your original gravity. Homebrewers should shoot for around 70% total efficiency, which is fairly easy to achieve once you become familiar with your process.