
 by
by 
One question I always found myself asking was “will my homebrew ever match the commercial brews I love to drink?” If not, why the hell am I even doing this? I’ll never truly enjoy my own beers—especially when I’m my own worst critic.
Well, I’m here to assure you that you too can brew commercial quality beer at home if you take the necessary steps and care during the brewing and fermentation process. The reason commercial beers are so consistent and high quality is because they precisely control every step of the process along the way and leave nothing to guesswork.
Here are some tips that really helped take my homebrew from homebrew to “wow this is good.”
1. Proper Cleaning and Sanitization
The easiest and simplest step here.
Commercial breweries religiously clean and sanitize their equipment and you should too. There is nothing worse than wasting hours of work with a ruined batch due to improper cleaning techniques. Bacteria will kill your beer if you do not clean and sanitize your equipment, especially on the cold side. I use the widely known PBW (powdered beer wash) cleaner to soak all of my kettles, tubing, and fermenters in warm water and then repeat with a no-rinse sanitizing like Star San.
2. Make a Yeast Starter
Can a yeast starter actually improve homebrew? You bet it will. A yeast starter is strongly recommended when using liquid yeast for beers starting at an OG of 1.060 or higher. The reason is most liquid yeasts available to home brewers do not contain enough yeast cells to adequately ferment your beer efficiently. I would say the number one overlooked problem I had with my homebrew was underpitching yeast.
A starter will accomplish two things. 1. It will kick off a mini fermentation and get the yeast working more rapidly after pitching. 2. Most importantly, it gives your yeast a chance to multiply and produce more yeast so you aren’t underpitching. The more yeast you pitch, the less stress you will put on your yeast during fermentation. Stressed yeast leads to unwanted off-flavors in beer.
This step really pertains to liquid yeast as dry yeast packets will have enough viable cells for adequate pitching. John Palmer recommends rehydrating dry yeast in warm water before pitching to ensure the yeast is still viable. Learn how to make a yeast starter.
3. Airate Your Wort
Yeast needs oxygen to do their job. More oxygen in your wort will lead to a better overall fermentation. I use a long drill bit with an aerating device attached to the head. This allows me to quickly churn up the wort in the fermenter and create a foamy head of bubbles. There are a handful of other ways to achieve aeration, such as a vigorous pour into the fermenter from your brew kettle. You can see more methods here.
4. Fermentation Temperature Control
As a homebrewer, I spent most of my time focusing on mashing, boiling, and how many hops I was going to add to my next IPA. However, it rings true that great beer is actually made during the fermentation process and not the former. This mindset was an area I neglected as a beginner homebrewer.
I cannot stress this one enough. By far the biggest improvement in my homebrew came from proper pitching temps and temperature-controlled fermentation. Actively fermenting beer can be 10 degrees higher in the fermentation vessel than the ambient temperature of the room you’re fermenting in. So if your brewhouse is 70°F your beer could be 80°F during active fermentation (that’s warm enough to turn an IPA into a witbier). It seems counterintuitive but yeast both thrive and produce more esters at higher temps. Keeping your fermentation cool will produce cleaner tasting beers.
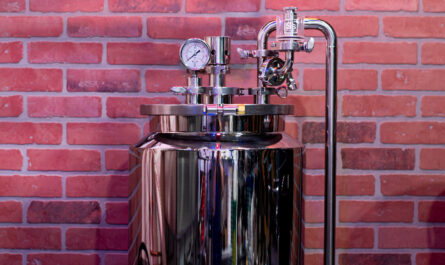
The solution to this problem would be to ferment in a temp-controlled fridge or pick up an internal cooling system for your fermenting vessel so you can dial in an exact fermentation temp. For ales, I like to ferment in the 65-70°F range.
5. Neglecting Conditioning
Like you, I hate waiting for my beer to be ready. It’s the hardest part of brewing. Fermentation, in most cases, usually happens very quickly—usually 4 to 5 days, but a key step is waiting adequate time for your beer to condition after it has completed fermenting. Yeast produces a lot of byproducts during fermentation that needs time to settle out of the beer. A general rule of thumb for beginners is to leave your beer in the fermenter for 2 weeks to ensure the yeast has had enough time to clean up after itself before transferring to bottles or a keg. You’ll notice that off-flavors will fade and drop out of your beer as it ages.
6. Water Treatment
Saving water for last since it’s the most complex practice and something I am still learning myself.
Beer is 90% water. If your water sucks, your beer will suck. Now obviously you can make good beer with plain tap water, but to really take your brewing to the next level you should understand exactly what is in your water. I’m talking pH and mineral makeup. Ask your local water supplier for a water report or send a home water sample to Ward Labs and they will give you all the information you need. Ward Labs has a test dedicated to homebrewers.
If your tap water won’t cut it, you can pick up RO (reverse osmosis) or distilled water and build a water profile from scratch with brewing salts. This is an advanced brewing practice but it’s really what gives commercial brews signature flavor. Brewing salts like gypsum and calcium chloride help to boost malt and hop profiles in specific styles.

Wonderful, could u teach me how to make wine. Iam dying to learn but fear material here(Uganda) not found
You need a bucket with a lid and then bottles to put your finished wine into. Honestly, wine is so easy compared to beer!
I wash my fruit, put it and sugar into a bucket and then pour on boiling water, stir and leave for 24 hrs.
Then add yeast and walk away for a few weeks. Transfer to a clean bucket then leave for a few months. Then bottle.
What I haven’t mentioned is the chemicals you may need to improve on this process, but that’s the basic equipment covered. If you can add an airlock to your bucket lid, all the better.