
 by
by 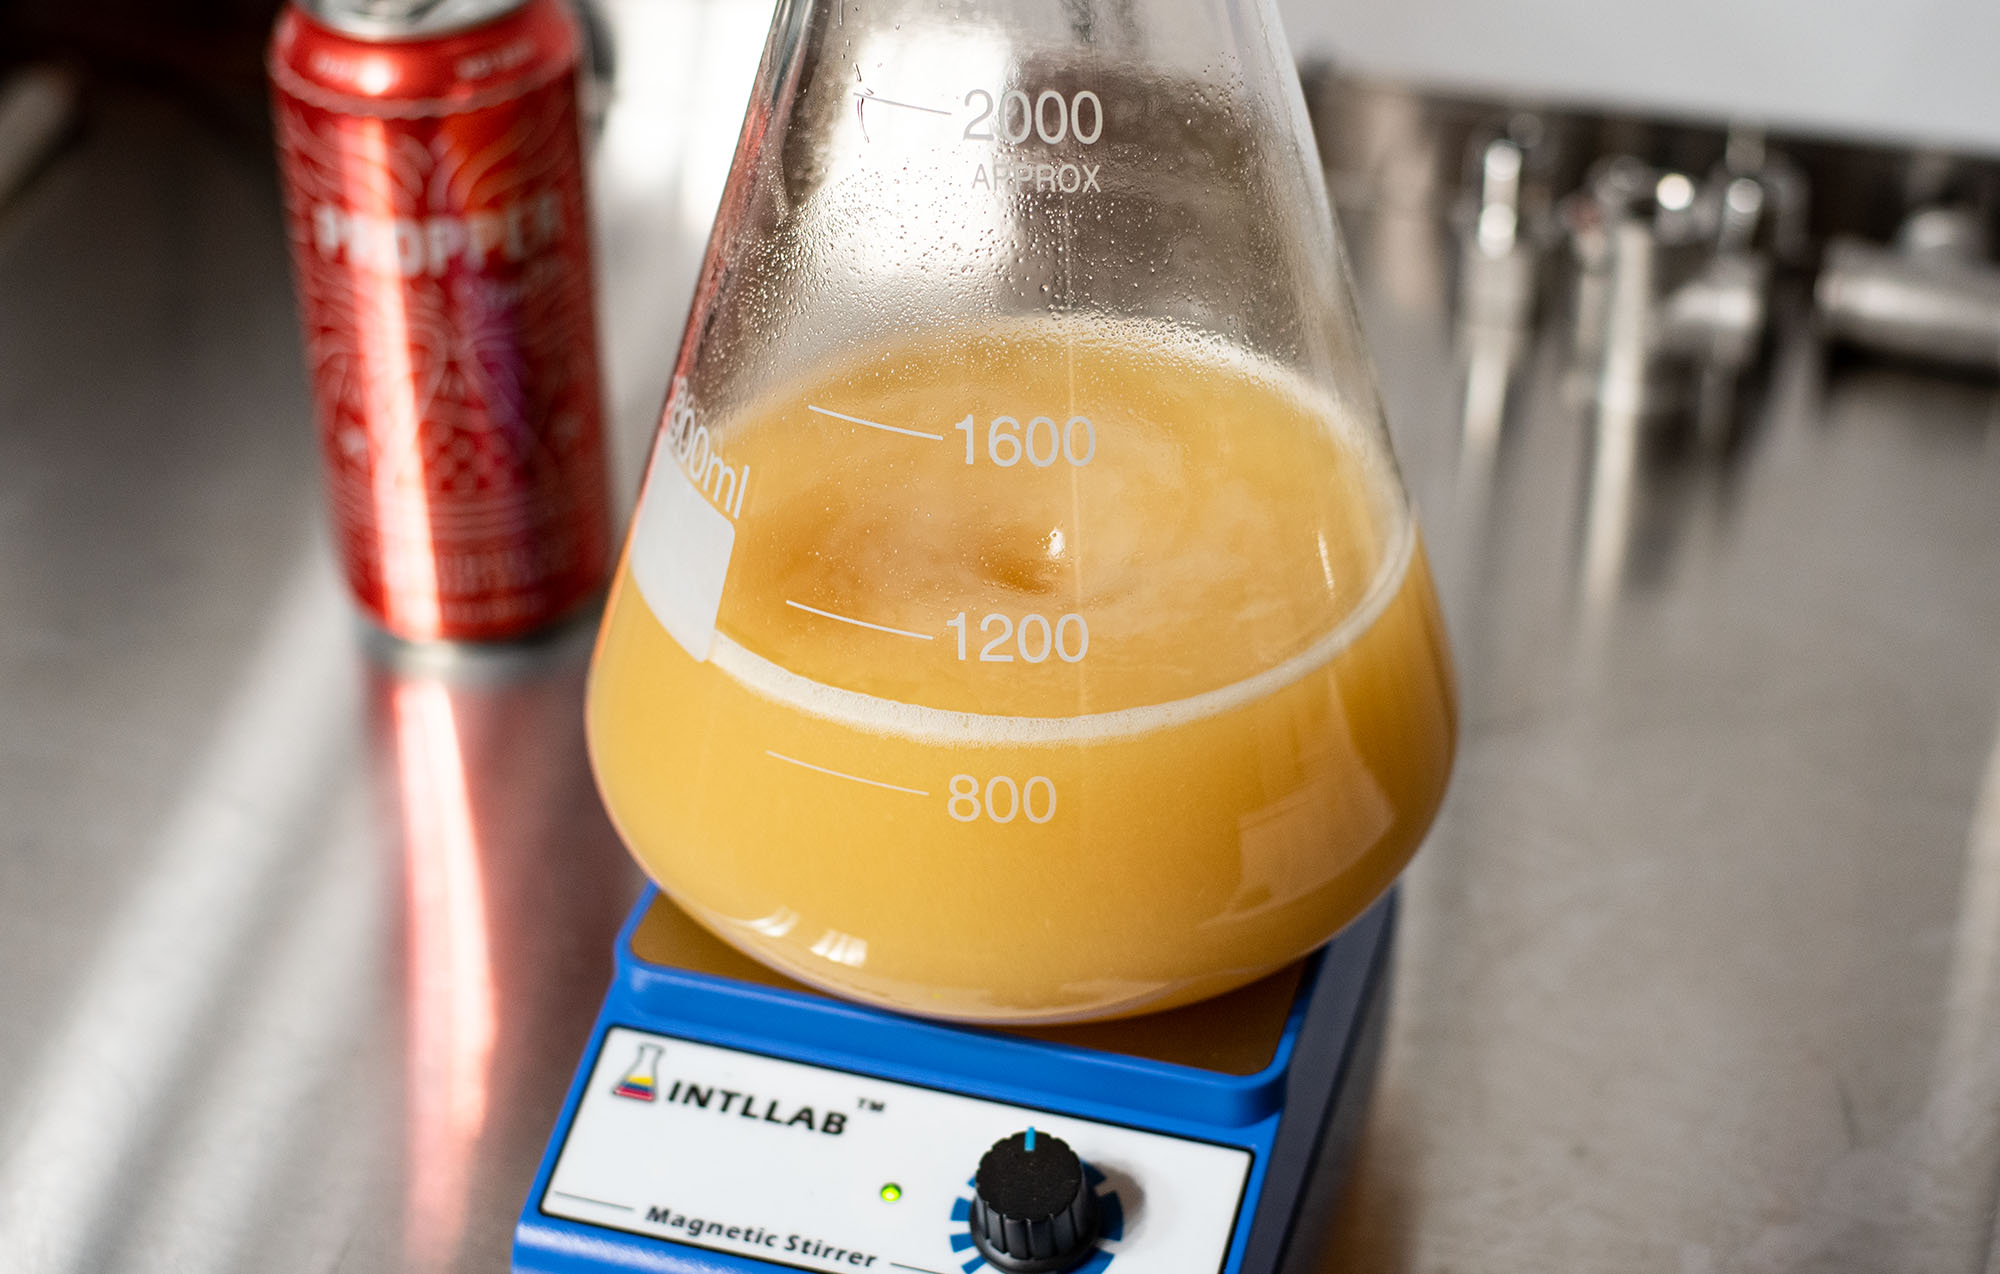
A yeast starter is an easy way to ensure your homebrew has a viable amount of yeast for efficient fermentation. Underpitching adds stress to your yeast, rendering unwanted off-flavors in your beer. Yeast starters can also help kick off active fermentation more quickly since your yeast is active and already working.
The alternative to a starter is to pitch more yeast (2 liquid packs for instance) however with the cost of yeast being among the pricer ingredients in homebrewing, it doesn’t always make sense. Plus there is nothing better than getting hyped for brew day with a swirling starter on your stir plate.
When Is a Yeast Starter Necessary?
A yeast starter is really only necessary for liquid yeast strands. An 11.5g packet of dry yeast has more than double the number of cells over your typical liquid yeast pouch (230 billion vs 100 billion).
A starter is recommended when using liquid yeast in 5-gallon batches with an original gravity over 1.060. I’d rather err on the side of caution and make a starter for anything close to 1.060. No harm can come of it.
Making a Yeast Starter
To make a yeast starter you’ll need a 2l or 2000ml Erlenmeyer flask and an optional stir plate if you want the absolute best results. A stir plate will allow you to stir your yeast constantly for an 18-24 hour period. The alternative is to swirl the yeast in the flask every few hours to ensure the yeast stays in suspension and oxygenated. If you make higher gravity beers more frequently, a 3000ml flask may make more sense since it has extra volume for 2-liter starters.
There are two ways to make a starter. The old fashioned (from scratch) way with dry malt extract (DME) or with canned condensed wort. For moderate ABV beers starting with an OG up to 1.060, a 1-liter starter is sufficient. For bigger beers with an OG of 1.065-1.070 or higher, I bump up to a 1.5-2-liter starter. I’ve personally found making a 2-liter starter is easier than messing with an in-between measurement.
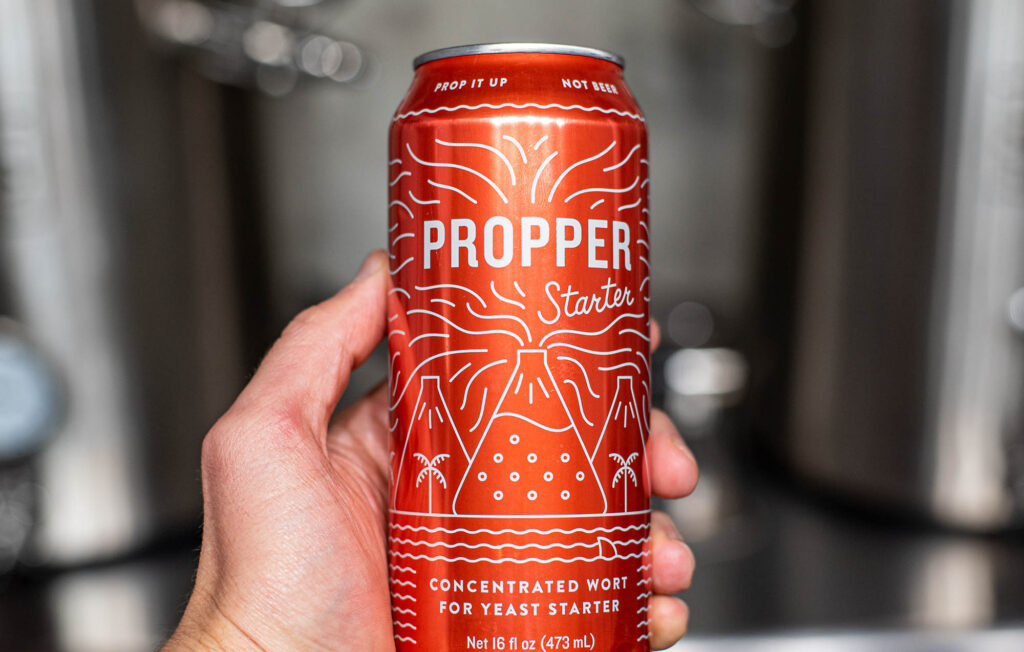
Propper Starter Condensed Wort
Today you can buy canned malt sold especially for yeast starters. It’s really convenient and eliminates the need to boil dry malt extract on the stove. They’re certainly pricier than buying DME but the convenience factor is a BIG plus for me.
To make a 1 liter starter with canned wort:
- Sanitize the outside of the condensed wort can, your packet of yeast, and your flask/stir bar with Star San.
- Combine one can of Propper Starter™ with 16 ounces of cool water.
- Pitch the yeast to the starter and cover with sanitized aluminum foil.
- Use a stir plate or intermittent shaking over the next 18-24 hours and store at room temp.
- Optionally decant and pitch into beer when ready.
Just note, a 2-liter starter will require two cans of Propper Starter. Read my Propper Starter review here.
Dry Malt Extract
When making a yeast starter with DME, you’ll have to calculate how much DME to use in the starter. The starting gravity of a yeast starter wort should be between 1.030-1.040.
The rule of thumb for calculating DME is 1 gram of DME for every 10 milliliters of wort. Therefore a 1-liter starter would require 100 grams of DME.
Formula: Liters X 1000/10 = DME in grams or 1X1000/10 = 100 grams
The Simplest DME Calculation
If you don’t have a scale to measure DME, John Palmer, Wyeast, and White Labs all recommend 1/2 cup DME to 1 liter of water for a standard ale starter for a 5-gallon batch. A two-liter starter would call for 1 cup of DME to 2 liters of water. This is by far the easiest way to go and my preferred method when using DME.
To make a starter with DME:
- Determine your yeast starter volume using Mr. Malty Pitch Rate Calculator.
- Weigh 1 gram of dry malt extract for every 10 milliliters of target starter volume or use 1/2 cup per liter.
- Add starter water volume to either a lidded pot or your Erlenmeyer flask if using as a boiling vessel.
- Start to heat water and stir in the DME.
- Add about 1/4 teaspoon of yeast nutrient (optional).
- Bring to a boil for about 10-15 minutes. Keep the pot covered to maintain as much of the volume as possible. Cover with foil if using your flask.
- After the boil, remove from heat and allow the wort to cool to about 72°F. You can place the pot in an ice bath to speed up the process.
- If needed, transfer the liquid to your sanitized flask
- Pitch the yeast to the starter and cover with sanitized aluminum foil.
- Use a stir plate or intermittent shaking over the next 18-24 hours and store at room temp.
- Optionally decant and pitch into wort when ready.
Decanting A Yeast Starter
Your average starter for a 5-gallon batch will be comprised of about 32 ounces of liquid. That’s 32 ounces of liquid/flavor you’re adding to your batch of beer. My preference is to only pitch the yeast and the least amount of extra yeast as possible.
To accomplish this you need to cold crash the starter in the fridge for 3-4 hours or overnight to drop the yeast out of suspension and separate the wort from the yeast. Pour out most of the wort except for a thin layer just above the yeast at the bottom. Swirl to mix the remaining wort and pitch.
A starter can chill in the fridge for several days before brewing if necessary. You can make 2-3 days in advance with no issue at all.

