
 by
by 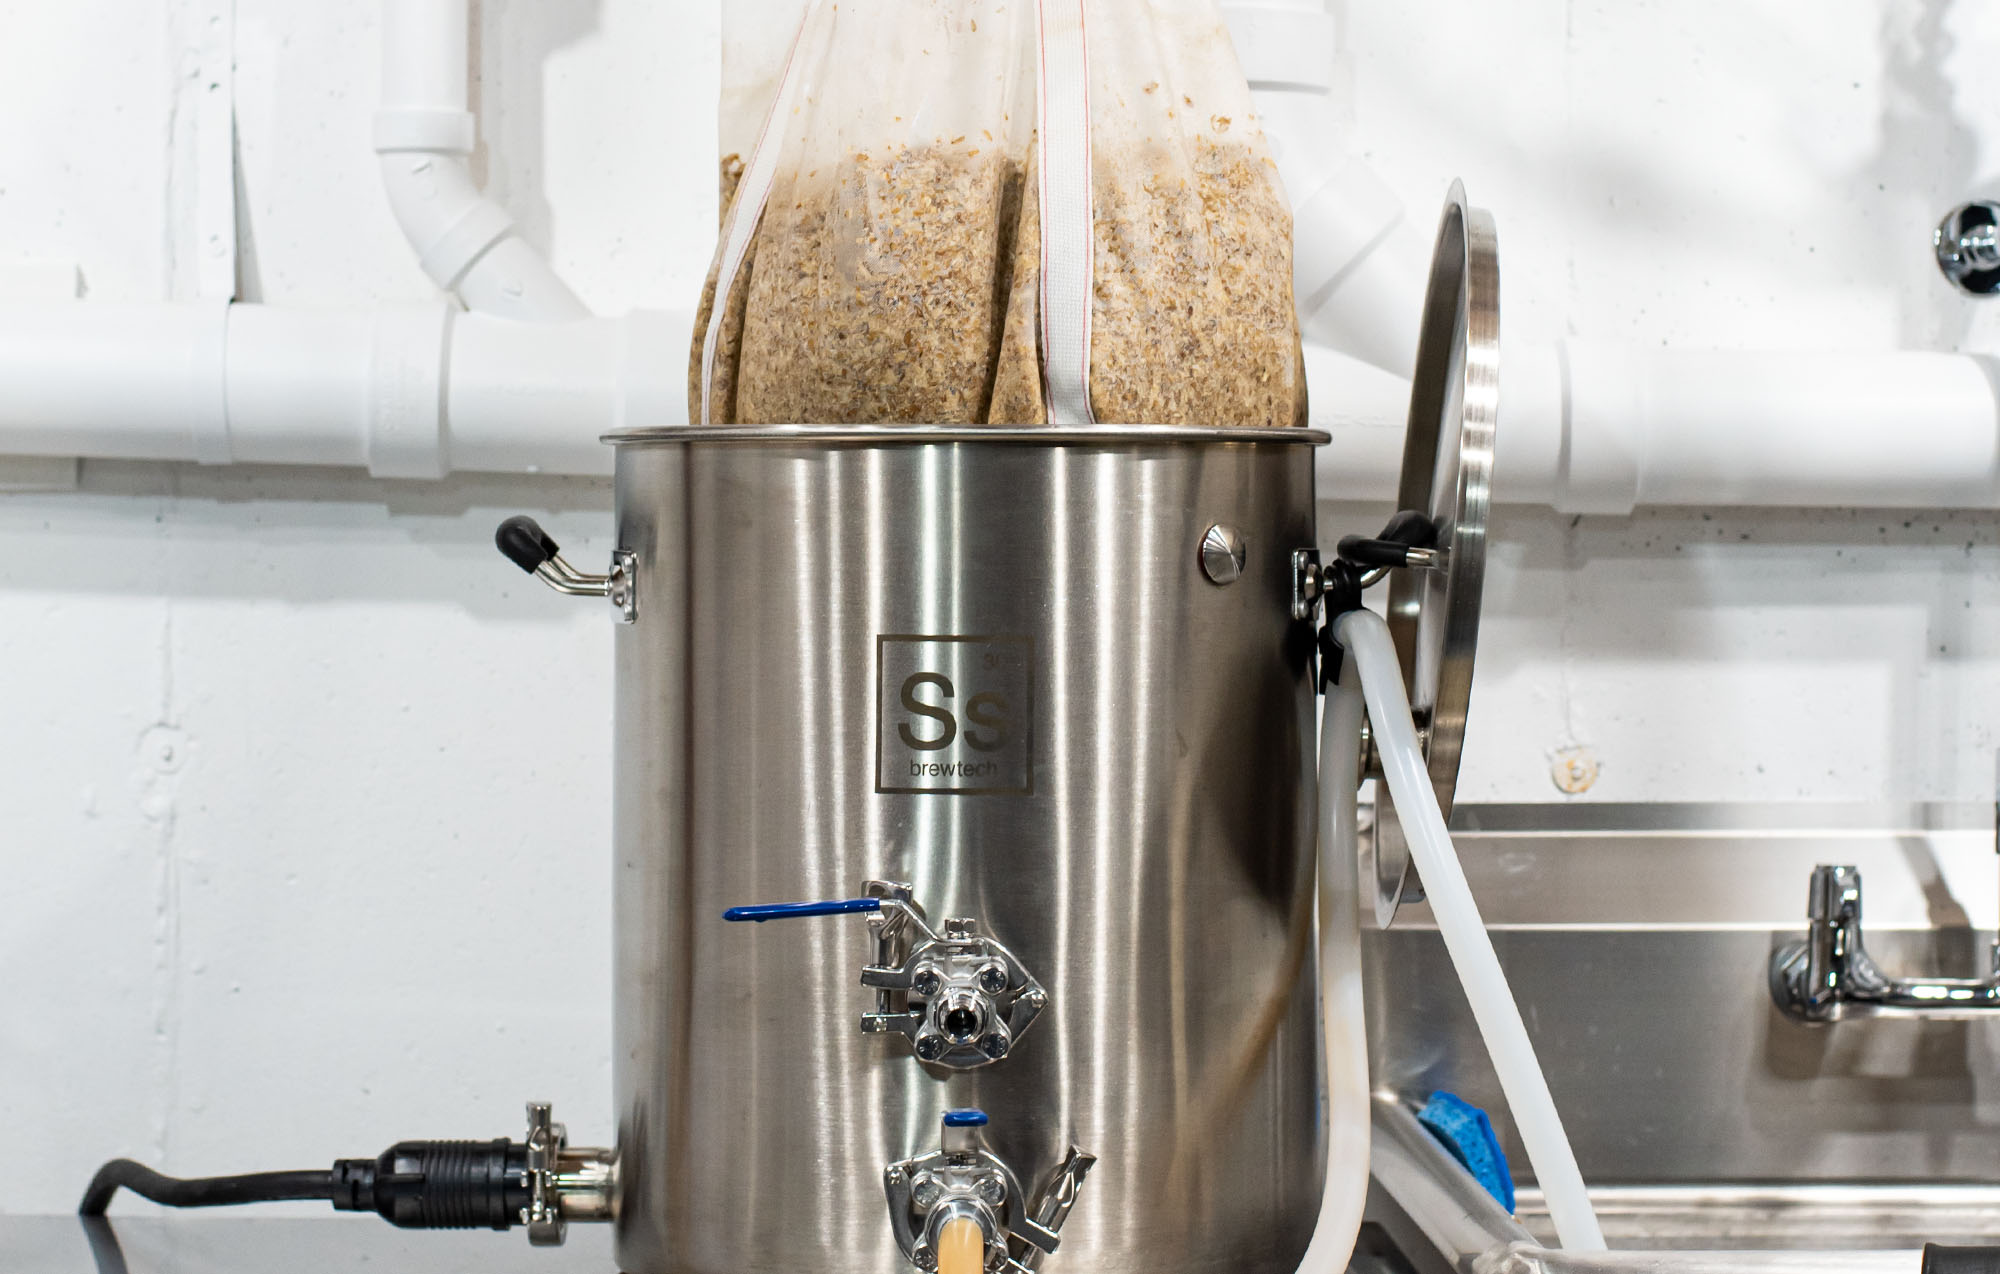
The brew in a bag (BIAB) method has opened the doors for many new homebrewers to jump headfirst into the hobby without the need of expensive equipment. With BIAB, you can basically start homebrewing with the same investment and equipment you would need for extract brewing. All grain brewing will give you more control over your recipes and will ultimately allow you to brew with the same ingredients as commercial breweries.
The Basic Process
In BIAB, crushed malted grains are placed in a very large fine mesh bag and are soaked (mashed) in a kettle full of hot water, typically in a range of 145-158°F, for 1 hour. This sugar-extracting process is called mashing. The bag/grains are then removed and drained, leaving behind the fermentable sugary liquid, called wort. The wort is then boiled with hops like any typical extract recipe. You now have fermentable hoppy wort.
All Grain vs Brew in a Bag
Brew in a bag is the most simple method of all-grain brewing. There are a handful of all-grain brewing systems out there, BIAB being the least intensive way to ultimately produce fermentable wort with malted grains. BIAB has become so popular that even experienced homebrewers (myself included) are trading in their large and complex system in exchange for a faster and more simplistic brew day.
Electric Brew in a Bag (eBIAB)
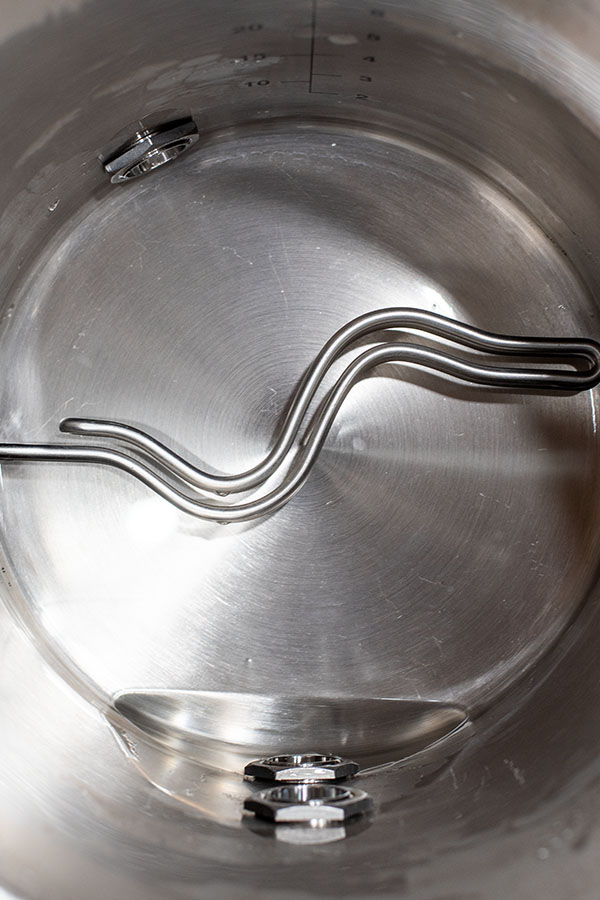
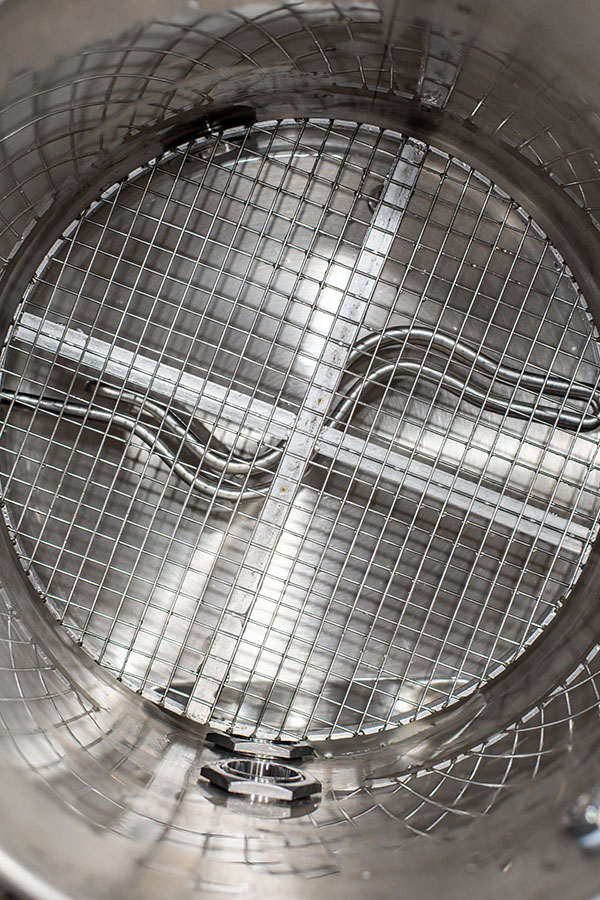
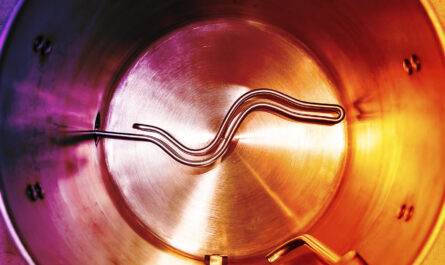
Today you can find a handful of turnkey electric BIAB systems offered to homebrewers. The only difference between eBIAB and gas BIAB is the heat source. With gas, there is an open flame and with electric, there is a heating element inside the kettle, usually protected by a screen or false bottom to keep the bag away from the actual element. I have a custom-built electric legacy Ss Brewtech system and I absolutely love the ease and control it gives me. The picture below is what the bottom of my kettle looks like with and without the false bottom.
Basic Equipment Needed
Outside of a homebrewing starter kit, you will need:
- A brewing kettle (usually 8-10 gallons for 5-gallon bathes)
- A heat source such as a propane burner, gas stove, or electric element
- A fine mesh bag to hold the grains
- A way to suspend the grain bag above the kettle to drain after the mash. I use a ratcheting pulley system, others have found simpler ways such as placing a circular grill grate on top of the kettle.
- Heavy-duty brewing gloves for handling the hot grain bag
Mesh Bag
The mesh brew bag is arguably the most important element of BIAB. You will need a very large and durable fine mesh bag that can hold 20-30 pounds (or more) of hot wet grains. A typical grain bill for a 5-gallon batch is around 10-12 pounds of dry grain. Add water absorption and you can double or even triple the weight. I love my brew bag and highly recommend them.
If you plan on recirculating your mash, a 400-micron brew bag is recommended. If not, a 200-micron bag is all you need. 400 micon is finer than 200, which helps to prevent a stuck mash when recirculating.
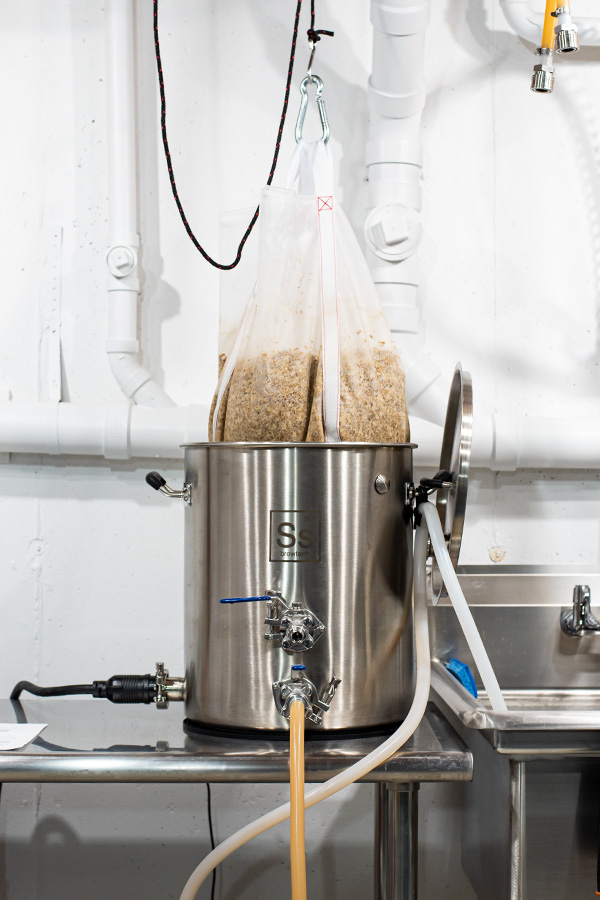
Pully/Hanging System
I use a simple ratcheting pulley system to hoist my bag above the kettle. It’s simple, cheap, and is the perfect solution assuming you have a place to hook it above your kettle. I put a 150 pound rated eye hook bolt in the framing of my basement ceiling to attach my pully. If you do a Google search you will see lots of creative methods for hanging the bag. If you have a tall enough step ladder, you can position it over the kettle and hang your bag from a step. Whatever you do, just make sure it can support the weight of the bag.
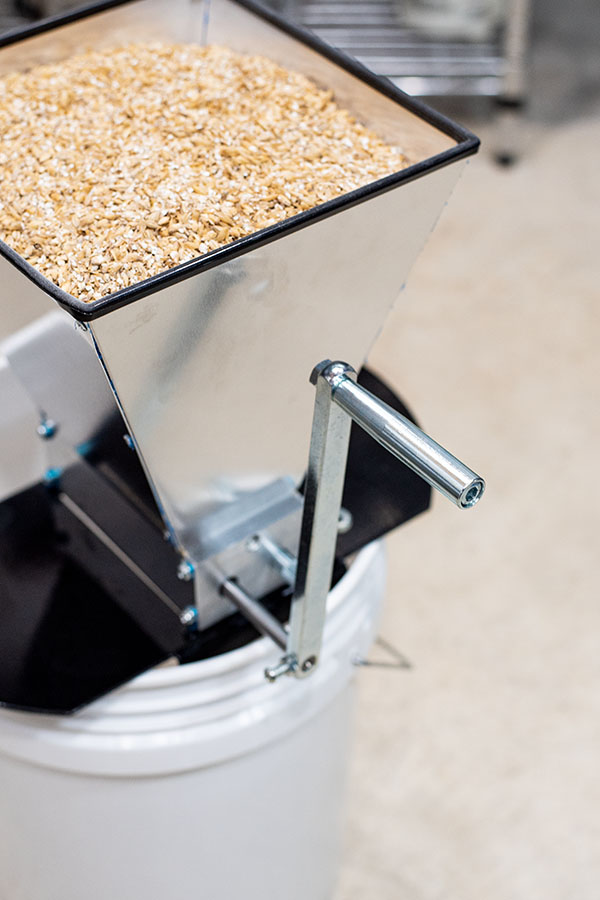
Grain Crush for BIAB
Grain crush is really important for the brew in a bag method because it heavily dictates efficiency. Because you’re mashing in a fine mesh bag, you can crush your grains much finer than a traditional sparge system. When you purchase milled grains online, the grains are crushed with a standard sparge brewing process in mind. While this is fine to use, it’s going to result in much lower efficiency, usually in the high 50’s or low 60s. A finer crush will help boost overall efficiency up to around 70+%. Luckily there are a few things you can do.
Ask your local homebrew store or online store (if they offer it) to crush your grains specifically for BIAB. The other option would be to invest in a grain mill and crush your own grains. This is a more expensive option, but as you get more experienced, this is an appealing option because you can buy unmilled grains in larger quantities and mill them as you need them.
For BIAB your grain mill’s rollers should be set to around .035 for best results.
BIAB Brew Day Steps
1. Water Volume Calc and Temperature
BIAB is so simple because it combines your total brewing water volume (strike and sparge) into one vessel. This eliminates technical processes like sparging, lautering, and transferring hot wort and water through a series of vessels. I use brewing software (Brewfather) to calculate the water volume needed for BIAB. This takes the guesswork out and accounts for grain absorption, boil off, and many other factors.
The best formula for water volume I’ve found is below. It’s simple and close to what I get using software. You can always top up with fresh water if your water volume at the end of the boil is low (original gravity is too high) or boil longer if you end up with too much water (original gravity is too low).
The only figure you may need to adjust is your grain absorption rate. This will vary depending on whether you squeeze the bag or not. I squeeze the bag and use .08 gallons per pound of grain. The formula works best if you understand your true “boil-off rate” and “trub loss.”

“Grain absorption”(12 lbs X .08) .96 gal + “finished batch size” 5.5 gal + “boil off rate” 1.25 gal (60 min boil) + “trub loss” 0.25 gal = 7.96 gallons total water
Add all water to your kettle and heat to 8-10 degrees above your target mash temp. This will account for the loss of heat from adding your grains.
2. Mash In (Doughing In)
Once your strike water is heated to your target temp, you can add your grains. Doughing-in is the process of slowly pouring your grains into the kettle. This should be done gradually and slowly to avoid clumps or dough balls, which will ultimately decrease the efficiency of the conversion process.
Once you have fully doughed-in, give the mash a solid stir for at least 30 seconds to thoroughly mix everything together. This is when I add brewing salts. If you overshoot your mash temp, continue to stir to dissipate the heat. If you undershoot, continue to fire the heat source and stir until you reach your mash temp. Set your timer for 60 minutes. If you’re interested in learning more about mash pH and how to adjust it, read this.

3. Mash (Saccharification Rest)
The mash is the process of using hot water to activate enzymes in the grain that convert the gain’s stored starches into fermentable sugars. The mash duration is called a saccharification rest, however, most brewers refer to this step as the mash or mashing. The mash is typically a 60-minute process, although sometimes it’s more or less depending on the style of beer.
Mash temperature will vary depending on the style of beer you’re brewing and overall characteristics. Lower mash temps typically yield dryer beers while higher mash temps yield sweeter beers. A typical mash temp is 152°F, as it’s right down the middle in terms of profile. Your recipe should give you a mash temp to target, which will dictate the beer’s general style.
I use the Blichmann BrewCommander and a 5500-watt electric ripple element to manage mash temps and the boil. It’s an awesome controller and does a great job of dialing everything in for me. Damn…I’m off by .02 degrees.

BIAB Mash Recirculation
Some brewers add mash recirculation to their systems to ensure even temps throughout the mash without the need to stir. Hot wort is pumped from the bottom of the kettle (closest to the heat source) to the top of the mash tun. This ensures the mash temp is even throughout. If you don’t have pumps, you can simply stir the mash every 10-15 minutes to eliminate hot spots. I use a RipTide pump and love it.
As I mentioned earlier, if you plan on recirculating your mash, a 400-micron brew bag is recommended. This helps to prevent a stuck mash when recirculating. You can learn more bout my BIAB recirculation setup here.

Do I Need to Mashout With BIAB?
Mashout is the process of raising the grain bed to 168°F in a conventional lautering/sparging system. This is done to help the wort flow, deactivate enzymes, and stop conversion during a prolonged sparge process. Since we are just lifting the bag from the kettle and moving to a boil immediately, a mashout step is unnecessary.
4. Remove the Bag
Once the mash is complete the bag must be removed and drained of sweet wort. As mentioned earlier, I use a pulley system to suspend the grain bag above my kettle so the wort can drain out. There’s a lot of debate on whether or not to squeeze the grain bag to help extract every last bit of wort from the grains.
Squeezing the bag will ensure you extract every last bit of wort possible and also increase overall efficiency. The argument against squeezing the bag is the risk of extracting tannins from the grains. I would say the majority of BIAB brewers squeeze the bag with no ill effects. If you go this route I recommend heavy-duty brewing gloves as the bag will be very hot.
5. Boil
Once you’ve completed mashing and draining the bag you’re ready to begin your typical 60 minute boil as you would any extract batch. Outside of the fact that you’re boiling a larger full volume of wort (6-7 gallons), there is no real difference from this point forward. Your hop additions, chilling (I use the Exchilerator), and yeast pitching should follow the standard brewing practice.

Do you take the false bottom out before you boil? I know this is an older thread but thought I’d try anyway!
Nope – I never remove it
Is that a custom made false bottom in your pot?