
 by
by 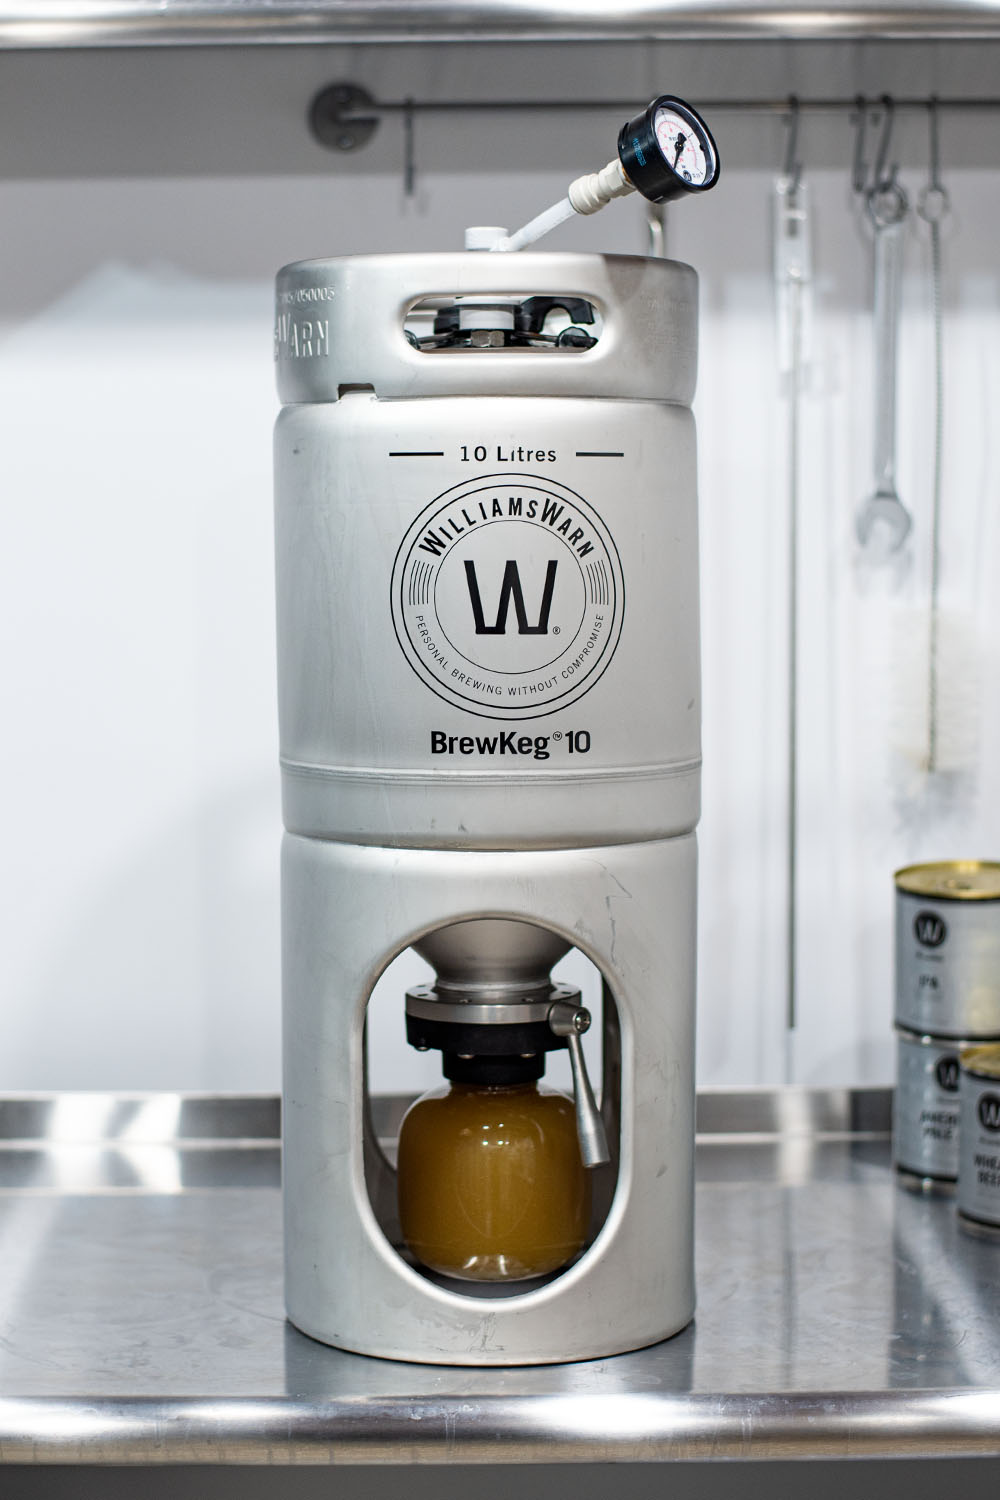
The BrewKeg10™ was generously provided by WilliamsWarn in exchange for an honest review. The information below is my own unbiased opinion.
I recently got the chance to brew with a really cool product that I think most homebrewers have at least seen and been incredibly intrigued by. The BrewKeg10™ is a conical keg system designed for brewing, fermenting, and serving from the same vessel. While you can fill it with your own home-brewed wort, it’s actually so much more than that. I’m going to break down the BrewKeg10 system and share what it’s all about. And most importantly, try to clear up some misconceptions that I assumed at first glance.
BrewKeg10 Product Overview
The BrewKeg by WilliamsWarn is an all-in-one brewing system designed to be used with WilliamsWarn extract beer kits. My friends over at WilliamsWarn (a New Zealand-based company) hooked me up with their 10L (liter) version and a few of their beer kits to pilot the system. I was sent a simple blonde ale, a classic IPA, a pale ale, and a wheat beer. The 10-liter beer kits are incredibly simple and yield about 2.6 gallons of finished beer. You can also get the BrewKeg in 12.5L (replacing the 10L), 25L, 50L, and monstrous 150L versions.

Top of keg 
Lid and diptube 
Bottom of keg
Now, for the most impressive part. Brew day takes about 20-25 minutes to pull together from start to finish. The keg itself is designed for pressure fermenting, so you can ferment at about 22 PSI or 1.5 bar within a temperature range between 68°F-86°F (20°C-30°C) and get an incredibly clean and ester-free beer. The best part is you’re drinking cold and fully carbonated beer in as little as 5-7 days from brew day. It’s a remarkable system and produces some great results without hours of work.
Equipment
The BrewKeg can be purchased with a handful of available accessories and dedicated cleaners but the most important being the keg itself, the dosing device, and the pressure gauge. I already had a kegging setup and CO2 so I did not require anything else to get rolling. The BrewKeg features your traditional ball lock keg posts, a built-in adjustable PRV, and a removable collection ball for yeast and sediment. The keg lid comes with a removable hard plastic dispensing diptube that sits close to the bottom of the cone.
The keg itself is roughly the same size as your traditional corny keg and features a true conical cone. The bottom port contains a heavy-duty butterfly valve that can be sealed off when it’s time to remove the yeast and serve.

Cleaning
WilliamsWarn offers their own cleaning and sanitizing products however I used my own brewery wash and sanitizer I had on hand to clean the keg before brewing. The same cleaning process can be done between batches as well. WilliamsWarn also recommends cleaning/sanitizing with a little boiling water.
I was honestly really surprised by how clean the keg was after fermenting/serving my first batch. It did not look like any vessel that had been fermented in. In fact, it looked like a regular serving keg. After a thorough cleaning and sanitization of the keg and components, you’re ready to get brewing.
The Brew Process
Brew day looks a little different with the BrewKeg. After you’ve brewed once you’ll honestly never need to reference the directions again. There are tons of helpful instructional videos online on how to prep, clean, brew, and ferment. Also, the keg comes with a nice booklet with very detailed instructions on how to do everything. It’s not every day you receive instructions that are clear and actually make sense. Below should serve as a summary of course, so I recommend you view the true detailed instructions before doing anything.

WilliamsWarn offers a variety of different beer and cider kits. Most recipes come with a can of liquid malt extract and a bag of dry malt extract. All of the kits use dry yeast packets for ease of use. Some of the kits include extra hops and malt (like the IPA), while others are pre-bittered and don’t require anything additional.
My first batch was their blonde ale kit fermented with Safale US-05. I also added about 2.5 ounces of Brewer’s Best blueberry extract post-fermentation to try to match my blueberry ale recipe. It’s always been a family favorite so I thought it was a great opportunity to put it to the test. Batch two would be an IPA with LaBrew Nottingham yeast and some hops. As of writing this review, I have only completed the blonde ale and IPA kit. I’m really eager to move on to the wheat beer next!
Boil Water and Add Extracts
First, you’ll need boiling water to dissolve the liquid and dry extracts. The directions recommend adding 16 ounces of boiling water to the keg to help dissolve the liquid extract before adding cool water and the dry extract (ensure the butterfly valve is SHUT before adding anything). I would absolutely boil extra water in case you need to correct the temperature before pitching the yeast. Once all extract is added and thoroughly mixed, you can top up with cool tap water to the keg’s marked fill line on the outside of the keg. The dry extract will get a little doughy when you stir it in. I did my best to break up large clumps but the rest will melt away on its own over time.

Adding LME 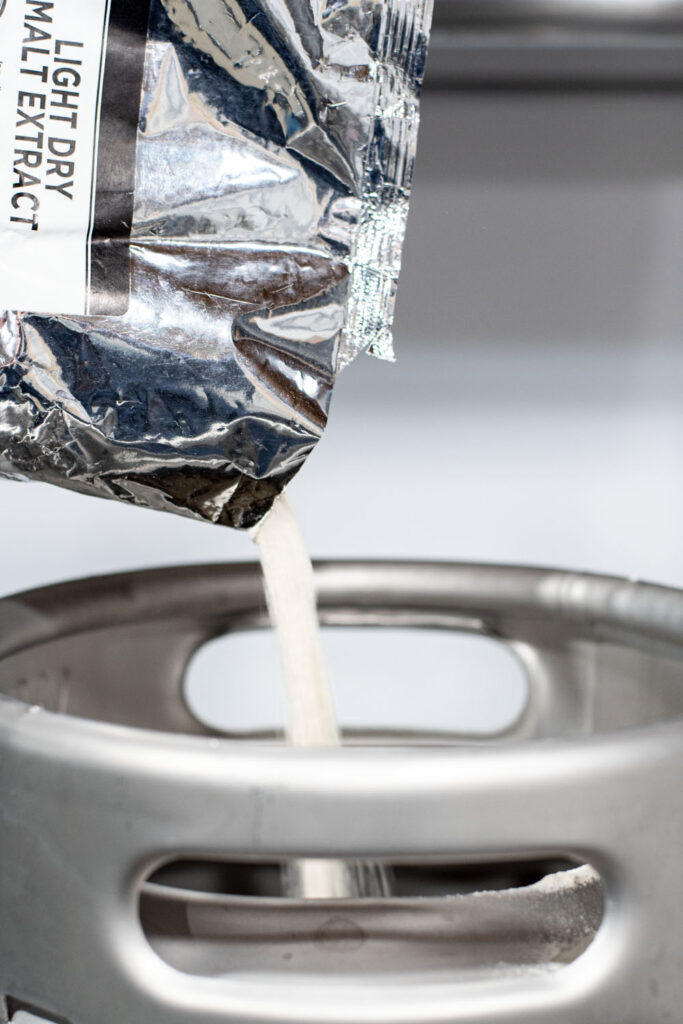
Adding DME
Adding Hops
While my blueberry blonde ale did not contain any additional hops, the IPA did. Hops can be added both pre and post-fermentation as you would with any IPA. The only difference with the BrewKeg process is how you prepare the hops. Since there is no true boil step, you’ll need to boil your bittering hop additions for 20-30 minutes in a small saucepan before adding to the keg. Furthermore, steeping hops at lower temps (under boiling) can be used to impart more flavor and aroma.
For my IPA I ended up adding 1 ounce of Nectaron (HORT 4337) hops to about 2 cups of 180-190°F water for 20 minutes. I then poured the hop tea through a fine-mesh strainer to leave behind the solids. You can see the before and after shots below. WilliamsWarn has a great video illustrating the process here. I was really excited about this as it’s a huge opportunity to experiment with different hops and add your own creativity to the process. It sounded cumbersome in the beginning, but it’s honestly really easy and can be prepped along with everything else.

Hop tea 
Hop matter left behind 
Dry hop tube
Dry hops can be added directly to the keg post-fermentation as well. I decided to keg hop my IPA on day 6 (after chilling overnight) with the remaining 2.5 ounces of Nectaron in a stainless hop tube. The hops will remain in the keg for the full serving duration. Since it’s only a 3-gallon batch, I wasn’t concerned with too much hop contact time. If you haven’t been able to tell, I tried to put a bit of an east coast spin on this IPA with strictly flavor/aroma additions (like whirlpooling) and a hefty dry hop. The recipe contained a total of 3.5 ounces (100 grams) of hops.
It’s really important to quickly add your dry hops and then immediately purge the keg of oxygen after doing so. This is going to keep the hop flavor fresh and prevent oxygen ingress. My only small complaint with the system is the rubber gasket that seals the keg’s lid. It can be a little tricky to open and replace the lid while ensuring the gasket doesn’t move around or fall into the keg. It’s not necessarily a problem, it’s just a bit of a balancing act as the gasket does not sit in a tight groove or securely attach to the lid. This nuance only presents itself with dry hopping.
Pitching and Fermentation
WilliamsWarn recommends rehydrating the yeast in room temp water in the collection ball before pitching. Once you’ve done so, you can simply screw the collection ball onto the bottom of the keg and open the butterfly valve to kick things off. Once the keg is sealed I gave the adjustable PRV the recommended 4 half turns and attached the pressure gauge to the gas post. This will ensure you ferment at about 1.5 bar or 22 PSI. Pressure will slowly build as the beer starts to ferment. I pitched at around 68°F and left the keg in my basement at ambient temp to ferment.

Rehydrated yeast 
Kicking off fermentation 
Post-fermentation
I ended up needing to slightly adjust the PRV after about 24 hours on both batches because there was a little too much pressure. Pressure adjustments can be made with press of a button and or by slowly turning the PRV knob on the lid clockwise (for higher pressure) and counter-clockwise to release pressure. By day 4-5, fermentation was complete and a nice layer of yeast formed in the collection ball. Because you can ferment under pressure, your beer will be fully carbonated at this point and free of unwanted esters!
Serving
Once fermentation was complete, I started the crashing/clarifying phase. I initially crashed for 4-5 hours and then added the clarifying agent via the dosing device to help drop the remaining yeast and sediment rapidly out of suspension. I used the BrewKeg dosing device to inject the clarifier and blueberry extract (for the blonde ale) all at once. The beauty of this approach is your beer’s exposure to oxygen is minimal.

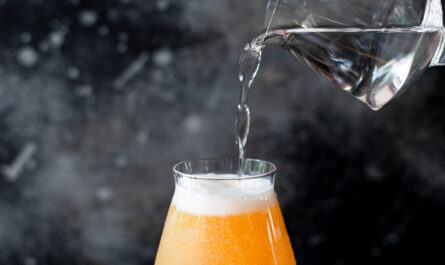
I’ll be 100% honest, I was really skeptical of the aggressive timeline for these beers. I have personally never made drinkable beer in 5 days. I sampled the fully chilled and carbonated blonde ale at around day 5 and it was surprisingly good. It was still a little hazy with some residual yeast characteristics but poured with a beautiful and creamy frothy head. At around day 8 it tasted cleaner, looked clearer, and was really enjoyable.
Tasting Notes
Both beers came out fantastic. The blueberry ale was delicious and just as good as any blueberry beer I’ve made in the past. Friends and family who tried it all really enjoyed it. It was a crushable beer that’s perfect for warm weather. It’s definitely something I would look to repeat as an easy crowdpleaser. The golden, straw-colored blonde ale base recipe was really nice in general. I of course sampled the ale before adding any extracts to get a true sense of the beer for what it was.


The IPA packed some serious punch and absolutely blew me out of the water. It had a nice deep golden hue and offered more malt character and pronounced bitterness thanks to the generous keg hopping. My initial chilled sample was taken just before I added my 2.5-ounce dry hop charge. The beer at this point was starting to clear and was well balanced and pretty mild overall. I tasted this beer again about 10 hours later and WOW. The hop aroma was screaming out of the glass and was among one of the freshest IPAs I have ever produced to this day. It’s honestly hard to beat a beer that was literally just bathing in tropical hops.
The IPA picked up quite a bit of haze from the dry hopping. This may settle over time however I personally love the cloudy orange glow. I’ll be curious to see how this one evolves over time but I’m amazed how much saturated hop flavor appeared in such a short amount of time. Ready to drink in just 7 days. Keg hopping is indeed a gamechanger.
Clearing Up Misconceptions
Now, I know what you’re asking yourself. Can I fill this with my own wort and why is it so much more expensive than your typical keg? Well, the answer is YES (and I will be experimenting with this very soon), you can fill this with your own wort but it’s honestly not how the product was originally meant to be used.
The BrewKeg is truly designed for the homebrewer not interested in investing several hours and money into the hobby. It’s really in its own category when it comes to producing great draft beer at home without a lot of time and effort. This is where the cost really factors in. Yes, at $349 the BrewKeg10 isn’t necessarily cheap, but it makes a lot of sense when you consider you don’t need ANY other kettles, burners, pumps, or a long list of supplies we all invest in the hobby. When you think of it as a true all-in-one piece of equipment, it’s a really great value. Plus, this is obviously a truly streamlined keg that doubles as a unitank conical fermenter.
You also can’t forget about the massive time savings and the pure convenience of the entire process. I brewed my beers in the comfort of my kitchen with basic kitchen utensils and was fermenting in under 30 minutes. Which to be honest was a nice change of pace from the garage or my basement. This makes year-round brewing that much more comfortable for us New Englanders who brew outdoors. One vessel obviously means no more transferring beer, no oxidation, and a lot less cleaning in general. Fermentation is done—boom, throw that sucker in the fridge and get it chilling. You cannot beat that process!
The only real downside I came across was the BrewKeg is it’s a little wider than my ball lock kegs. I can JUST fit two corny kegs in my homemade kegerator however the BrewKeg puts me just over the size limit. Unfortunately, You’ll need to consider these space constraints.
Final Thoughts
The WilliamsWarn BrewKeg setup is a really cool and well-built piece of equipment. I was really impressed with the beer quality—it’s absolutely a leader in the quick and easy homemade beer category. If you’re already an extract brewer looking to save more time than the BrewKeg is for you. It also just may be the answer for the homebrewer who has to give the hobby up due to the overwhelming time commitment.
While the batches with the 10L are certainly smaller (unless you purchase a bigger unit), you can turn beer around quicker and much more easily. I love how this product and the general process can make your brew day a little more spontaneous. You only really need to dedicate 30 minutes to pull it off. You’re committing to the time it takes to cook dinner.
I’m personally OK with the reduced batch size as I brew small batches anyway, and I know a lot of other homebrewers do as well. I think it’s only fair to really evaluate the BrewKeg for its intended purpose, and in that regard, I think it’s a homerun. I’m looking forward to brewing the wheat bear next.
Future Ideas
I was originally interested in this product because it was a great opportunity to brew New England IPAs in a fully closed environment and eliminate the risk of oxidation through transferring or cold crashing etc. While I still need to put this idea to the test, I think it will work phenomenally, especially for a mini-split batch variation with different yeast or dry hops. If you add your own wort, you may need to dump the collection ball a few times depending on the amount of hops, trub, and yeast.
I look forward to continuing to put the BrewKeg to the test and will certainly follow up with more results soon. In the meantime, maybe I’ll see if I can convince the team to dream up a NEIPA kit for me???

I’m strongly considering getting two of these.
I will mostly be brewing NEIPA and love the idea of split batches to experiment with different yeasts and dry hops.
One thing I’m trying to figure out would be using the collection ball for hop additions. It would be great if this worked with the Brewbuilt or Fermzilla collection jar that you can purge oxygen out of with CO2. It doesn’t look like the collection jar on this would be compatible with those, but I would love to hear any updates on using these without the extract kits.
Yeah, I’m curious to test it out myself. My one concern is the size of the collection ball. You will have to monitor closely as I usually get a tremendous amount of trub with NEIPAs. Dropping that out may have to be done in a few stages. It’s a great keg though! The WW collection ball screws in so there isn’t really a way to modify it. I’d love it if it was tri-clover. You’d have to get lucky and find a perfect fit with something like this: https://www.jmesales.com/dixon-sanitary-17mp-15-clamp-x-threaded-bevel-seat-adapters-304-ss/
I have 4 BK10’s. I have 2 for ale’s & beers and 2 for ciders. I don’t worry about tweaking the WW brews as they all make an excellent drop. There’s a full range of beers to chose from stout and dark ales to pilsners, lagers and summer/blondes ales. The ciders are even faster to brew and the ales, if you like them sweet you can drinking them on day 4 after 12 hours of cold crashing included. I prefer mine dry so I ferment for 8-10 days. I add syrups to flavour them, the options are only limited by your imagination.
How do you add flavors and when? I be tried but I always seem to lose carbonation
Shawn,
Did you ever get around to experimenting with your own worts? Can you use pressure lower than 1.5 bars? Were in the world besides down under can one purchase WilliamsWarn brew kits? I sure can seem to find any available for purchase in the US. Thanks for getting back to me.
Not yet, but I’m hoping to very soon!