by
by 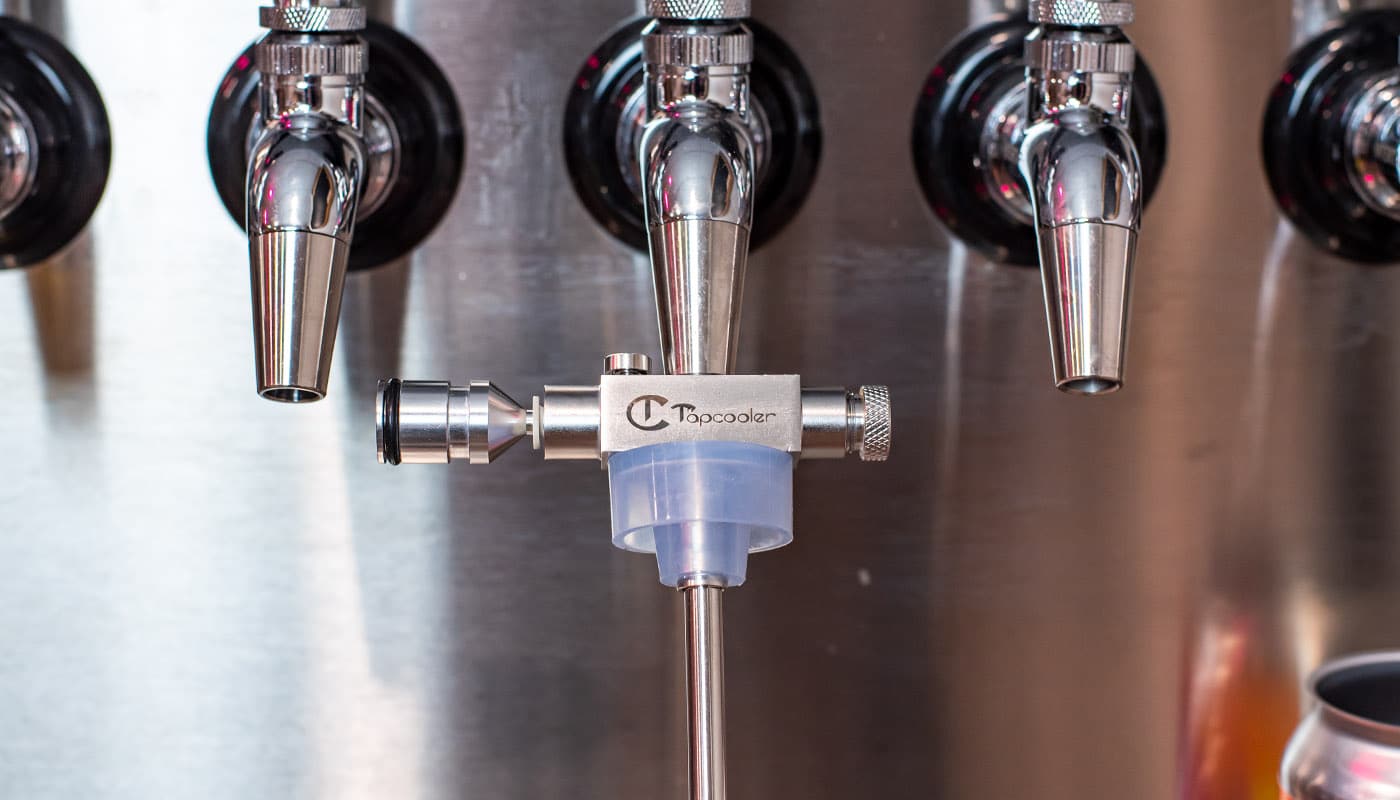
The only downside of kegging homebrew is not being able to transport your beer as easily. While I don’t miss bottling 50 beers with every batch, I do miss the convenience of grabbing a 4-pack and heading out the door. Sharing homebrew with friends and family is one of the most rewarding parts of the hobby.
There are a few products on the market designed to bottle fully carbonated homebrew directly from a keg. Having previous hands-on experience with both the WilliamsWarn BrewBottler and Blichmann BeerGun has allowed me to trial a few different types of fillers.
When it comes to filling bottles or cans on the fly, the TapCooler Counter Pressure Bottle Filler has become my go-to tool. In this review, I’ll address the pros and cons of the TapCooler and how I’ve been using it for the past year.
Product Overview
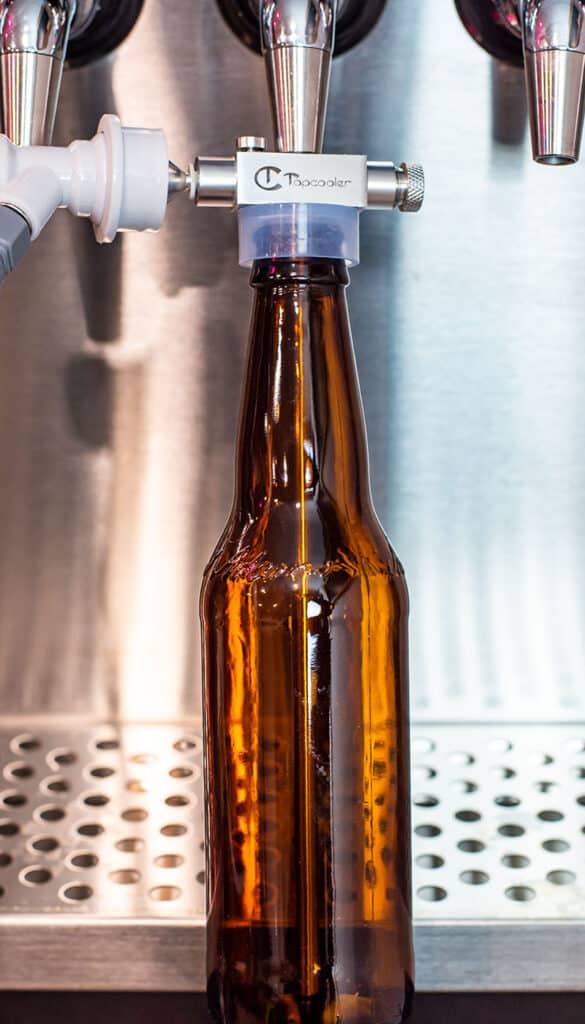
The TapCooler Counter Pressure Bottle Filler is designed to fill bottles directly from a tap faucet with minimal carbonation loss, ensuring that your beer tastes just as good as it did straight from the keg. One of the best features going for the TapCooler is just how easy it is to use. Simply insert the top inlet into your forward-sealing faucet and connect your CO2 source and you’re ready to fill. If used properly, your beer will not come in contact with oxygen and will remain in a relatively closed environment.
The device is comprised of 6 main components:
- The beer inlet that hooks into your tap faucet (top)
- CO2 IN barb connection (left)
- Push button to start/stop the flow of CO2 (top left)
- CO2 OUT PRV that regulates bottle pressure (right)
- Telescoping beer outlet that inserts into bottles/cans (bottom)
- Silicone stopper to create a sealed environment (blue)
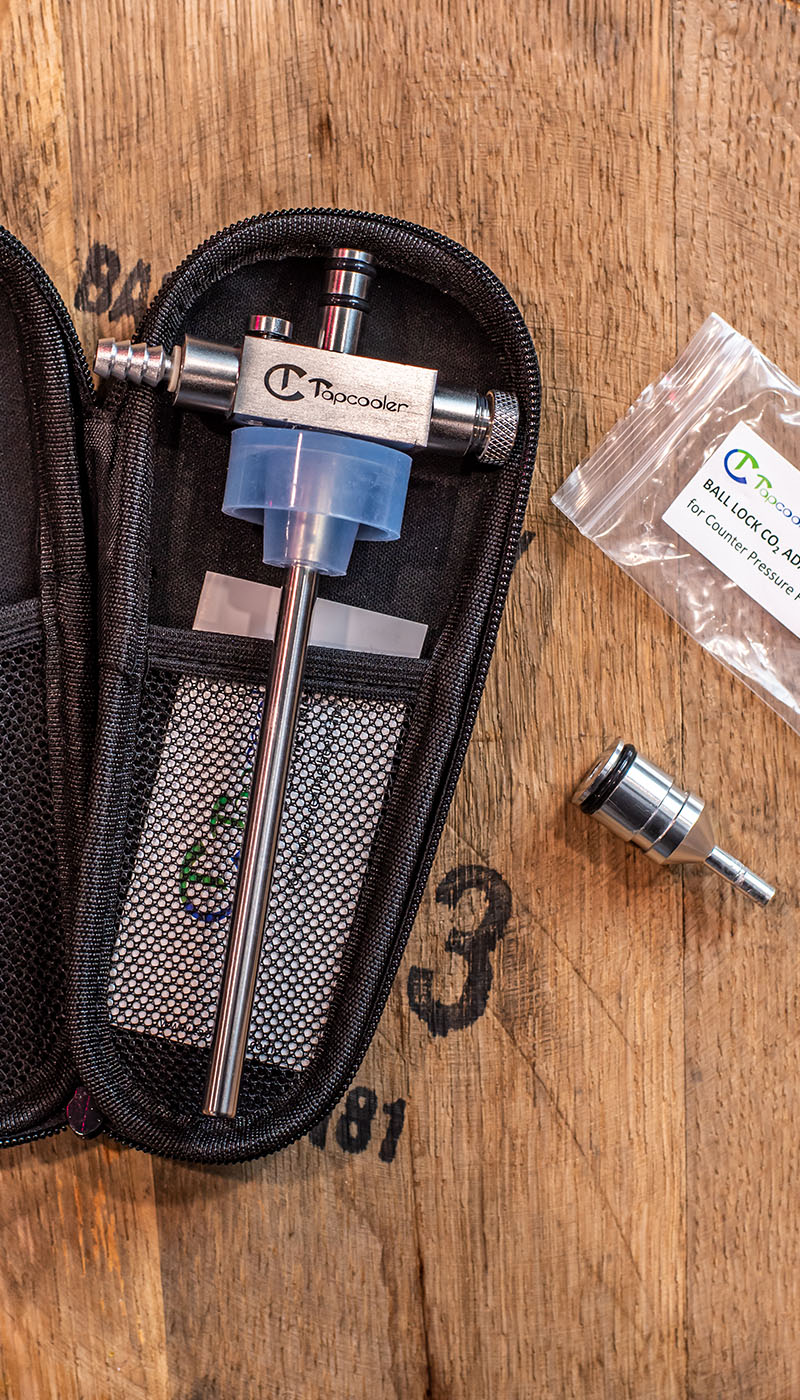
Pictured below is the out-of-the-box configuration along with the optional CO2 QD connection that is sold separately.
The beer IN and OUT components are fairly self-explanatory. The TapCooler’s C02 IN connection and purge button allows the flow of CO2 while the twist knob regulates the amount of pressure in the bottle. Both the liquid and CO2 flow through the beer outlet, allowing you to fill and purge from the bottom up.
Purging and pressurizing a bottle with CO2 will equalize the pressure between the keg and the bottle, allowing you to easily control the flow rate of beer as it fills. This ensures less foaming and virtually no carbonation loss, which is the entire purpose of a counter-pressure filler.
Lastly, the filling ‘wand’ features a telescoping tube that extends from 4.5-12.5 inches long. This allows you to fill bottles of varying sizes. Being such a small and simple device, it’s incredibly easy to clean with no additional tubing or forced flushing. I usually rinse it with hot water and stow it away. You could alternatively soak it in brewery wash and rinse.
Optional Accessories
Depending on your kegging setup, you may want to consider a few additional attachments that are sold separately. For starters, I would opt for the Gas Ball Lock Adapter so you can easily attach your CO2 to the TapCooler. The TapCooler comes equipped with a hose barb for CO2, however, I don’t think it makes much sense for the majority of homebrewers. The CO2 connections insert similarly to John Guest push fittings.
Second, if your taps are in an awkward location or you have a tap tower with low clearance, you may want to consider the Filler Extension Tube. This will give you more wiggle room in terms of positioning the filler upright, especially if filling taller bottles. Lastly, check your faucet type for compatibility as there is a specific Perlick 500 Series Adapter. They also offer a specialized extension tube specifically for Intertap/NukaTaps. To clarify, the standard connection fits in my Intertap faucets (which I love BTW).
TapCooler offers a nifty Hands-Free Magnetic Mount accessory for bottles that can be used in conjunction with their short Filler Extension Tube or longer Tapcooler Beer Valve Keg Connector. This is an intriguing option that still allows for easy breakdown and cleaning if using the small Filler Extension Tube. I would likely use the magnetic mount and Beer Valve Keg Connector for longer bottle sessions since that’s going to demand more cleaning. I have not personally used the clip so I cannot speak to its functionality.
They also make a dedicated counter-pressure can-filling accessory (Nanocanner) with a magnetic bracket, making it ideal for attaching to a fridge. It’s not a cheap upgrade ($165 without the TapCooler) and it seems overkill for my own personal purposes.
Using the TapCooler
While I’ve used the TapCooler to fill bottles, my primary function is actually filling cans. Since I rarely bottle anything except Stouts or the occasional Saison, I use the TapCooler whenever I’m trying to crank out filling a few 4 packs. The ease of connecting it to my faucet without needing to open my beer fridge or move kegs around is highly appealing.
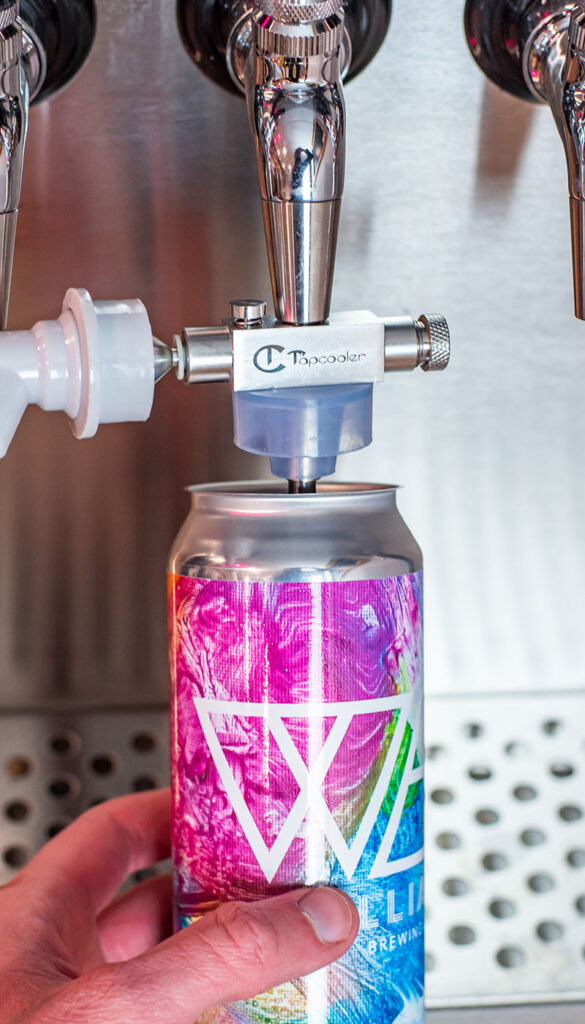
Before filling a can I will do a solid 10-15 second purge at around 10 PSI. From here I open my faucet and fill each can to the brim, capping on the foam. Seam it with my Oktober SL1 Seamer and move on to the next one. It’s a quick process with virtually no setup time and an even faster breakdown.
My bottling process is very similar, you will just need to release the pressure in the bottle with the PRV knob to regulate the flow of beer. The learning curve for bottle filling is a little different but it’s easy once you get a feel for it.
Note: If you have any difficulty inserting the top inlet into your faucet, lubricate it with water or Star San and it will easily slide in
Downsides
Now there are a few minor drawbacks when it comes to the TapCooler. It’s a standalone device with no base so you’re responsible for holding your cans/bottles as they fill. This can be awkward depending on what your dispensing setup is. You’re essentially at the mercy of how your taps are installed. As mentioned, there are additional accessories to solve for this.
Since I have a converted fridge keezer, I have to place a tub directly under the faucet to collect beer spillage (especially for cans). Unfortunately, I don’t have a very sophisticated means of this other than balancing it on a chair or keeping it on the floor.
I don’t know if the TapCooler alone would be the most efficient device for canning or bottling an entire batch of beer. A beer gun or wall-mounted upgrade may be slightly faster and more efficient for longer packaging sessions. That being said, those devices require more prep and cleanup afterward, making them more geared toward bigger projects.
Final Thoughts
The TapCooler Counter Pressure Bottle Filler is a great investment for the homebrewer looking to package their beers for travel or brewing competitions. With its ease of use, efficient performance, and high build quality, I’d absolutely recommend it. Given the TapCooler is compatible with a wide range of bottle sizes, I’d be hard-pressed to find a task it wasn’t up for. Starting at $79.99 without accessories, It’s a pretty good value for an entry-level filler with lots of nice features. Again, the simplicity and easy cleanup are huge for me in terms of value here.