by
by 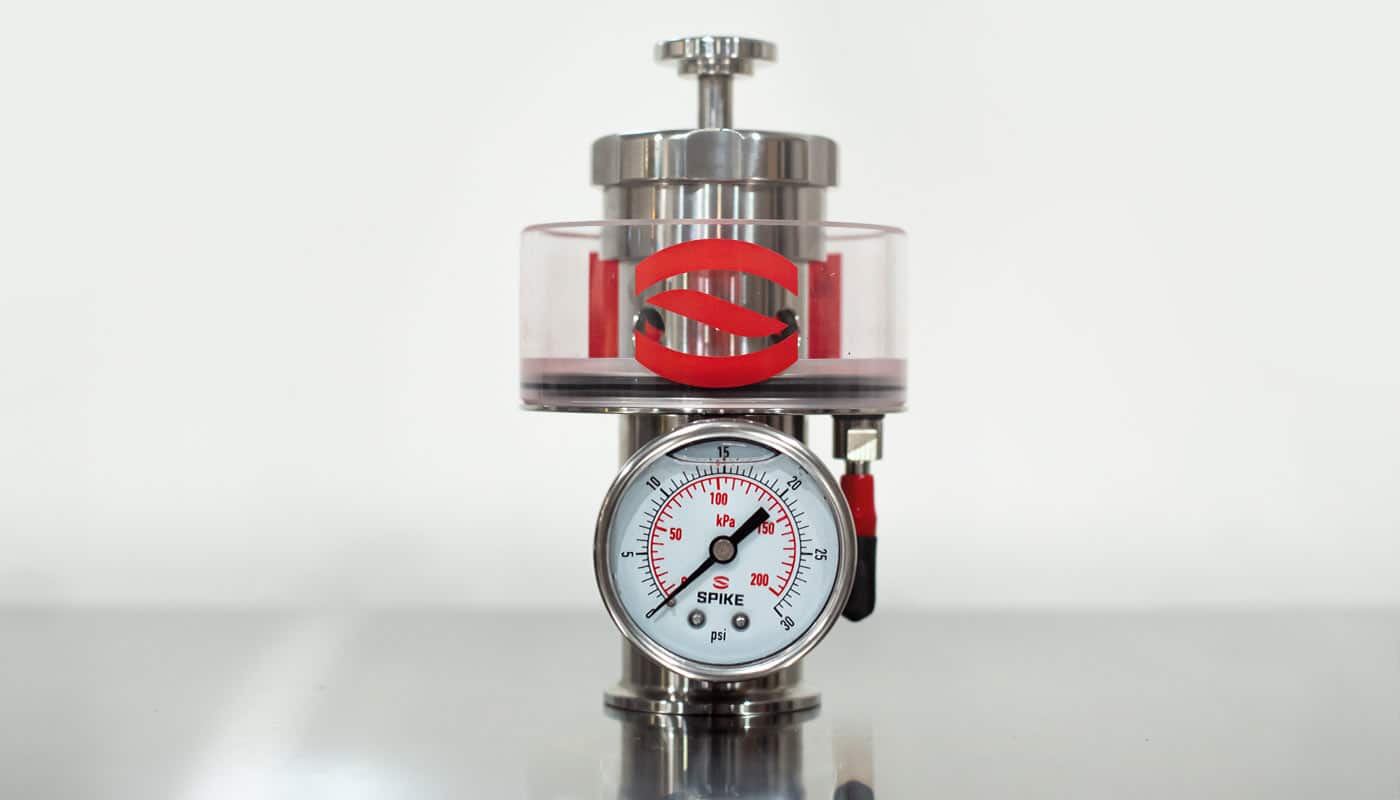
Spike Brewing generously provided the All-In-One PRV for the purposes of this review.
I recently got my hands on the long-awaited Spike All-In-One PRV. Having previous experience with spunding valves, I was really eager to test out the Spike model firsthand. Before I dive into my review and trials, I’ll touch on the benefits and overall usage of a spunding valve.
What Is a Spunding Valve?
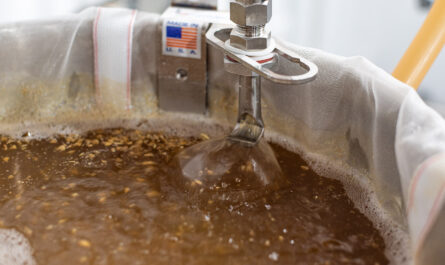
Simply put, a spunding valve is a safe and effective way of maintaining a set level of pressure in a conical fermenter or unitank. The most common use of a spunding valve is managing pressure fermentation. Fermenting under pressure is the practice of sealing off a fermentation vessel and allowing pressure to naturally build up during active fermentation.
Obviously, the pressure build-up from fermentation must be relieved or it will quickly reach unsafe levels. A PRV allows you to safely set a ceiling and slowly relieve pressure as it builds. A few advantages of pressure fermentation include natural carbonation, ester suppression at warmer fermentation temps, and room-temp lager fermentation. If you’re fermenting under pressure, you MUST have a failsafe way of automatically regulating pressure!
My personal most common usage of a spunding valve revolves around under-pressure dry hopping. Dry hopping in large quantities mid or post-fermentation can kick start refermentation and result in significant pressure build-up alone. A spunding valve ensures you do not exceed unsafe levels of pressure in a tank. Furthermore, since I typically dry hop under 8-10 PSI, this prevents any more pressure from potentially building up in the fermenter.
Product Overview
The tri-clover fitted Spike All-In-One PRV is comprised of three basic components. A pro-grade pressure release valve, a pressure gauge, and a gas post. The top of the PRV features an adjustable knob to set your desired PSI along with a plunger that serves as a simple way to manually relieve pressure from the vessel. The multi-feature design allows you to combine 3 accessories into a single TC port, saving space for other accessories. My version came as the Carb Stone Bundle, which includes a carbonation stone that can be used for wort oxygenation and carbonation. More on that to come.

The sanitizer cup also has a drain port that allows you to easily drain sanitizer solution from the cup without removing the PRV or depressurizing your vessel. If you’re wondering why this matters, it’s so you can both replace and drain the sanitizer fluid as needed, without disassembling or removing the PRV.
One last feature that should not go unnoticed is the built-in vacuum release. This is for relieving negative pressure inside the tank from intense temperature drops. For example, If you cold crash a fully sealed and unpressurized vessel, the pressure inside the tank will drop, creating a vacuum (also known as suckback). This can potentially crunch a tank inward in extreme cases. This is why it’s important to always apply positive pressure to a sealed tank when cold crashing.
My Experience
The PRV is easy to assemble. I used PTFE tape to assemble the gas and gauge connections to ensure an airtight seal. Once you’re connected, you’re good to attach to your conical/unitank and start fermenting. My pilot batch was a NEIPA (go figure) that featured a pressure dry hop. I did not use the PRV until it came time to actually dry hop my beer. For this reason, I set the PRV to 15 PSI and utilized a blow-off during active fermentation.
Once it came time to dry hop, I set the fermenter pressure to about 10 PSI. This process consists of turning the PRV knob all the way to the right until you can no longer tighten it (this by default is 15 PSI). Set your CO2 tank to 12 PSI (or a few PSI above your target) and connect it to the PRV gas post. Fill until the fermenter gauge reads 12 PSI.
Disconnect the gas post and slowly loosen/unscrew the PRV knob until the pressure in the fermenter stabilizes at 10 PSI. Your pressure is now set to 10 PSI. This is best done with an empty sanitizer cup so you don’t spray solution everywhere. You can test it afterward by hitting the fermenter with additional pressure. Fill the cup with your desired solution and you’re ready to roll.

One thing I really like about the design is the reduced footprint and built-in pressure relief button (plunger). This is really handy for easily decreasing pressure from the tank for transfers etc. Just to note, the plunger will release pressure RAPIDLY if fully pressed down. If you press down while the cup is full, it will spray everywhere. My advice would be to first empty the cup!
Spike has a great video on how to get up and running. I highly recommend you give it a watch. Note: I’ve seen a lot of comments regarding the liquid level in the sanitizer cup decreasing over time. This is a direct result of evaporation and is true for all spunding valves. It does not matter if you use Star-San or vodka. My recommendation is to closely monitor and refill above the PRV holes as needed.
Competitive Comparisons
There are a few different types of spunding valves available to homebrewers. I’ve used both professional-grade PRVs and cheap DIY products. It’s hard to truly compare these products because they operate very differently and fall in separate classes.
In my opinion, the Spike PRV (priced at $150) is probably the most versatile product and provides the best value for homebrewers. While it’s much more expensive than some of the $50 or DIY options, you have to decide what safety risks you’re willing to take.
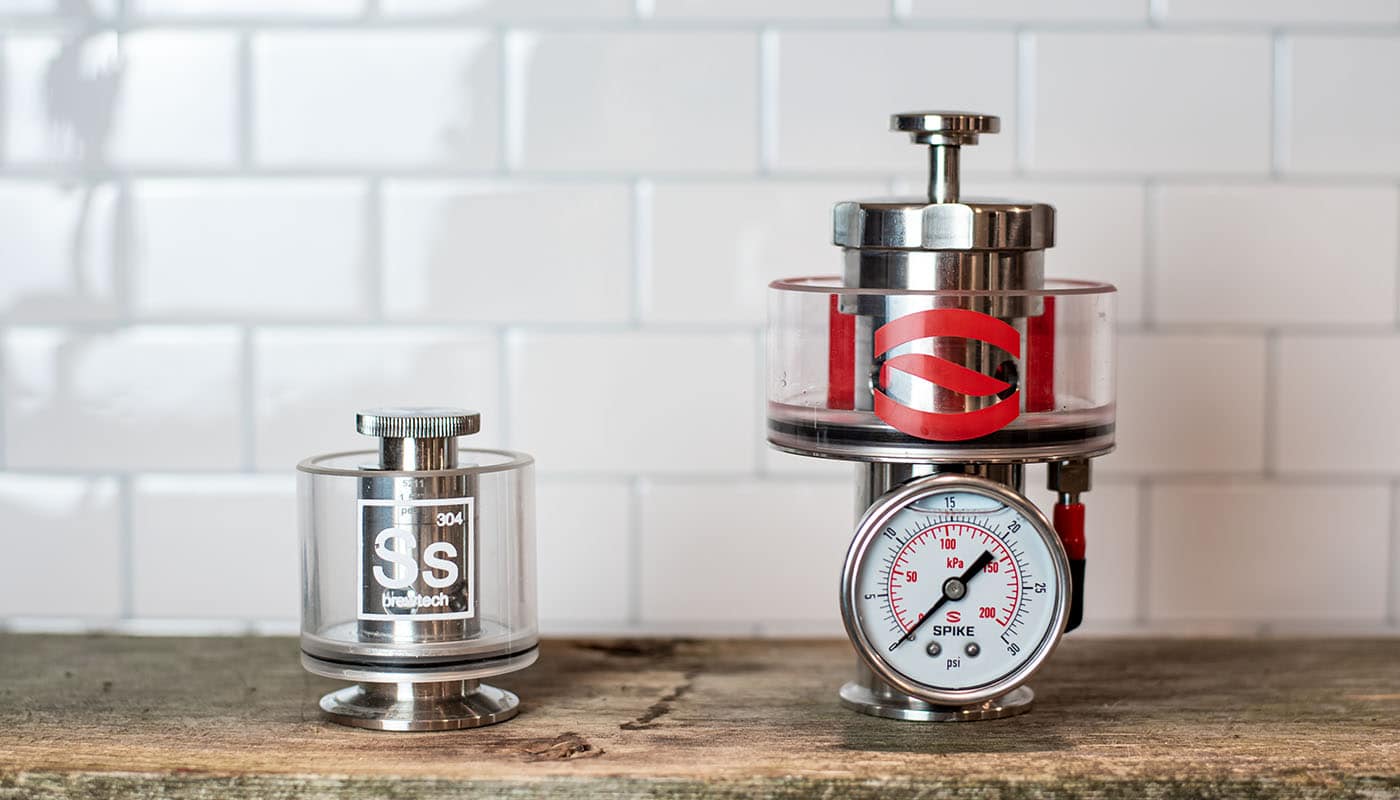
As a current user of the non-scaled Ss Brewtech Sspunding valve ($119), I would have to lean towards recommending Spike’s PRV unless you’re on a very strict budget. If you also have to invest in a TC gas post and or pressure gauge, then the Spike PRV is a no-brainer. The addition of the pressure gauge and gas post frees up lid ports and makes my process a little simpler. The pressure setting knob is also easier to adjust.
Lastly, the pressure-release plunger is a really nice touch. This is something I did not have the ability to do with my previous setup. My only means of releasing pressure was pressing down on the gas post poppet with a screwdriver (ghetto…I know). It’s the little things, folks.
The closest comparison to the Spike PRV is the Ss Scaled Sspunding valve ($179). I don’t have hands-on experience with that model, but the only real advantage is the etched markings for estimating PSI. I personally would not use that in place of a pressure gauge…but that’s just me.
My only note on the Spike PRV is the physical size. It’s designed for fermenters up to 3bbl, so it may feel larger on smaller fermenters. This isn’t really a concern, but something worth noting. I was surprised by the overall heft and cup size right out of the box.
Final Thoughts
Overall, the Spike All-In-One PRV is money well spent. I would not feel comfortable with a DIY product or something that could easily clog and fail. Spike sends a pretty clear message that they don’t endorse some of the homebrewed solutions we’ve all seen in forums and on Facebook.
Personally, I want something that is both overkill and redundant. Not to say that the Spike PRV is overkill…but I’m certainly not leaving things to chance and risking injury. Prior to Spike actually releasing their new PRV, they recommended homebrewers invest in pro-grade equipment, like Ss Brewtech (which I did).
The Spike All-In-One PRV is a winner thanks to the extra features and homebrewing-focused design. Like all Spike products, it’s their dedication to the homebrewing community that really sets them apart.