by
by 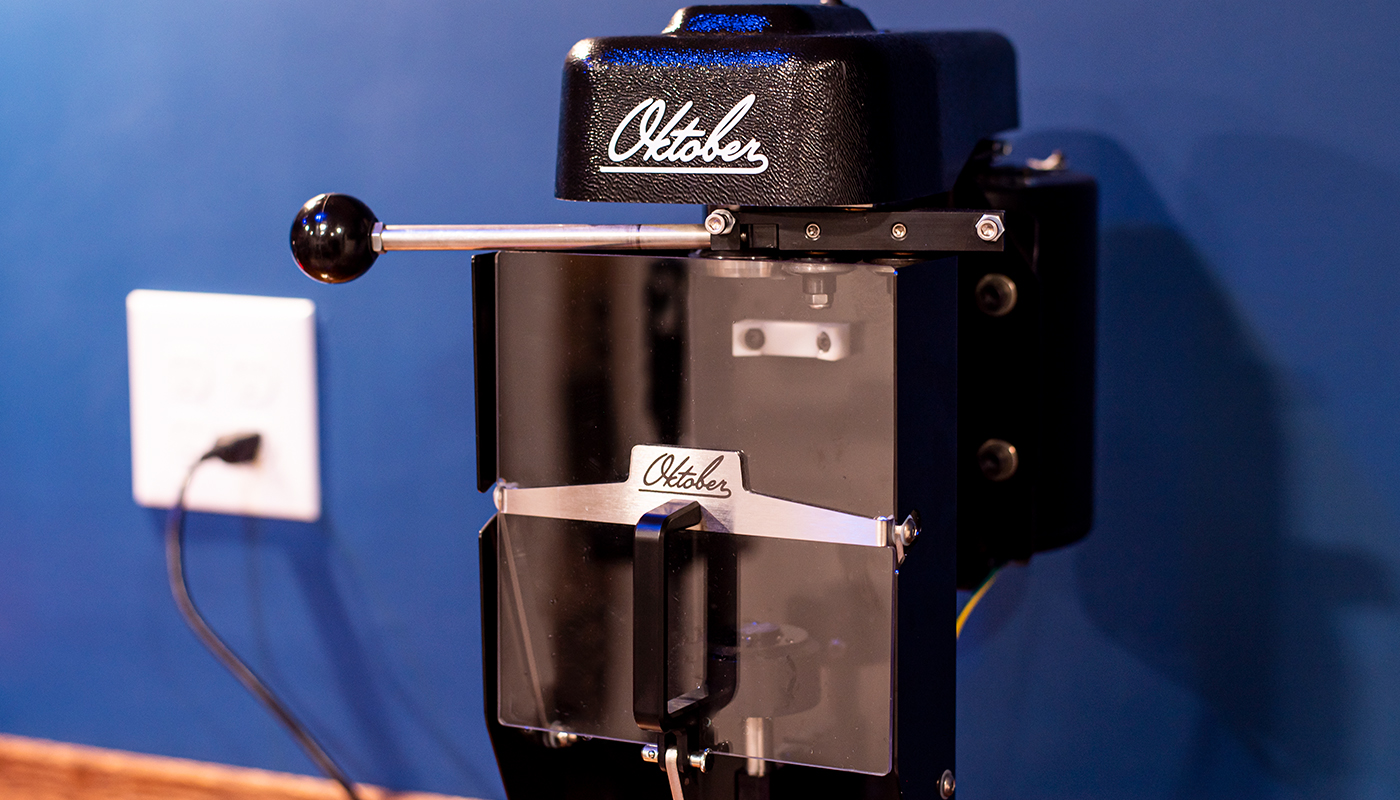
Oktober Design generously provided the SL1 Splash Guard in exchange for an honest product review.
Oktober Design offers some of the best compact beer canning solutions for restaurants, breweries, and avid homebrewers. If you haven’t already read my previous reviews for the BenchMK or SL1, that would be a great place to start. Oktober recently released the long-awaited Splash Guard for their SL1 Can Seamer. The unit can be purchased separately as an accessory and be easily retrofitted to your existing SL1 Can Seamer. I was lucky enough to get my hands on one and try it out for myself.
Product Overview
The new SL1 Splash Guard from Oktober Design is very similar, if not identical to the splash guard equipped on the BenchMK Drill-Powered Seamer. Having had hands-on experience with the BenchMK, I was already familiar with the functionality and design. The new SL1 Splash Guard retails for $159 and features a fully enclosed shield that replaces the existing back shield/guard on the SL1. Installation is really easy and only takes 15 minutes.
The unit itself feels like a quality product. The back construction is thick metal and the front is made out of plexiglass. In general, I think it makes the seamer look that much more professional.
Operating the seamer with the Splash Guard is basically the same as with the traditional lever. The clever design allows the user the both lift the can into the seaming position while simultaneously closing and locking the guard into place. The handle on the Splash Guard will replace the lever functionality after installation.
A useful tip—removing the bottom pin (where the arm meets the base of the shield), allows you to swivel the plexiglass cover outward for easy cleanup. If you hadn’t guessed, this will collect plenty of beer.

Installation
I recorded this video demonstrating my first and only attempt at installing the Splash Guard on my SL1. I didn’t practice and intentionally did not read any directions. The existing screws and stainless components on the SL1 is all you will need to attach the new SL1 Splash Guard. I trimmed this video down to 90 seconds, but the entire process only took 14 minutes from start to finish. All you need is an Allen wrench.
My Thoughts and Advice
Now the big question—is the Oktober SL1 Splash Guard worth the $159 price tag and does it make a difference? I honestly think it’s a matter of personal preference. If spraying beer is bothersome to you while canning, I would absolutely recommend it. Splashing is inevitable if you’re properly filling your cans. I personally appreciate keeping my work area and clothes cleaner, especially if I’m quickly canning a four-pack for friends. The longer the canning session, the more this guard will really pay for itself.
Admittedly, it’s not an inexpensive accessory, especially after purchasing an expensive piece of equipment. Given the choice, I 100% prefer the SL1 WITH the Splash Guard. In terms of the construction, the product does not feel overpriced for what you’re getting.
Oktober Design delivers solid products, the new SL1 Splash Guard is no exception. Every time I use Oktober equipment my belief is reaffirmed that you truly get what you pay for. The SL1 Can Seamer is still one of my favorite pieces of equipment in my brewery. Nothing has been more convenient and gratifying than handing someone a professionally labeled four-pack of your own homebrew. I’ll never go back to bottles!