
 by
by 
Well, I finally pulled the trigger on my first conical fermenter. After years of fermenter envy and getting fed up with limitations, I decided to purchase my last fermentation vessel. Not to say I won’t get another down the road, I’m just happy to report I’m done with upgrading fermentation capability. With a handful of options on the market between Spike, Ss Brewtech, Brewtools, Blichmann, and now BrewBuilt, I was eager to experiment with something totally new. Enter the BrewBuilt X1 series of fermenters.
Product Overview and Setup
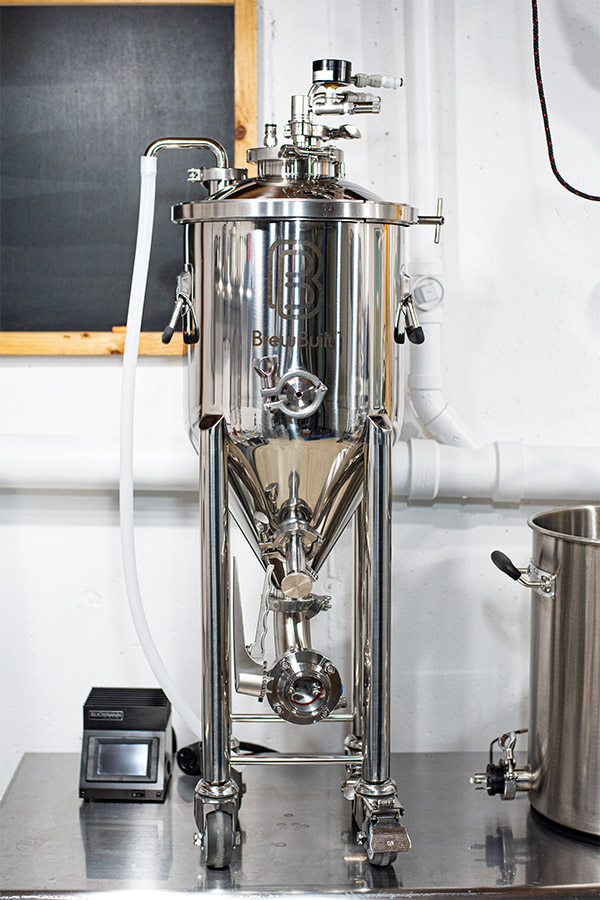

The BrewBuilt™ X1 Uni+ Conical Fermenter is brand new to the market and offers pro-quality fermenting capabilities at the homebrew scale. At a glance, it bears a close resemblance with the Spike lineup of conical fermenters. It’s a beautiful piece of equipment with a near-flawless inside and mirror finish. I honestly had a difficult time photographing it because it was so shiny (playing tricks on my camera lens). The X1 fermenter comes in 3 different models, the X1 Uni, X1 Uni+, and X1 Uni Pro. It also comes in 4 sizes, 7, 14, 27, and 42 gallons. I decided to go with the 7 gallon X1 Uni+, which offers all of your standard conical basics plus a few very important upgrades.


All fermenter models are pressure capable up to 15 PSI and come equipped with a heavy-duty lid clamp and built-in PRV. The domed lid features a large 4-inch TC port in the center and another 1.5 inch TC port for other accessories. The X1 Uni+ comes standard with a neoprene insulated jacket, glycol-ready cooling rod (CoolStix), yeast harvester (Flex Chamber), and Pressure Pack. The additional upgrades I purchased were the Rolling Casters (really worth it for mobility and some extra height) and the Pressure Fermentation Kit. I also added a 2-inch 90-degree elbow that I can toggle with the Flex Chamber at the dump port.

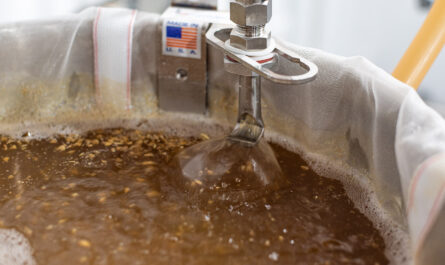
One of the simpler, yet nice features is the downward-facing blowoff barb (1.5 inch Tri-Clamp Blowoff U Barb). This seems like a no-brainer to me as it allows the tubing to nicely fall to the ground without having to kink or bend the hose. The hose is a 1/2 inch ID silicone tube and doesn’t require additional clamps.

Pressure Pack Lid 
Glycol lines connected to CoolStix 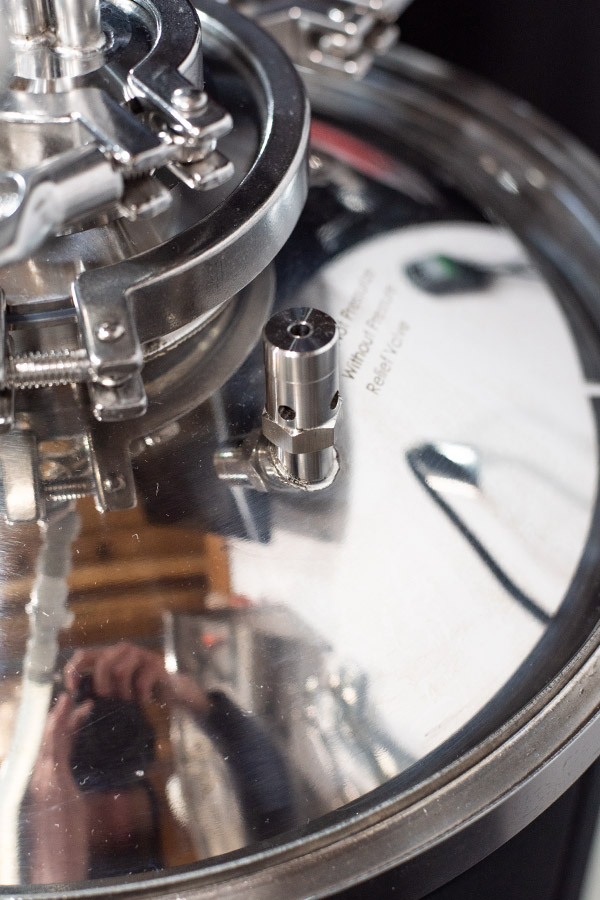
Built-in PRV
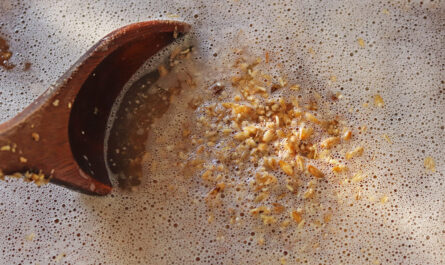
Before adding any wort I did a CIP run with cleaner and sanitizer. I used my RipTide with a 1.5-inch tri-clover male quick disconnect on the top of the fermenter and a 2-inch tri-clover quick disconnect on the bottom dump valve. This works well and does a great job at throwing both cleaner and sanitizer over every inch of the inside of the fermenter. This isn’t a BrewBuilt accessory, just something I put together.
Pressure Pack vs Pressure Fermentation Kit

The Pressure Fermentation Kit is NOT to be confused with the Pressure Pack. Both are required to safely ferment under pressure according to BrewBuilt. The Pressure Fermentation kit comes with a hefty 1.5 inch TC pro-grade PRV and a stainless steel spunding valve with a gauge. The Pressure Pack alone is only for pressurizing the unit for pressure transfers (more on this later).
BrewBuilt recommends pairing all 3 PRVs to safely ferment under pressure (2 PRVs and a spunding valve). I’ve only fermented under pressure once, however, I do like to apply head pressure on my vessel when dry hopping. 3 PRVs is likely overkill for my application but I wanted to see it for myself.
Flex Chamber vs. 90° Elbow
Before I say anything else I should mention the supplied 2-inch butterfly valve is an absolute beast. The handle is very long, so it must be installed slightly off-center in order to open and close the valve. I originally thought I received the wrong valve, but then I took a closer look at the product shots online. The valve handle will likely not be an issue on the larger models, but it’s a tight fit on the 7 gallon. Not an issue but worth mentioning.


The unit can be assembled with a TC-integrated yeast harvester or optional 2-inch TC elbow, which is what I decided to do. This is not an official add-on as an FYI, but it works out great. The Flex Chamber is made entirely from plastic and has two 1/2 inch NPT ports on either side for optional accessories such as carbonation/aeration stones etc. The black top features a plastic 2-inch TC flange and unscrews from the clear base.
This is definitely one of the game-changing elements of the fermenter if you’re looking for a simple yeast harvesting solution with less room for error.
Temp Control and Cold Crashing

I have my X1 hooked up to BrewBuilt’s IceMaster Max 2 Glycol Chiller (which is great BTW). This paired with their CoolStix, did a great job managing fermentation temp down to the degree. The glycol lines actually snap into the CoolStix and have a nice quick-release button that seals the lines off after they’re removed. This is so glycol doesn’t leak out everywhere for cleaning and removal.
The CoolStix extends all the way down to a few inches from the bottom of the cone. It’s 25 inches long and 1.25 inches in diameter. Just as an aside, the TC integrated thermowell sits at about the 3-gallon mark on the fermenter, so your minimum batch size is likely to be around 3.5 gallons if you would like to leverage temp control.
Now, the moment I had been waiting for all week—cold crashing. My goal was to see if I could successfully cold crash down to 35°F with the CoolStix. With my chiller set to -2.6°C (27°F), I was only able to get 5.5 gallons of beer down to 4.3°C (39°F). This took about 24 hours. After about 30 hours I decided to call it quits.
I was a little skeptical of the CoolStix’s slim design because it’s obviously narrow and not your typical larger coil design. While it makes for really easy cleaning and exceptional temp control, cold crashing left me desiring a little more. 39°F is passable but could be better and faster. What concerns me the most is the fact that my basement was running at about 66°F ambient. I’d be even more concerned in hotter conditions in the summer. I should say, and to be completely fair, I’m not sure the CoolStix was ever designed or intended for cold crashing.
Pressure Transfers
The Pressure Pack makes closed pressure transfers really seamless and easy. The Pressure Pack features a 4-inch TC cap with integrated ball lock liquid and gas posts and a 1.5 inch TC port for the CoolStix. The liquid post comes with an identical floating dip tube system that I’ve used for keg fermenting, making me feel right at home. The big plus with this is easy transfers, sampling, and drawing from the top of the vessel as opposed to the bottom. The only tradeoff with this setup is additional component cleaning on brew day. With a completely external transfer system, you can save some extra cleaning/sanitizing for kegging day.
Pressure Transfer kit 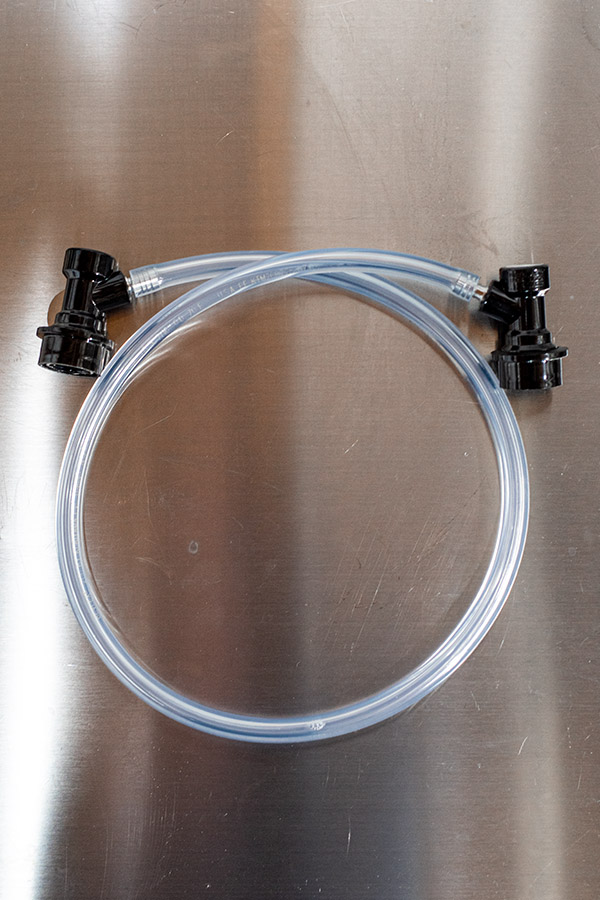
Jumper cable 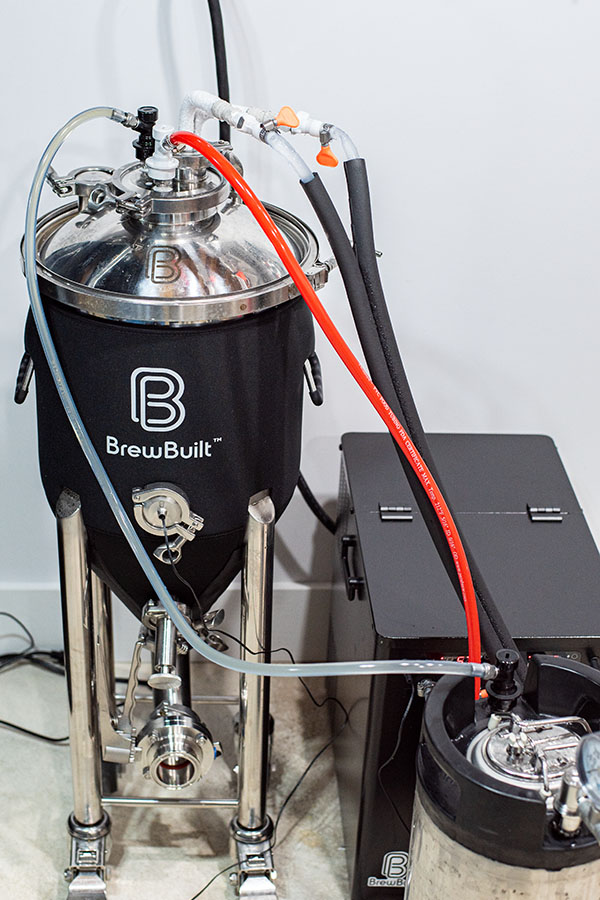
Closed transfer to keg in progress
The other thing worth mentioning is the floating dip tube’s capability to fully drain the fermenter. If you brew a heavily hopped beer or beer with lots of trub, there will be a point where the tubing “bottoms out” on either the trub or the cone walls and fails to suck the additional liquid out. This is where you should have a backup plan to fully drain the vessel. My suggestion would be to put a butterfly valve on the sampling port so you can swap with a TC with a 1/4 inch flare and drain to a keg if your floating dip tube fails, or gets hung up on something. This may be less of a concern on larger conicals but has been something I ran into with mine. I ended up trimming the tubing that came with the Pressure Pack, but I may need to trim it more.
The most basic model fermenter (X1) does not come with the Pressure Pack or CoolStix, so you’ll have to purchase as add-ons or devise another method of cooling and transferring your beer.
BrewBuilt does not currently offer a tubing accessory to actually transfer your beer to a serving keg. I used a basic DIY jumper line with liquid quick disconnects attached to 3/16″ ID beverage tubing on each end. I have experience with this so I didn’t even think twice but I’m surprised they don’t offer it as an accessory or include it with the kit. As mentioned, you could also easily devise another transfer method via the middle port.
You’ll only need 2-3 PSI to transfer your beer via the floating dip tube. Obviously, I would say it would be very important to cold crash at the very least before attempting to transfer beer to avoid any clogs. Heavily dry-hopped beers would run the risk of clogging the poppets or narrow tubing on either end of the transfer!
X1 Uni Pro and Peltier Technology
While I did not test or buy the top-tier X1 Uni Pro model, I did want to at least mention what sets it apart. The X1 Uni Pro leverages Peltier technology to both heat and cool the fermenter as needed. This is the only model that offers both a heating AND cooling solution all in one. The Uni Pro doesn’t require an external glycol unit and runs on a standard 120v outlet. It’s priced around the cost of a fermenter and glycol system combined. I was initially intrigued by this model but I saw two potential issues for me personally.
One, it will be more expensive to add additional fermenters down the road if you want cooling capabilities. Your typical glycol system can power two or more fermenters, where the Peltier technology is built into the fermenter itself. The other potential downside is the cooling power of Peltier technology. While it can certainly maintain temps well below ambient, I have not been able to confirm it can be used to cold crash down to 35°F either.
All that said it’s a really cool piece of technology. Being able to avoid a glycol setup altogether is certainly a plus for some.
Downsides
BrewBuilt offers a handful of accessories for their fermenters but I cannot say they are quite as robust or specialized as some of their competitors at this point. BrewBuilt does not offer a conical heating pad for their glycol-controlled systems. I am not sure why this is and as of writing there weren’t plans to create one.
I ended up buying the Spike CS5 heater and tucked it into the jacket (the velcro pads will not adhere to the BrewBuilt jacket in case you’re wondering). As of now, all BrewBuilt accessories mentioned can be purchased a la cart with the exception of the neoprene jacket. Just to mention, it doesn’t come standard with the base fermenter (X1). This is the only caveat if you’re looking to upgrade over time however I’m sure this will be available at some point. I also ended up purchasing the Spike CIP ball as it’s designed specifically for lower pressure homebrew pumps.
Overall, it’s a brand new fermenter on the market so there are bound to be some tweaks made down the line. I’d like to see more detailed information provided on some really big questions around cooling, temp control, etc. Since BrewBuilt is owned and sold by MoreBeer, it’s more difficult to get in touch with a dedicated BrewBuilt representative that has detailed product knowledge. That being said, it was a risk I was willing to take being an early adopter.
Final Thoughts

Overall, I’m happy with my purchase despite some of the very minor drawbacks. This fermenter accomplishes everything I need with the exception of more aggressive cold crashing. I wish BrewBuilt had more of an a la cart pricing model and vast array of accessories, however, hopefully, this will evolve over time to meet demand. The pressure fermentation setup is a huge plus with this unit if you’re looking to explore that avenue. The fermenter is truly a unitank as it’s designed for fermenting, aging, lagering, carbonating, and even serving via picnic tap if you so desire.
The quality is really nice overall. It’s rugged and really clean in terms of finish and looks sweet in my brewery. It’s very competitively priced and ultimately, the sky is the limit in terms of accessorizing. I devised a simple and relatively budget-friendly dry hop doser that easily integrates with the 1.5 TC port on the side of the lid.
Lastly, early customers of the BrewBuilt X1 fermenters received branded pint glasses and coasters with their purchase as a special thank you. Mine came with a black BrewBuilt hat, too. A nice touch.

Do you have instructions on how you CIP the BrewBuilt X1 Uni+ ? The review of the fermenter touches on it but I wanted to see if you have a more detailed page/video of it.
Is there a CIP ball that you use?
I use the spike CIP ball. I use hot water, brewery wash, and circulate for 20-30 minutes with my riptide. My fermenters are spotless after this. My return tubing connects my dump valve with the sampling valve with a stainless T. I, unfortunately, don’t have a picture of this setup.
Hey Shawn, excellent review!!
I’m considering picking one of these fermenters up. I’m curious if you’d still recommend it 2 years later? It looks like a solid unit.
Cheers!