by
by 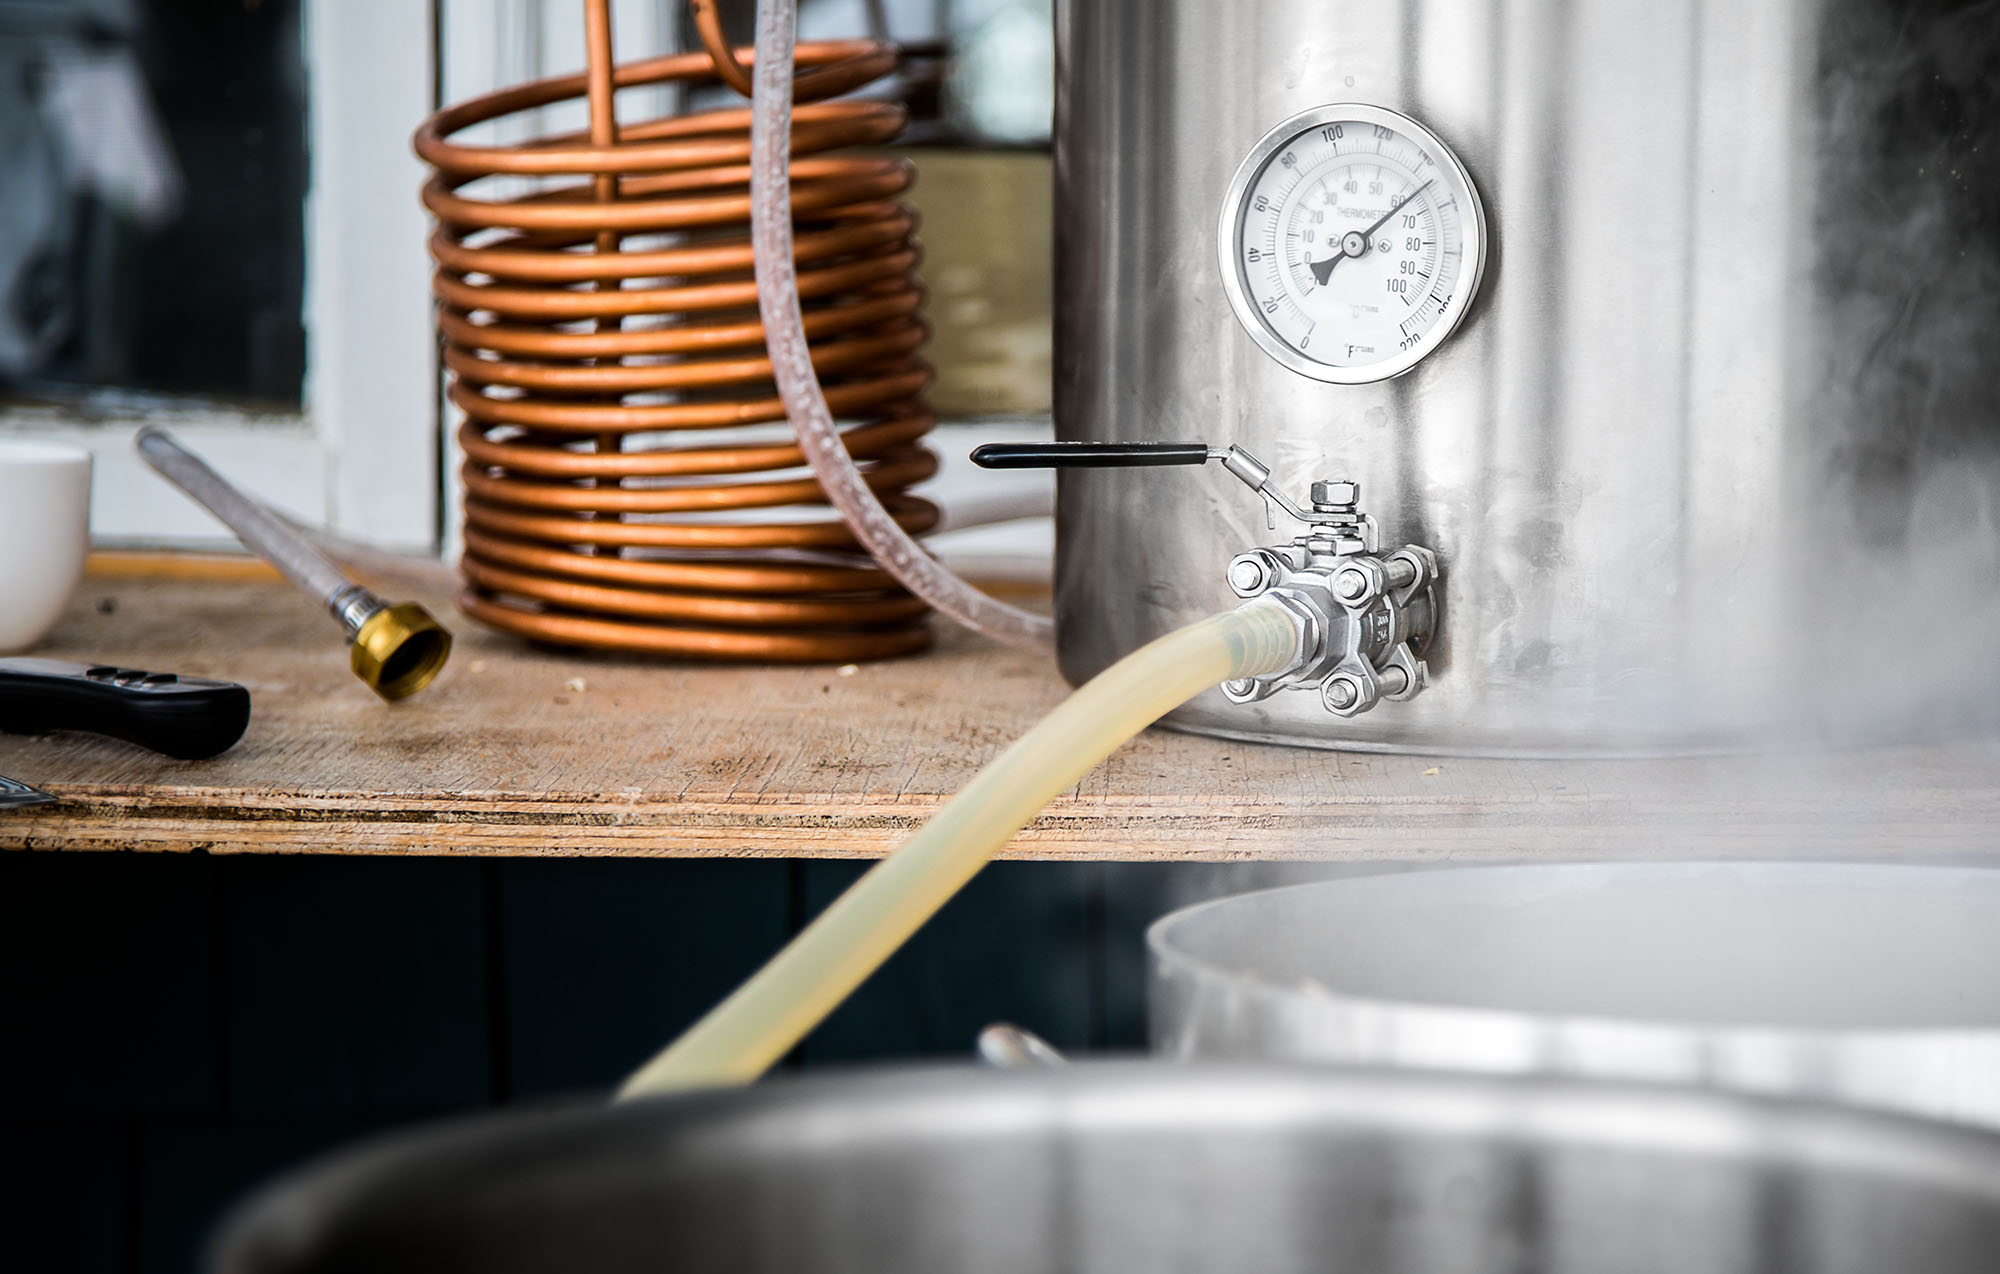
There are a handful of ways to chill your wort down after the boil to pitching temps. You can go as simple as an ice bath or something a little more sophisticated that doesn’t involve buying bags of ice on brew day (a task I always hated along with making sure I had enough propane!). Depending on the scale of your brewery, an ice bath may no longer feasible and a more efficient method of cooling is required. Plunging a full 10-gallon kettle in an ice bath is not ideal. Trust me, I know from experience.
There is also an important benefit to cooling your wort down quickly. The risk of wild bacteria contaminating your wort is highest between 140°F-80°F. Long story short, you want to chill your wort down to 80°F as fast as possible to avoid anything spoiling your beer.
Below are 3 common types of wort chillers, how they’re used, and their pros and cons. I’ll touch on what I recommend and which style may be the best option for you.
Immersion Chiller
The immersion chiller is the simplest method of chilling your wort down to pitching temp besides maybe an ice bath. Immersion chillers come in both stainless steel and copper and consist of 25-50 feet of tightly coiled tubing. A water source (usually a garden hose) is connected to one end of the chiller and pushes water through the coil as it’s submerged in your hot wort. The water is expelled through the exit end of the chiller and is discarded or saved for later for cleaning or sanitizing.
The heat transfer will slowly chill the wort as water spirals through the length of coil. The longer the coil, the more efficient the cooling capability. To get the most out of your immersion chiller, you should whirlpool your kettle in the opposite direction than water is flowing through your chiller. I whirlpool with a pump and it chills nearly twice as fast this way. I use my Brew Commander’s digital temp to monitor and can stop right at 68°F.

Pros
- Budget-friendly
- Easy to use and clean
- No extra equipment needed
Cons
- Slower(est) cooling times than alternative methods
- Can be annoying with electric brewing due to the heating element in the boil kettle
- Uses a lot of water
My Pick
I have the 50-foot copper coil chiller from NY Brew Supply. It’s prob the best value immersion chiller on the market given the length and price tag of $67. I ended up swapping out the vinyl tubing with 3/8 ID high-temp silicone tubing. I think it works better overall and won’t warp on you due to the heat of the water or kettle. My only complaint is I don’t feel comfortable resting the chiller on my ripple element so I use a spring clamp to clamp it to the side of my kettle and keep it suspended.
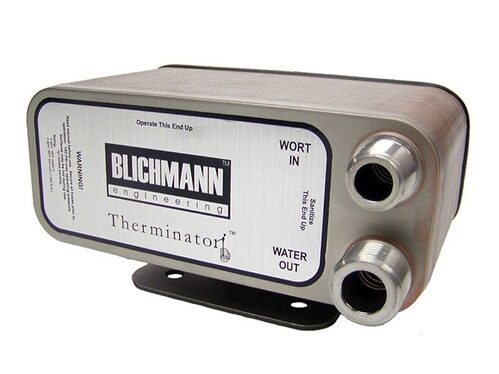
Plate Chiller
A plate chiller is a compact stainless steel unit with a brick-like shape. Plate chillers are layered with several thin layers of copper tubing. Water from a water source (such as a garden hose) is pumped through the chiller in one direction, while the wort is pumped through the chiller in the opposite direction. The water cools the wort as it passes by the hot wort. The design is intended to cool the wort in 1 or 2 passes, depending on the model and temp of your water source. In Theory, your wort would cool from near-boiling down to near pitching temp as it is pumped from the kettle through the chiller and directly into your fermenter. These units can be gravity fed but work best with a pump.
Pros
- Incredibly fast and efficient chilling
- Less water consumption than an immersion chiller
- Single-pass chilling
- External chilling so no need to fit in the kettle (plus for electric)
- Small and compact
Cons
- More expensive option, expect to spend $80-$200 depending on size
- Harder to clean/sanitize—should be flushed with PBW/Star San after brew day to remove wort and residue
- Can become clogged with hops if proper care isn’t taken
My Pick
The Blichmann Therminator is the gold standard of plate chillers. This unit is best suited for serious homebrewers doing 5 or larger 10+ gallon batches. The Therminator can be mounted to a brew table or rig with the bottom bracket for easy storage and use. Blichmann claims it can chill 10 gallons of wort in 5 min to 68°F using 58°F cooling water pumped at 5 GPM. That’s fast and worth the price tag of $199 in my opinion.
Counterflow Chiller
A counterflow chiller is almost a hybrid between an immersion chiller and a plate chiller. Counterflow chillers function similarly to plate chillers but use a coiled copper pipe similar to an immersion chiller. The design is usually copper tubing housed within another tube. The outer tubing is fed with a cold water source (garden hose once again) flowing in one direction, while hot wort is pumped through the inner copper tubing in the opposite direction. The same logic as a plate chiller but a larger design that is easier to clean and reduces the risk of clogs. These units can be gravity fed but work best with a pump.

Pros
- Incredibly fast and efficient chilling
- Less water consumption than an immersion chiller
- Single-pass chilling
- External chilling so no need to fit in the kettle (plus for electric)
- Easier to clean than plate chillers and less clogging risk
Cons
- Pricy option, expect to spend $175-$300 depending on size
- Another item to clean/sanitize—should be flushed with PBW/Star San after brew day to remove wort and residue
- Some versions may be more prone to clogging than others
- Bulkier than plate chillers
My Pick
The Exchilerator Maxx Counterflow Wort Chiller is a beast of a unit ideal for 5 or larger 10+ gallon batches. It works as quickly as a top of the line plate chiller and offers single-pass chilling down to pitching temp. The Exchilerater claims it can chill up to 10 gallons of wort in 5 minutes. It’s really easy to clean and won’t clog on you. With a price tag of $199 with an included thermometer on the unit, I’m all in! Read my full review of the Exchilerator here.
Final Thoughts
Whatever your brew volume and brew day looks like, there is a wort chiller for you. There are certainly other great products out there, these are just a few I’ve either had personal experience with or have heard great things about.
My advice would be to not buy a budget plate or counterflow chiller if it’s still going to take you 25 minutes to chill your wort. Spend the extra cash and get a single pass unit—otherwise, it’s not worth the hassle of extra tubing and cleaning in some cases.
While I like my immersion chiller, I don’t like the way it fits in my kettle with the ripple element. Because I’m a hop head and often do a lot of whirlpool hops, I went with a counterflow chiller over a plate chiller to reduce the risk of clogging and keep cleaning simpler.