
 by
by 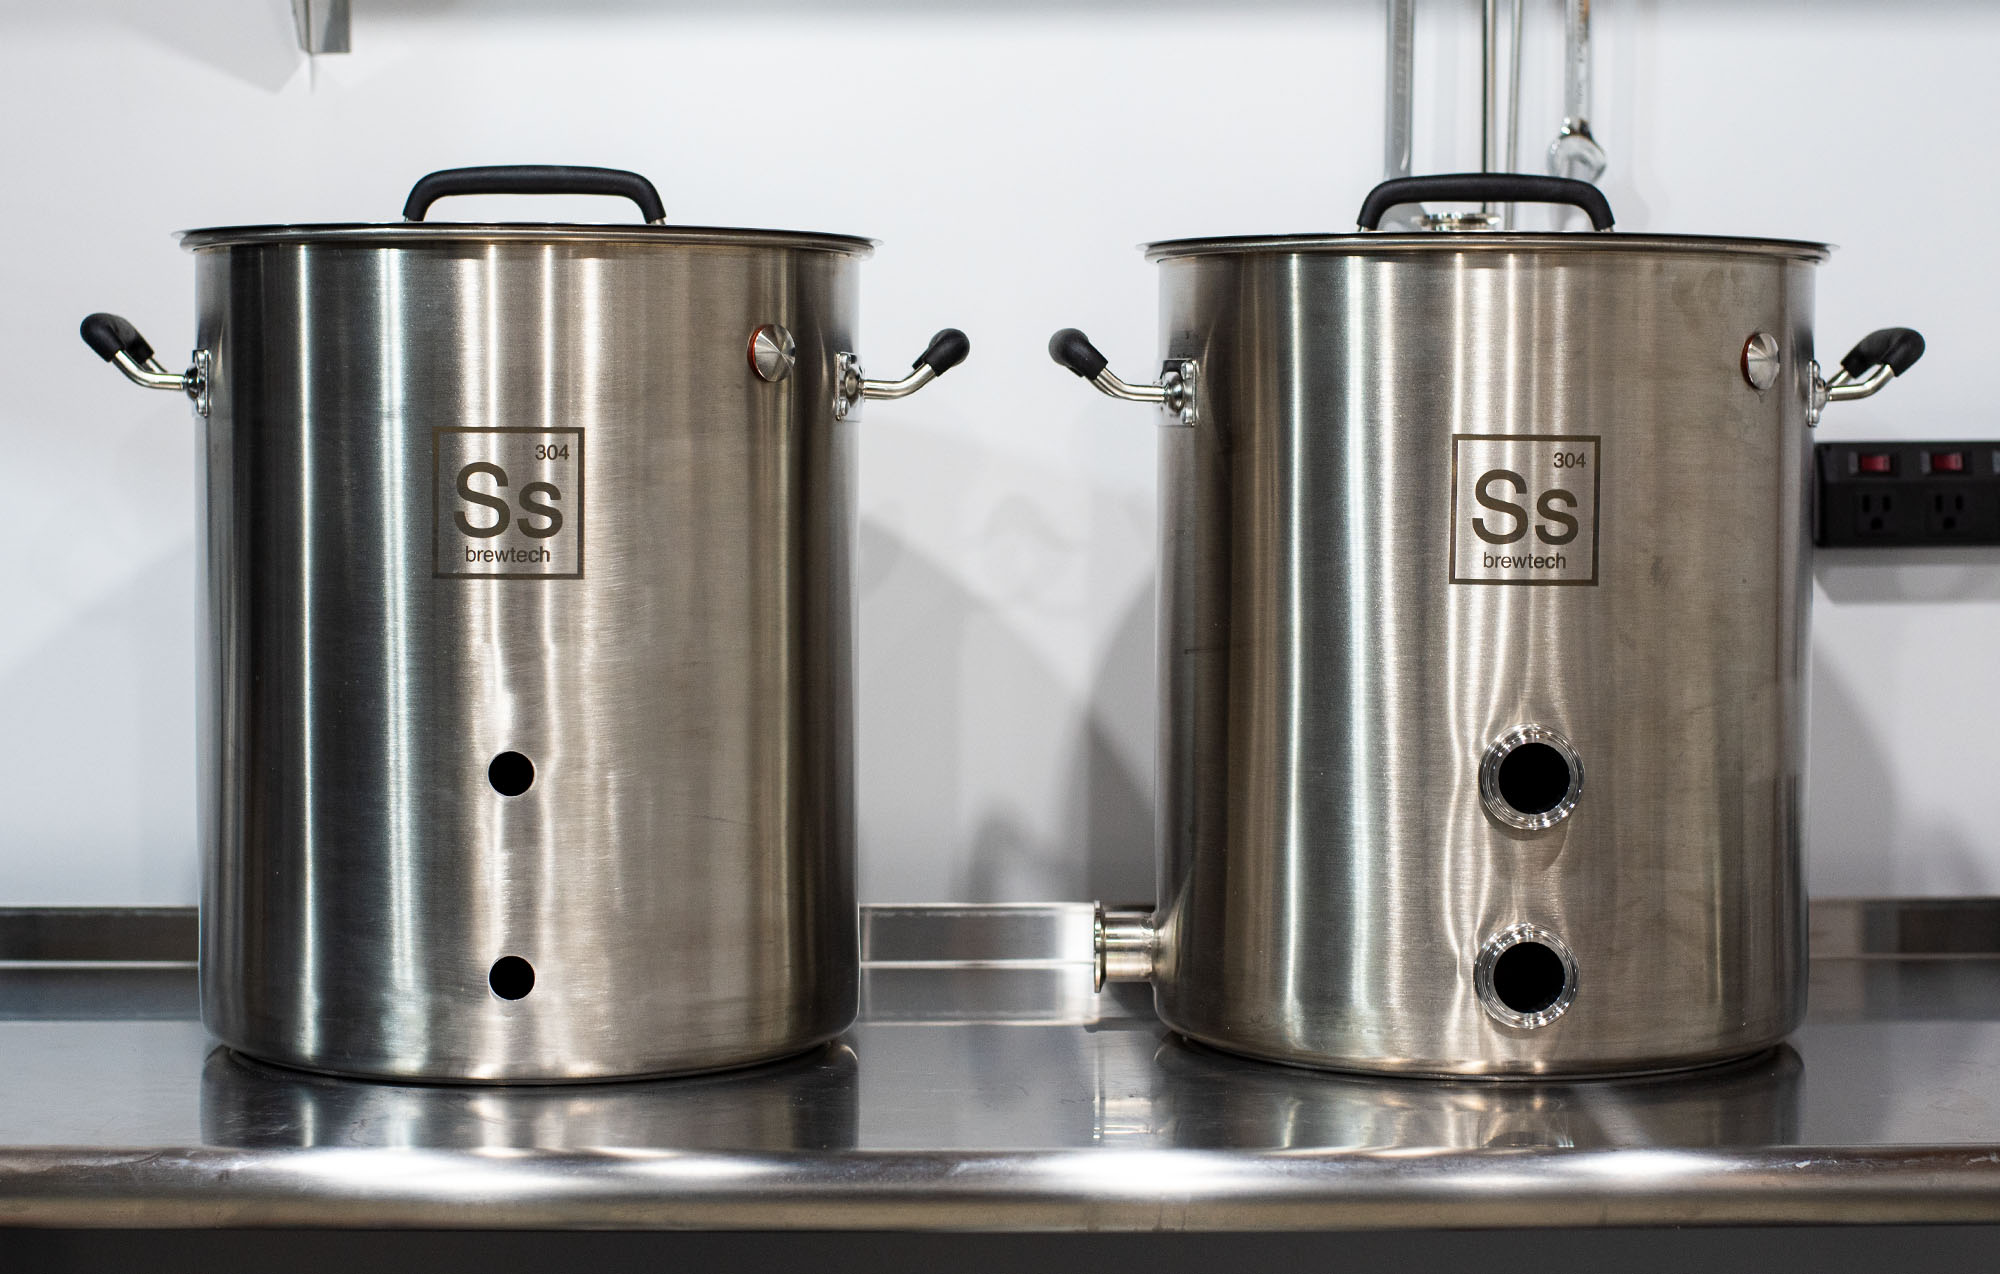
Tri-clover (TC) ports have become the gold standard in both professional and home brewing because of two important benefits. Tri-clover fittings are usually more sanitary because they don’t use NPT to connect components. TCs also makes swapping out or removing accessories really easy during brewing or for cleaning and soaking parts in PBW.
Many threaded components require PTFE tape so removing and reassembly is not really functional, especially on the fly. Lastly, TC ports seal really well and don’t run the risk of leaking assuming you tighten the wingnut enough. This almost makes them worth the effort alone.
I decided to switch my older legacy Ss Brewtech kettle from 1/2 inch NPT ports to weldless 1.5″ tri-clover bulkheads. This will ultimately give me more flexibility and the ability to remove ball valves and my new Ss Brewtech whirlpool TC and soak after brew day. I mainly made this switch because I need to streamline my setup for my eBIAB build. While these units are obviously not as sanitary as a clean welded bulkhead, I still think they’re a major improvement.
Parts and Tools Needed

- 2 (or more)1-1/2″ tri-clover (TC) weldless bulkhead flanges (does not come with clamps or gaskets)
- Greenlee 1-5/8 knockout punch (the bolt is 15/16″)
- Regular or adjustable wrench with 15/16″ capacity or 15/16″ socket wrench (for Greenlee bolt)
- 52 mm socket tool with 1/2 inch drive (these are some of the cheapest options at this size (2-1/16″), also recommended by Brew Hardware)
- Rachet with 1/2 inch drive
- 2 1-1/2″ silicone gaskets and 2 1-1/2″ TC clamps
Increasing Kettle Holes From 7/8″ To 1-5/8″
The easiest way to create 1-5/8″ holes with the total assurance you aren’t going to destroy your kettle is to use a knockout punch. They’re expensive, about $100, but in my eyes risking ruining my kettle was not an option. If you have multiple kettles or plan on adding several holes, it will pay for itself. The good news is your kettle’s existing ports work perfectly as the pilot hole for the punch, so you may not even need to do any dirty work beforehand.
You can also use a tungsten carbide hole saw for this task, but I think it would be difficult as you already have a large existing hole where you’re adding a bulkhead. I did not trust myself to drill a clean hole with this.
Be careful buying CHEAP or second-hand knockout punches online. You need SHARP blades to cut through a kettle. If you cheap out it could fail or ruin your kettle.

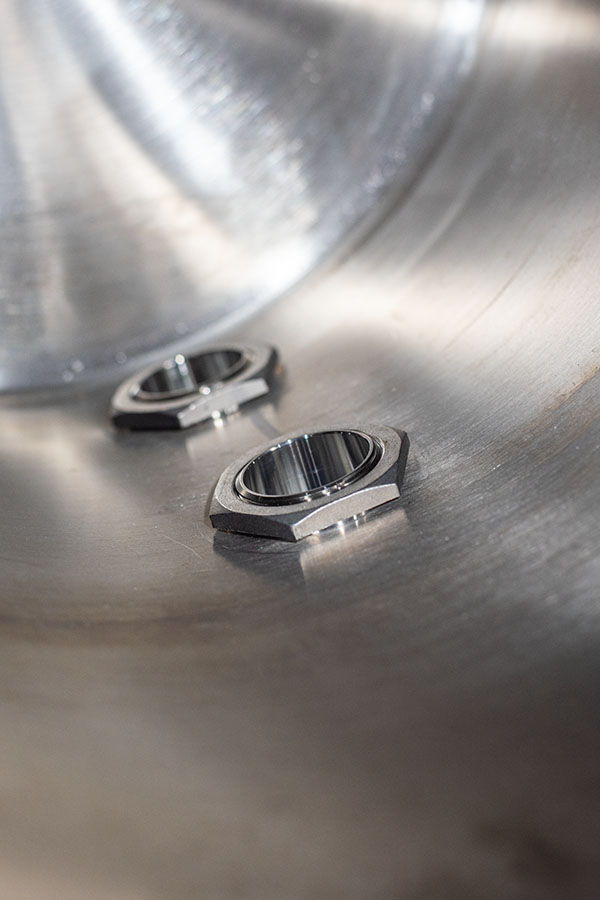
Blade side on outside 
Smooth side inside
The punch is assembled with the blade (curved portion) on one side and the flat end on the other. The bolt is tightened with a wrench or socket wrench until the blade side cuts and eventually pops through the kettle wall, leaving you with a perfectly smooth hole that doesn’t need any deburring. Keep turning the bolt until you hear a couple of pops and the punch immediately releases on its own.
Always position the blade side on the OUTSIDE of the kettle. I noticed this made the face (outside of the kettle), ultra smooth with no ridges. This is optimal because the rubber gasket faces the outside of the kettle, and works best if smooth.
Installing And Tightening Bolts on Tri Clover Bulkhead
Install the bulkhead with the TC flange on the outside of the kettle and hand tighten the locknut until snug. The lock nut hex on the bulkhead measures 2-1/16″ or 52mm. Turning it with an adjustable will not work well. You’ll need to use the 52 mm socket tool with 1/2 inch drive recommended by Brew Hardware. A traditional socket will be very hard to find in 52mm and will be expensive.


The front of the flange does not have flats for a wrench. The easiest way to hold the front of the flange for tightening is to clamp any other TC part on with the gasket and clamp (a blank cap works great). Once tight, you can insert a screwdriver in the wingnut grip and use for leverage for tightening. You honestly don’t need to go crazy with the tightening, but you do want it pretty snug.

Adding Brand New Holes
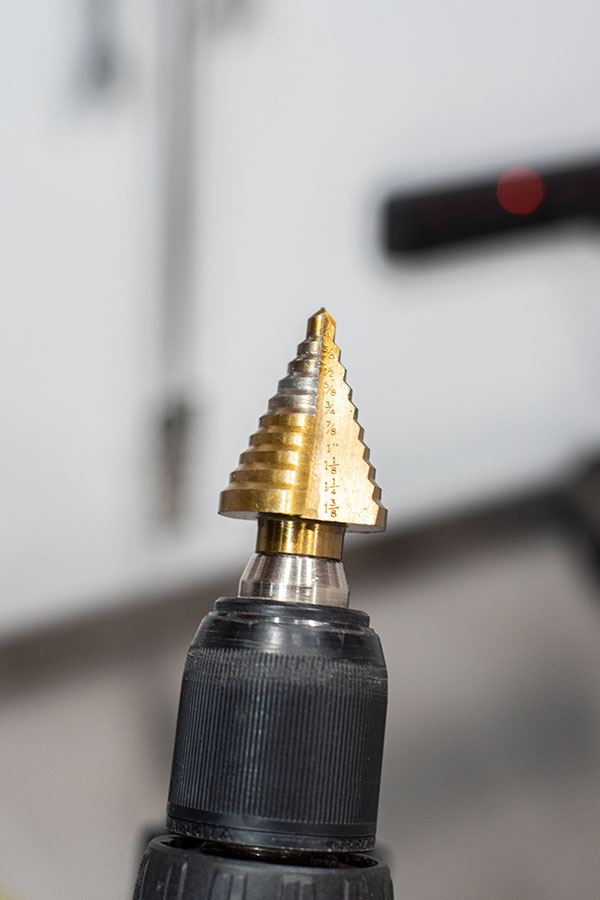
If you want to add a new hole from scratch, you will need to create a pilot hole for the punch. This will require a power drill, a 9/64″ drill bit, and a step bit with 3/4″ capacity.
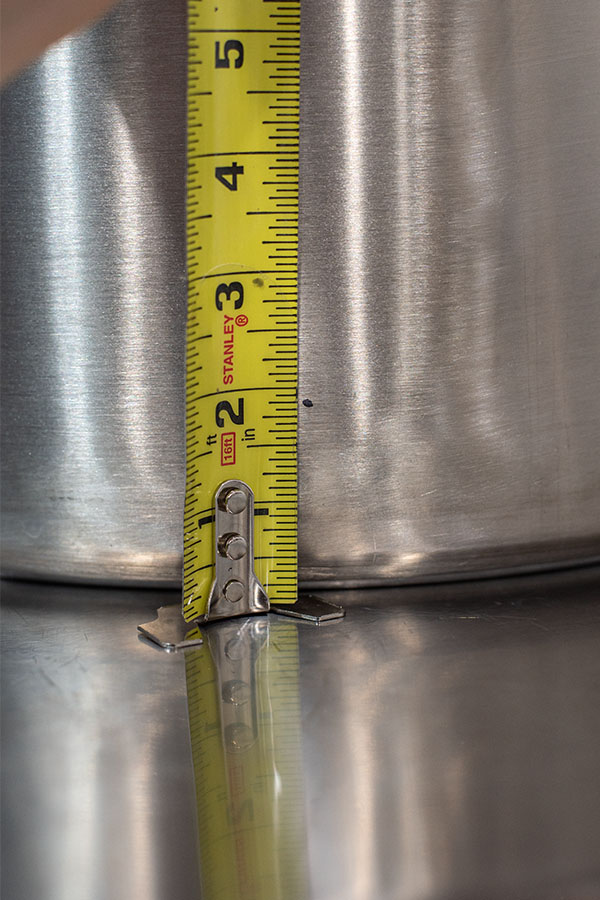
Measured 1-7/8″ from bottom 
Drilled 9/64″ pilot hole 
Expanded to 3/4″ with step bit 
Punched with knockout and added TC
Step By Step
- Mark where you want to position your hole with a sharpie. I put min on the bottom for a temp probe, but you could also use one of these for installing an electric element.
- Use a hammer and nail to create a small indentation where you will drill the pilot hole. Give it a few firm hits. This will prevent the bit from slipping.
- Carefully drill a small pilot hole (I used 9/64″) using a drill bit rated for metal.
- Expand the hole to 3/4″ inch using a step bit on low torque setting with a drill. This won’t create an ultra-clean hole but it’s easy to way to gradually increase the hole size with minimal effort. Use a little cooking oil or cutting oil as a lubricant.
- Use the knockout punch like above to expand the hole to 1-5/8″.
IMPORTANT: When putting a weldless TC bulkhead this close to the bottom of the kettle, be sure you give yourself enough clearance on the inside of the kettle to tighten the lock nut! I would highly recommend my positioning. If anything, cheat UP otherwise you’re in trouble.
Overall, this is a really easy task to pull off assuming you’re relatively handy with tools. Honestly, documenting and writing this blog post was way more of a pain in the ass and took a lot longer than converting my kettle!

Thank you for this super useful post. I was able to add a new hole to my older 15 gallon SS kettle in order to finally get a ball valve installed. Now I have a proper HLT. The hardest part was getting the 3/4″ hole drilled with a step bit. The punch was awesome.