by
by 
How to Keg Homebrew
Kegging homebrew is a magical thing. The idea of having beer on tap that YOU made in your home is a luxury. It’s certainly an investment but eliminates the need for bottle collecting, cleaning, scraping labels, and countless filling. Instead of cleaning 50 bottles you only need to clean 1 vessel. Plus, it’s easily scalable to add additional kegs without too much of an investment assuming you have the fridge space.
Below is everything you need to know about making the switch from bottling to kegging your homebrew. Trust me, once you keg, YOU WILL NEVER GO BACK.
Equipment Needed
I’ll break down the major components in kegging below. I do recommend you purchase a system rather than piecing together on your own to make sure everything is compatible.
Cornelius Keg
Homebrewers typically use reconditioned soda kegs for kegging because they’re easy to fill, clean, and dispense with basic equipment. They’re also the perfect size for the home scale. Most homebrewers opt for reconditioned kegs to save money. The o-rings are replaced and they’re pressure tested for quality. You can purchase soda kegs brand new, they’re just more expensive, and used kegs work just fine (despite being a little banged up).
Soda kegs or Cornelius (corny kegs) come in two styles, pin lock, and ball lock. Ball-lock kegs are a litter taller and skinnier and give you the ability to fit 2 in a standard mini fridge with some modifications. Overall I’d say ball lock kegs are the more popular choice for homebrewers.

Single or Dual Body Regulator
A regulator regulates the CO2 pressure in your kegs for dispensing and force carbonating. A single body regulator can be split to dispense two kegs, however, both kegs will then need to be dispensed at the same pressure. You will also have to disconnect a keg if force carbonating another since you do not want to put 30 pounds on an already carbonated keg. A dual body regulator will give you additional control and allow you to keep one or multiple kegs at dispensing pressure while simultaneously force carbonating another. It just makes things a little easier and eliminates the need to adjust regulators when juggling force carbonating and dispensing your brew.
Just note, the top pressure gauge tells you your keg pressure, the side gauge on the end tells you your CO2 tank’s fill level.

5# CO2 Tank
A 5# CO2 tank is pretty standard in the homebrewing world. Depending on your brewing process, a 5# tank will last multiple batches of carbonating and dispensing. CO2 tanks come empty when purchased online (for safety) and will need to be filled or swapped. Most homebrew stores will swap out tanks rather than refilling yours so don’t fall in love with a brand new tank. You may be able to find a local gas company that will refill your new tank but they’re much harder to find. You may be better off buying a prefilled tank locally than buying new and swapping.

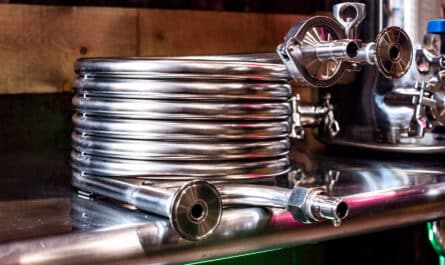
Vinyl Gas and Beverage Line
Food grade/pressure rated tubing is needed to dispense your beer and transfer gas from your tank to your keg. A ball lock keg typically uses 5/16 ID gas line and 3/16 ID liquid lines. (some systems use 3/16 for both gas and liquid). Liquid lines should be purchased around 10 feet each in length to help prevent foamy beer. My 5-foot lines never worked for me. It seems excessive to coil up all that line in a small kegerator but it makes a huge difference. Trust me.
Be sure to clean your lines every few weeks with a flush of warm water or sanitizer. I replace my lines altogether annually. Gas lines don’t need to be messed with and don’t require a specific length. A tip is to soak your tubing ends in hot water to make them malleable so you can easily push them onto the barbs if you’re having difficulty.
Gas and Liquid Quick Disconnects
Quick disconnects make for easy switching and removing from keg to keg. For ball lock setups, grey is gas and connects to the gas IN post, and black is liquid and connects to the liquid OUT post. Be sure to get QDs with hose barbs for connecting your lines. You’ll also want to note the compatible tubing size as gas line tubing can vary as mentioned above. The pictured QDs here use 5/16 ID for gas and 3/16 ID for liquid, which is my configuration right now.

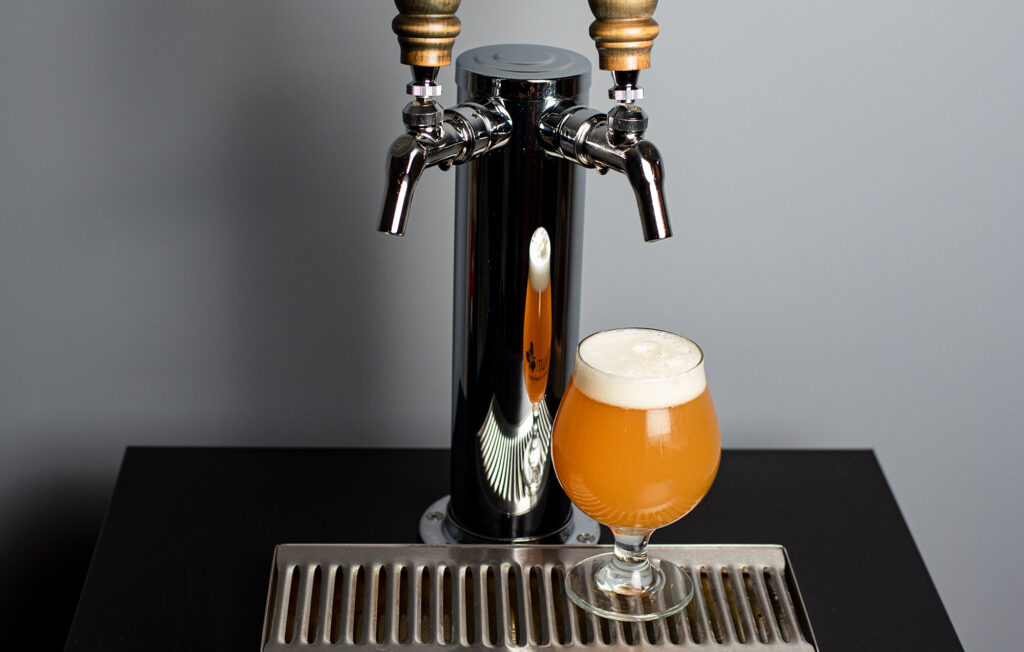
Picnic or Dispensing Tap Tower
If you go the kegerator route, you can buy one for big money or DIY your own by converting a mini-fridge and adding a tower to the top. The interim solution could be to just use a picnic tap and store your kegs in any fridge you have without modifications. I use a Krome tap tower with Perlick faucets. Perlick faucets are more expensive but don’t get stuck from old dried beer thanks to the way they’re designed. Only took a few months of frustration for me to upgrade from the cheap faucets that came with my tower. You would think they were glued SHUT after 2-3 days.

Wrenches
Keg posts require either a 7/8 or 11/16 combination wrench to remove/tighten. I have both sizes as you never know what you’re going to get in terms of post sizes with used equipment. I highly recommend picking up these sizes so you don’t get stuck…literally. A combination wrench includes a standard end and the circular end. Some gas posts have a 12-point star shape and will need the circular fitting.
Keg Starter Kit
I’d recommend a starter kit for anyone getting into kegging for the first time. Several homebrew suppliers have both single and dual systems with everything you need to get going. I’d highly recommend getting a dual keg system since after you brew one batch and keg it the first thing you’re going to do is want a second keg. Adventures in Homebrewing has a lot of options for a single and dual system with both old and brand new kegs. Here is what I would recommend. It’s very similar to my setup.
Note you’ll need to specify a CO2 tank and also purchase a tap tower separately if going that route.

Cleaning Used Corny Kegs for the First Time
If you purchase used kegs, they’re going to need a deep cleaning before you can use them. Some suppliers will clean/rinse the kegs before selling, most do not. There will most likely be syrup residue from soda in your used keg. A 24-hour soak in hot PBW water is necessary to remove excess soda and syrup flavor that has been “retained” in the mettle. Follow up with fresh hot water and soak for 24 more hours.
All keg components should be broken down and soaked in PBW solution to clean. This includes removing o-rings, poppets, dip tubes, gas and liquid posts, and lid. Do not skip or you could contaminate your beer or introduce off-flavors and totally ruin your batch.

I ruined about 3 batches of beer due to failing to properly prep a keg for use. My beers ended up with a weird sweet off-flavor after sitting in the keg for 2-3 days. Took me about 3 batches to figure out what the hell was going on! Brand new kegs should also be cleaned and sanitized, they just don’t need a rigorous 24 hours soak. 30 minutes should do.
Cleaning and Sanitization In Between Batches
Kegs should be broken down completely every time to clean. This includes removing o-rings, poppets, dip tubes, posts, and lid and soaking in PBW solution. DO not skip or you could contaminate your beer. An often overlooked item to clean between batches is the liquid QD that attaches to your keg for dispensing. There is a flat head screw-top on the QD that can be twisted off and removed for cleaning. Sludge can form in there.
Kegs should always be soaked with PBW in hot water (filled to the top) in-between brews. I usually soak for a few hours or overnight and follow up with a good rinse and hot water soak for 20-30 minutes. All keg components should be broken down and soaked in PBW to clean. This includes removing o-rings, poppets, dip tubes, gas and liquid posts, and lid. Do not skip or you could contaminate your beer or introduce off-flavors.
From here a keg should be sanitized with Star San before filling. You can do so by soaking your components in Star San first and then reassembling the keg. Fill halfway with water and sanitizer, replace the lid and shake the keg all around to sanitize all surface area. Drain the keg and you’re ready to go. There is no need to rinse Star San but you should try to get as much out as possible.
Filling the Keg
Beer can be easily racked into a keg using an auto-siphon from your fermenter. There are more sophisticated methods such as doing closed pressure transfers to fully purged kegs with CO2 but that’s a more advanced method I’ll cover in another post. The main advantage of a closed transfer is to eliminate oxidation that can kill hop flavor and aroma, especially in delicate IPAs.
Purge Kegs and Seal Before Carbonating
Always purge the headspace of oxygen in your kegs before carbonating—this will prevent oxidization and stale beer. To do so, connect your gas line to your gas IN post and set your regulator to 10 PSI. Give the pressure relief valve a good 4-second pull. Air will come hissing out. Let the keg fill with more CO2 until you hear it stop. Repeat 3 more times. The CO2 will force the air out of the top of the keg leaving you with a fully purged and oxygen-free keg.
From here I like to hit the keg with an initial 30 PSI to seal the lid. This will ensure the lid is firmly pressed against the top of the keg and no CO2 can leak out. I can’t even tell you how many CO2 tanks I prematurely drained before I got my act together. A spray bottle filled with water/Star San solution is great for identifying tiny leaks (look for the bubbles popping).
I always use a sanitary keg lubricant on my lid’s o-ring to ensure a tight seal. The lid is the most likely place a keg will leak because they are not always perfect. I’ve found it helps promote a tighter seal and keeps o-rings from drying out.
Carbonation
Kegged beer can be carbonated via natural carbonation with priming sugar (just like bottles) or they can be force carbonated with CO2. There are a few different ways you can carbonate but 24 hours chilled at 30 PSI is a very common practice. Learn all about force carbonation methods.
Beer does NOT need to be cold to force carbonate, however, it is a much faster process if it is cold. Once your beer is kegged you should store away in a cold fridge to carbonate and you’ll be ready to enjoy in a few days.
Kegerator or Freezer, or Fridge
I store my kegs in a DIY kegerator made from a modified Danby mini-fridge. You don’t need a kegerator to keg your homebrew, you can always store your beer in a dedicated fridge or temp-controlled freezer/keezer and use picnic taps for dispensing. This would be the most budget-friendly approach until you upgrade to a kegerator with a tap tower. If I were you I would scour craigslist for used fridges and see what you can come up with. Just make sure you do your research before drilling holes into a fridge so you don’t hit a cooling line!
How Long Does Kegged Homebrew Last?
Honestly, 6-8 months is a realistic threshold if kept cold and properly dispensed with CO2. That being said it could probably last longer it just may start to degrade in terms of flavor depending on the style. Long story short, you’ll likely never find out because the average beer drinker is going to finish a 5-gallon keg LONG before they need to worry about it spoiling.